|
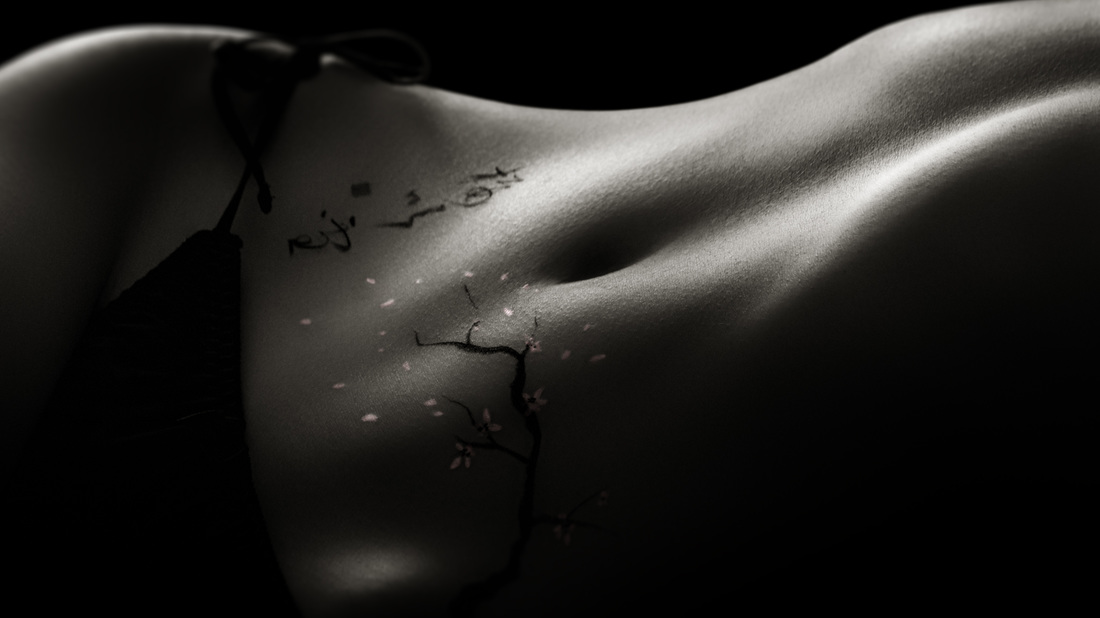
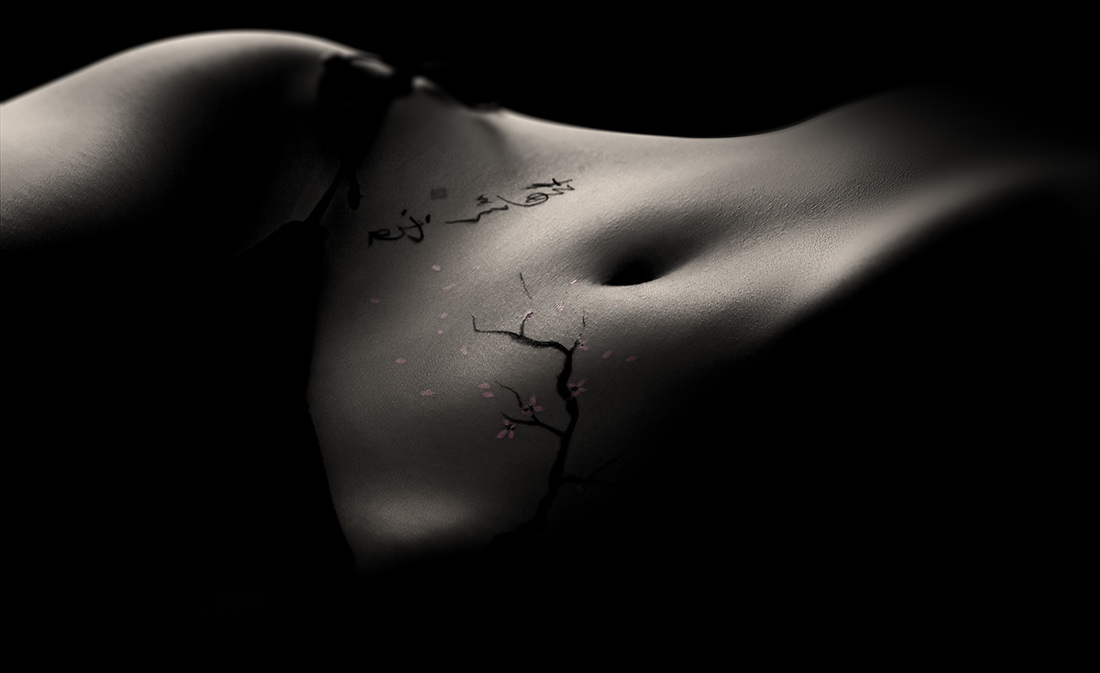
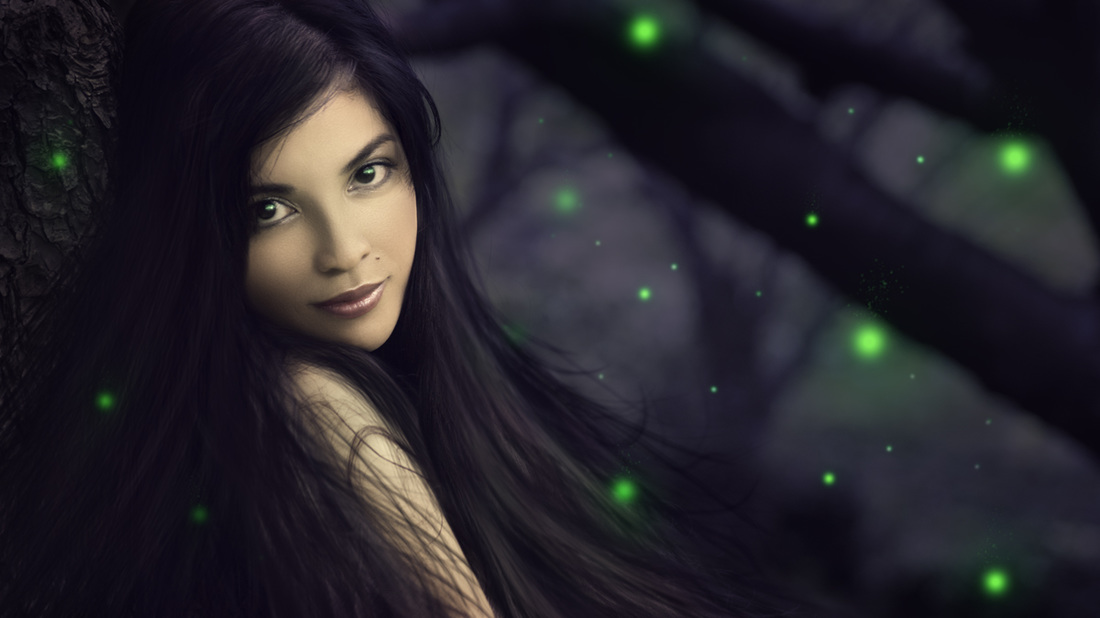
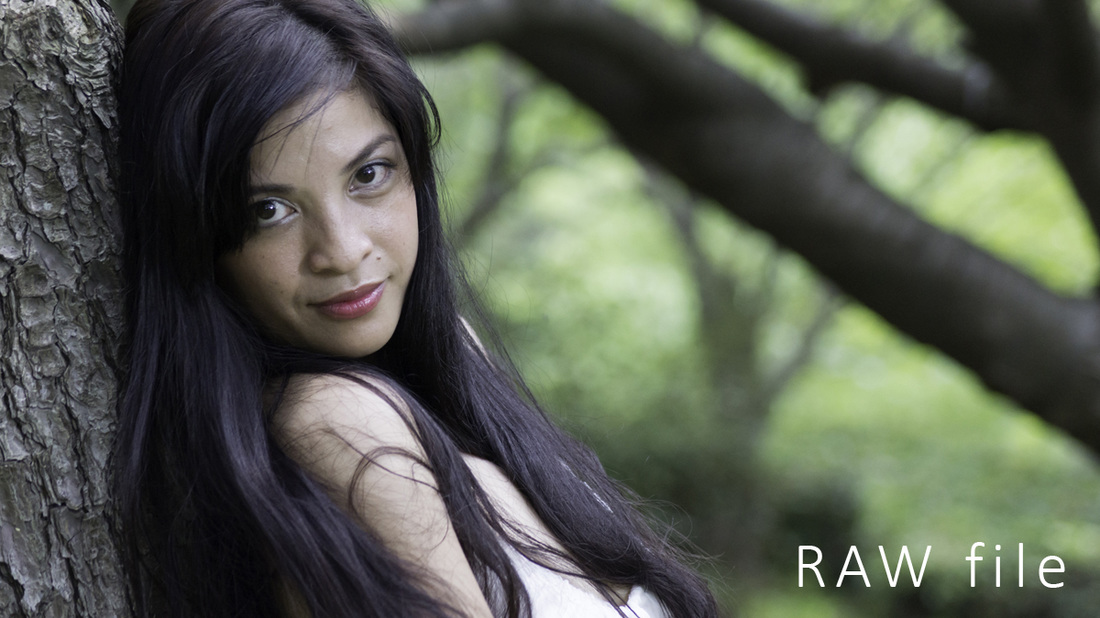
Regardless of what type of artist you may be portfolio is your business card. It is your resume, marketing tool, an ad and a statement in one. It says "look this is what I can do and that is my style". It is also a self-check medium for you as the author of its content. There is no time frame within which you should review your folio. you should do it as often as needed, or as often as you feel it is necessary. If you are like me and you love editing your photos, love learning and are on a constant hunt for new ideas, new ways of retouching, new ways of toning images and so on, you will realize two things very quickly. One is that the quality of your work improves with passing time, and two, that your style is evolving. Consequently, if you have a mix of old and new images in your folio, it may happen so that some of them may become outdated and inconsistent in terms of their style. This sends a clear message to your clients that you are not a mature artist, or perhaps a lazy one, who cannot see inconsistency in his or her own work, etc. All that suggests unreliability. Also, clients will choose you mainly for your style and quality of work. They do not know you in person, so all they know about you is what they can see in your portfolio. It is essential to develop a self assessment routine and implement it rigorously in your timetable. Yes, it is time consuming, but it is worth it in more ways than one. Look at the above images which were created within less than a year. The top one is a new version and the bottom one was created last year. It is a whole new edit from scratch, and you do not have to take my word for it, just watch the video below which shows the entire editing workflow in photoshop. Both photos are very different in style and quality. First the quality of texture is much better in the new edit. Old version suffered from texture loss due to blur vignetting done manually without working on tones layer and texture layer separately. This is something I would not do now. Also, skin texture received a much more detailed retouch via micro dodging and burning which eliminates small skin bumps amplified by the hard steep angled light. Vignetting is executed very selectively in the new photo, and it complements the way I reshaped the body of the model with shadows and highlights. The entire image was turned on its axis counter-clockwise to add more kinetic energy and create diagonal lines across the image. They contrast with a general calm and moody feel to the photo. The old edit was a bit too static for my liking and was not multilayered. Dodging and burning emphasizes the drama and creates more visual anchors. I added a tilt shift blur to redirect the attention of the viewer to the body art and lines running across model's body. I also changed the toning to much warmer, which further calms the feel of the photo. There are no happy accidents here, it is all planned and premeditated based on what I feel when I look at the photo. The old edit was not in full agreement with my current style and it had to be addressed. I truly enjoy re-working my images. Some of them I re-edit a few times, even complex photoshop manipulations. I do not care how much time it takes. It is always a very rewarding and educational experience.
Photography workshops in Tokyo: http://www.ryuurui.com/photography-workshops.html Hire a photographer in Tokyo: http://www.ryuurui.com/hire-a-photographer-in-tokyo.html Photo blog: http://www.japan-in-photography.com/ Facebook: https://www.facebook.com/ponteryuurui Twitter: https://twitter.com/PonteRyuurui Google+: https://plus.google.com/u/0/+PonteRyuurui/postsFor more tutorials and how to videos check out my photoshop and photography tips and tricks YouTube channel: https://www.youtube.com/channel/UCEOVGZ2rpLhR7gSPvaexxxQ Neither. It all depends on what mood you are after in your photos. I use studio for specific types of photography. Inside the studio I shoot fine art nudes, calligraphy body art, and dramatic portraits or portraits I use for photoshop manipulations. Outdoors I shoot urban portraits, natural light portraits, where I have the advantage of choosing from variety of backgrounds. On the other hand, I can create dramatic light outdoors as well with the help of flash photography. By combining natural light and flashes I am able to capture images that would not be possible to create in ambient light. I find myself shooting outside more often, because I like the endless possibilities of what surrounding world has to offer. Whether it is city or nature the options are limitless. Studio photography usually has a very stiff and artificial feel to it, but it doesn't have to be so. It all depends on how skilled are you with controlling the light and how good of a connection you have with your model. Outdoors and indoors portrait photography come with challenges that you will need to face. Outside you have to be in control of the background, and also very skilled with understanding the ambient light and how to bend it to your will. It is much harder to control ambient light than artificial studio flashes. When you choose between indoors or outdoors portrait photography always think about what is the theme, what effect you are after and who you are shooting and why. That should give you a clear answer on where to shoot. The most important is to capture your model at their best, and choice of a location is just another tool like your camera or lenses.
Props, make up, hair stylist and all of these are all great, but so much more can be done in terms of creative portrait photography during photo retouching process. For me photoshop is a doorway to complete artistic freedom. Being able to do anything I want with a photo in post production offers not only much more room during shooting, but also allows me to complete my vision and achieve that perfect mood I was after in a comfort of my digital dark room. I always shoot with a vision of post processing, and photoshop skills are an essential tool not just in my career as photographer, but more importantly as an artist. During the shoot I know exactly how much I can or cannot get away with, what I can or cannot remove or change, which elements of the photo I will use, or what other photos I need to take to complete the image. It is like a puzzle and hell of a fun as well. I love teaching photography and photoshop and I always try to show to others how important and powerful post processing skills can be. For me a photographer who cannot or does not want to edit his work is crippled or has limited imagination. There are occasions when a photo will require a minimum of editing, and I have those as well in my portfolio, but it is not really what the argument is about. The whole point of photo retouching is to give it your own personal finishing touch. For me capturing an image is 50% of work done, and sometimes much much less than 50%. Photo editing will broaden your horizons, your artistic sensitivity, the way you look at details and notice them, the way you take photos, the way you understand light and human anatomy, how to work and combine colors in the scene, how to notice an image in a chaos around you, how to compose images, and so much more. My advise to you is simple - if you want to sail the vast oceans of creativity and not just the seas, master the art of photo retouching, composite photography and even photo manipulation. It is a whole new world. model: Mandy JanePortrait photography service, Tokyo - website
http://www.portrait-photography-tokyo.com/ Photography workshops in Tokyo: http://www.ryuurui.com/photography-workshops.html Hire a photographer in Tokyo: http://www.ryuurui.com/hire-a-photographer-in-tokyo.html Photo blog: http://www.japan-in-photography.com/ Facebook: https://www.facebook.com/ponteryuurui Twitter: https://twitter.com/PonteRyuurui Google+: https://plus.google.com/u/0/+PonteRyuurui/posts For more tutorials and how to videos check out my photoshop and photography tips and tricks YouTube channel: https://www.youtube.com/channel/UCEOVGZ2rpLhR7gSPvaexxxQ Taking photos of what you can see around you is a great fun and can be done in many inventive ways. However, you could push your imagination much further by creating a scene that does exists nowhere else but inside your head. I was out on a shoot with a Tokyo based model Mandy Jane, and we were taking some portraits in a park, and I spotted a small patch of mossy tree roots on the ground. The sun came up and lit the whole scene, and it looked like from a fantasy wold. Immediately I saw a complete image in my mind. All I needed was a few photos put together inside photoshop, a bit of tinkering, color toning and viola. Modern photography is offering us so much potential it can be overwhelming, but do not let that massive world of endless possibilities intimidate you. Remember, the only limit to what you can do is one that you restrict yourself with. Any type of art is about discovery of self through expressing thoughts, feelings and emotions that are a result of an artist being able to see surrounding world differently. Do not be afraid or shy about sharing it, it is your world, be proud of it. I will use anything I can use, and if I cannot and need it then I will learn how to use it, to express what I feel or see. It can be camera, photoshop, 3D program, manipulated scenery - I honestly do not mind. all I care about is the final result. (see the final photo in high quality) Private photoshop workshops via skype - http://www.ryuurui.com/photo-retouching-lessons.html
My portrait photography service, Tokyo - website http://www.portrait-photography-tokyo.com/ Photography workshops in Tokyo: http://www.ryuurui.com/photography-workshops.html Hire a photographer in Tokyo: http://www.ryuurui.com/hire-a-photographer-in-tokyo.html Photo blog: http://www.japan-in-photography.com/ Facebook: https://www.facebook.com/ponteryuurui Twitter: https://twitter.com/PonteRyuurui Google+: https://plus.google.com/u/0/+PonteRyuurui/posts For more tutorials and how to videos check out my photoshop and photography tips and tricks YouTube channel: https://www.youtube.com/channel/UCEOVGZ2rpLhR7gSPvaexxxQ Quick guide to an in-depth video tutorial series on portrait retouching techniques in photoshop3/29/2016 This is a short speed art video summarizing the entire process of portrait editing in photoshop. I created it to help with navigation through 5.5h long video tutorial series that are have split into parts 1 to 5. Quick guide video is only 8min long and includes captions that denote most of the actions I have performed during editing. The full length tutorial has a slow pace and a lot of explanatory talk, so it should be very comprehensive, given you have enough patience and determination to listen to me for nearly 6h. I covered steps even before any editing begins, and that is how do I pick a photo for editing. I am comparing a few images and discussing various issues and problem areas. I then talk briefly about achieving a perfect skin tone / white balance in portrait photography, perform rough editing in Adobe Camera RAW, and then I jump into photoshop. Inside photoshop I first assess issues in the photo, minor composition problems and visual distractions, and then I go ahead and start skin editing on a macro scale. Next I split textures and tones (frequency separation) and show you how to edit a portrait without damaging the skin or lowering the image quality. The tutorial will lead you through skin, lips, eyes, hair, skin retouch, matching skin tones, removing skin discolorations, hand drawing eyebrows, halos, blurred shadows, texture grafting, smoothing skin shadow transitions, dodging and burning or macro and micro scale, toning, black and white conversion, some photoshop plugins and how to use them creatively and more. The most important thing is, that this is a free photoshop tutorial series that should allow you to master some of the most advanced photo editing techniques. It is impossible to share it all, even in a few hours long video, but nonetheless you can see a full on in-depth portrait photo retouch in photoshop. Private photoshop workshops via skype - http://www.ryuurui.com/photo-retouching-lessons.html
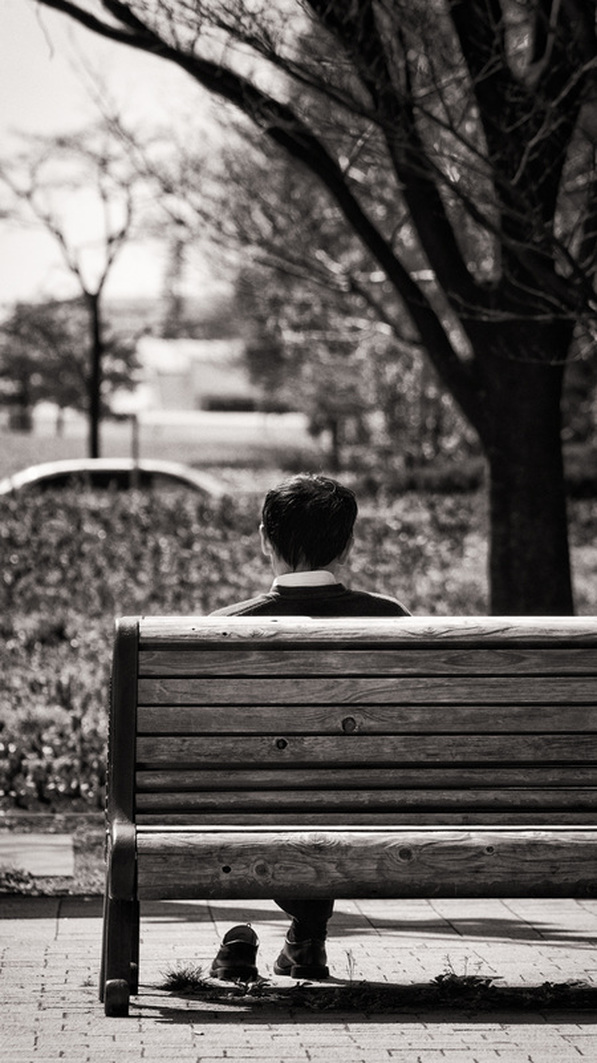
My portrait photography service, Tokyo - website http://www.portrait-photography-tokyo.com/ Photography workshops in Tokyo: http://www.ryuurui.com/photography-workshops.html Hire a photographer in Tokyo: http://www.ryuurui.com/hire-a-photographer-in-tokyo.html Photo blog: http://www.japan-in-photography.com/ Facebook: https://www.facebook.com/ponteryuurui Twitter: https://twitter.com/PonteRyuurui Google+: https://plus.google.com/u/0/+PonteRyuurui/posts For more tutorials and how to videos check out my photoshop and photography tips and tricks YouTube channel: https://www.youtube.com/channel/UCEOVGZ2rpLhR7gSPvaexxxQ Secrets of composition in street photography - a conversation between a moment and the environment.3/24/2016 Street photography is based on two elements: a moment or mood, which is the kinetic part, and the environment or scenery, which is often very static and forms a structure, sort of a framing, to which all the strings are attached. Even the most emotional or candid street photography must have some sort of static reference to bring balance into the composition. However, what is static and what is kinetic does not have to be so clearly defined. If you look at the photograph below, you will notice several things. There is a dialogue between certain elements that create balanced composition. The tree to the right is quite heavy visually, but it is introduces intimacy into the photo. The diagonal branches and deep shadows create an illusion of a shelter. The shoe, the guy the second tree behind the car and the car itself create an off weight to that tree. All photo elements are static. The guy sitting upright like in a church, the trees, no wind, even the car seems static and that is because we can only see the rooftop. Stillness is further emphasized by parallel horizontal straight lines running across the photo from top to bottom. From the shadows on the ground, wood planks the bench is made of, folds and layers of dissipating horizon and so on. The shoe also suggests a pause. Hard sunlight adds warmth and sensation of relaxation. The kinetic element of this photo is indirect. It is hidden inside knowledge of the viewer that this guy is on a short break outside the office. He is taking a breather and will soon rush back to work. This is Tokyo, there is no such thing as rest here. To be able to capture great street photos you not only have to learn how to see photos in your surroundings, be able to predict what is about to happen (things happen in patterns in real life), but also be very patient. Patience is a sign of certainty. People do not wait for no reason. You find a great spot, and you know that there is a photo about to happen, and you know what you are waiting for. That skill of envisioning images is so important, especially if you wish to venture deeper into the realm of photo retouching. All those elements are interconnected. Private photoshop workshops via skype - http://www.ryuurui.com/photo-retouching-lessons.html
My portrait photography service, Tokyo - website http://www.portrait-photography-tokyo.com/ Photography workshops in Tokyo: http://www.ryuurui.com/photography-workshops.html Hire a photographer in Tokyo: http://www.ryuurui.com/hire-a-photographer-in-tokyo.html Photo blog: http://www.japan-in-photography.com/ Facebook: https://www.facebook.com/ponteryuurui Twitter: https://twitter.com/PonteRyuurui Google+: https://plus.google.com/u/0/+PonteRyuurui/posts For more tutorials and how to videos check out my photoshop and photography tips and tricks YouTube channel: https://www.youtube.com/channel/UCEOVGZ2rpLhR7gSPvaexxxQ Master photoshop and learn how retouch photos the way you want, and not just the way you can3/23/2016 There is a huge difference between being limited by your knowledge and limited by your creativity. By mastering photoshop and the art of photo retouching you can literally do anything you want with any photo. In this video I am rearranging hard sunlight shadows, removing them from places I do not want them in and creating new highlights in their place. I also changed the photo composition by cloning a bit of hair to cover a part of the model's chin, to make her appear a bit more mysterious and delicate. By doing so I also redirected the attention to the upper part of the face. Sometimes you capture an amazing body language in your photo, and there are few elements that ruin the impact it could have if they were removed. The art of photo editing is a massive knowledge and a rare one too. Not many photographers can do it well, and lots of them outsources their editing. If you really want to produce your own photography art, that goes along with your vision from the moments you press the shutter to posting the image on your folio, then knowledge of photoshop or any other professional software for photo retouching is a must. Painters create their images in layers, it sometimes takes weeks or months. Why would photography be any different? If the only thing you can do is capturing images, then you are missing on half the fun! Private photoshop workshops via skype - http://www.ryuurui.com/photo-retouching-lessons.html
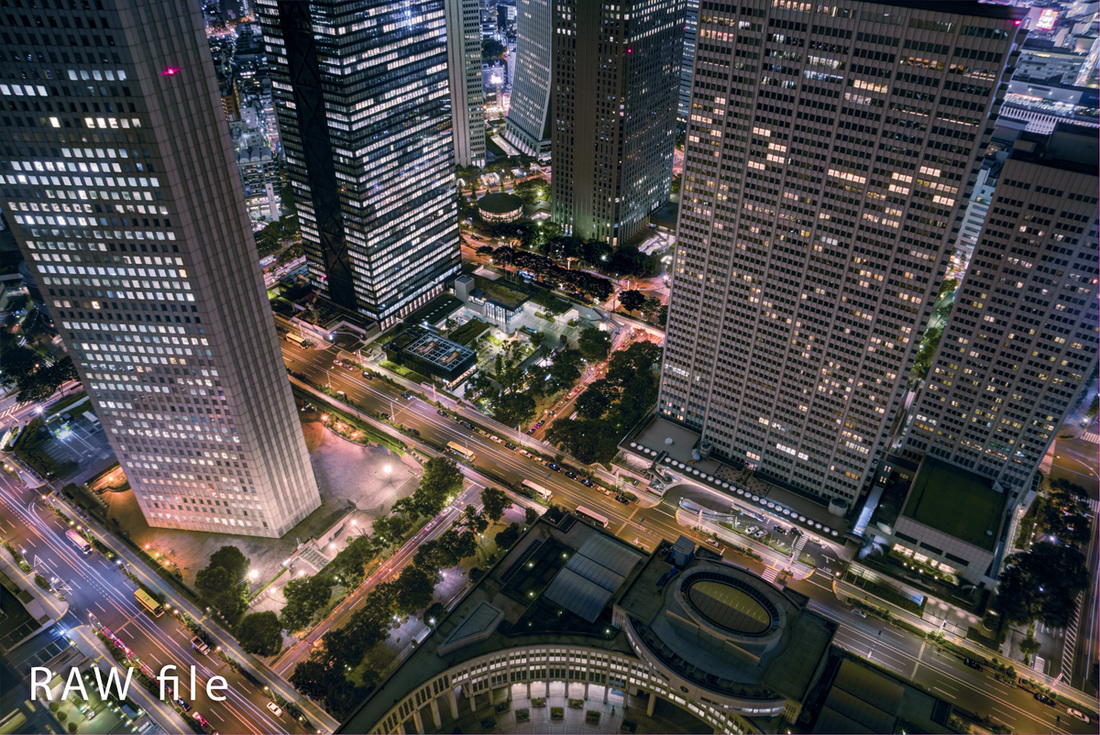
My portrait photography service, Tokyo - website http://www.portrait-photography-tokyo.com/ Photography workshops in Tokyo: http://www.ryuurui.com/photography-workshops.html Hire a photographer in Tokyo: http://www.ryuurui.com/hire-a-photographer-in-tokyo.html Photo blog: http://www.japan-in-photography.com/ Facebook: https://www.facebook.com/ponteryuurui Twitter: https://twitter.com/PonteRyuurui Google+: https://plus.google.com/u/0/+PonteRyuurui/posts For more tutorials and how to videos check out my photoshop and photography tips and tricks YouTube channel: https://www.youtube.com/channel/UCEOVGZ2rpLhR7gSPvaexxxQ This is a complete guide to high-end portrait editing in photoshop, aimed at photographers and anyone who is into photo retouching. The entire tutorial is split into 5 parts (part 5 is still in production and will be released later on this week). I cover a lot of material and the whole thing is about 5h long. I will show you not only how to use photoshop tools and various techniques to create stunning portraits, but also explain how to choose photos for editing before you even start to work on one. Portraiture photography is all about natural and balanced body language and great lighting. If you have those two components checked, the rest is fixable in photoshop. There is no such thing as a perfect photo, and it is not even about creating one in photoshop. Far from it. But in the era of digital photography and RAW files with flat contrast, no saturation, it is essential that you know how to edit your images, regardless how far you want to push them. Now there are many ways of editing, some are lazy, like sliding a few adjustments in Lightroom for the whole batch of photos, or going deep and detailed down to a pixel level in photoshop. I do not know about you, but when I am done with a photo, it can be printed into a huge poster, I dont care, because i know how detailed I am in my editing. I often work on 300-400% zoom to make sure that the skin texture and skin pores are not being damaged. That the tone transition is smooth and pleasing. That I do not have any skin blotches or nasty color shifts (usually red, yellow or cyan). That I have good contrast in my image. That the toning and finishing touches match the mood of the image. The list goes on. Photo editing is an art, and takes time and a lot of patience. It is a blend of technical knowledge, vision and artistic sensitivity that guides you from start to finish. I hope this video tutorial series on how to edit a portrait in photoshop will help you realize how important is the knowledge of photo editing, regardless of what type of photography you are into. (You can find part 2,3,4 on my YouTube channel) My Youtube channel with free photoshop tutorials Photography workshops in Tokyo - click for more details. Hire a photographer in Tokyo Buy original Chinese and Japanese calligraphy art Check out my new portrait photography services in Tokyo website! So what do you do when you have two portraits that you would like to edit, you really like both of them but none is actually perfect. You take the elements from both and composite them into one image in photoshop. We had lots of fun with Diana during our recent photo shoots, and I came back with many great portraits. I sat down yesterday to do some more editing and could not decide between two portraits. I love both of them, the lighting, the body language, the composition, and so on, but each of those photos had small issues. You may not notice this if I do not point it out, but since I am obsessively paranoid with balance in my images I simply had to break those photos apart and make one image out of them. In the shot in which she is fixing her hair with a hand, I am bothered by the position of the thumb and slightly strong gesture of the hand. The palm is facing too boldly towards the camera and I think it ruins the delicate and vulnerable pose. The other photo is beautiful, but after adding cascading hair over her hand, I created balance for the sparkling backlit leaves to the top right corner of the photo. Now it creates a bow or curve of light, engulfing the model. It also creates an anchor point for the eyes to the left side of the image, which is crucial, because we are used to look from left to right. That being said, the negative space to the right makes perfect sense and provides sensible pillar that the right side of the image rests on. Got to love photoshop! My Youtube channel with free photoshop tutorials Photography workshops in Tokyo - click for more details. Hire a photographer in Tokyo Buy original Chinese and Japanese calligraphy art Check out my new portrait photography services in Tokyo website! A lot has happened for the past three years, many new projects were started, some have come to their completion and many more are still waiting to be undertaken in the near future. I think this is a good opportunity to tell you what is happening at Ryuurui's Art Studio at the moment. My focus now is portrait photography and professional headshots here in Tokyo, I am also offering architecture and interior photography services, and you can see my works on my portfolio on SmugMug, where I currently upload full size (1:1 ratio) images at 300dpi print quality. I am also teaching photo retouching in photoshop for beginners and intermediate photographers, as well as photoshop manipulation and composite photography internationally, via skype desktop sharing. I am orgamnising photography workshops in Tokyo to individuals and small groups, and offer photwalks for anyone who is visiting Tokyo and wants to go to the best spots in the town and pick up some photography tips at the same time. I still study Japanese calligraphy, and that includes calligraphy body art and boudoir / fine art nude photography, as well as kanji tattoo designs. My original works and calligraphy & digital art are available for purchase via Emillions Art - my agent in US, and soon through galleries in several countries worldwide. I have successfully completed publishing of my 4 books and you can purchase them globally. For now I do not plan on publishing more, even though I have two manuscripts of new books basically complete. I simply do not have time for it. I have launched a few sites over those 3 years, www.japan-in-photography.com, as well as a site co-created with Mariusz Szmerdt, a very talented Polish ink painter, titled www.ink-treasures.com. I have closed down my page www.ryuurui-foto.com and in its place I have launched www.portrait-photography-tokyo.com, which is more focused on portrait photography. Currently I am studying 3D art and will be launching a new unique photography service that merges photography, photoshop and 3D art worlds into one. I will reveal more information about it soon, but I think you get the general picture. It has been a very busy 3 years for me, lots of work, lots of studies, but a very fruitful and enjoyable ride it was. I really want to thank all of you who have supported me in my artistic craziness, and all I can say is that it will get even more interesting from now on. Here is a new photoshop manipulation speed art video, I picked up an old photo I took in early 2013 -an old photo and new editing skills. Thanks guys and hope you will enjoy the new content! Here is the final edit, and here you can see a full size image. Original RAW file straight from the camera.
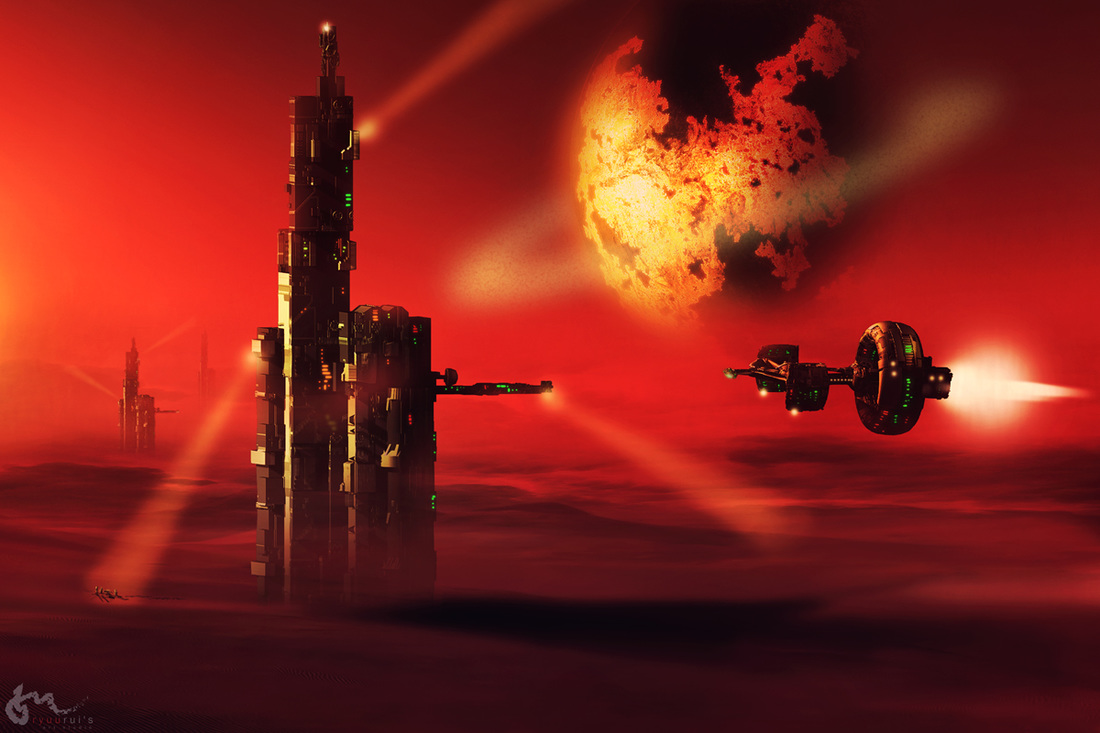
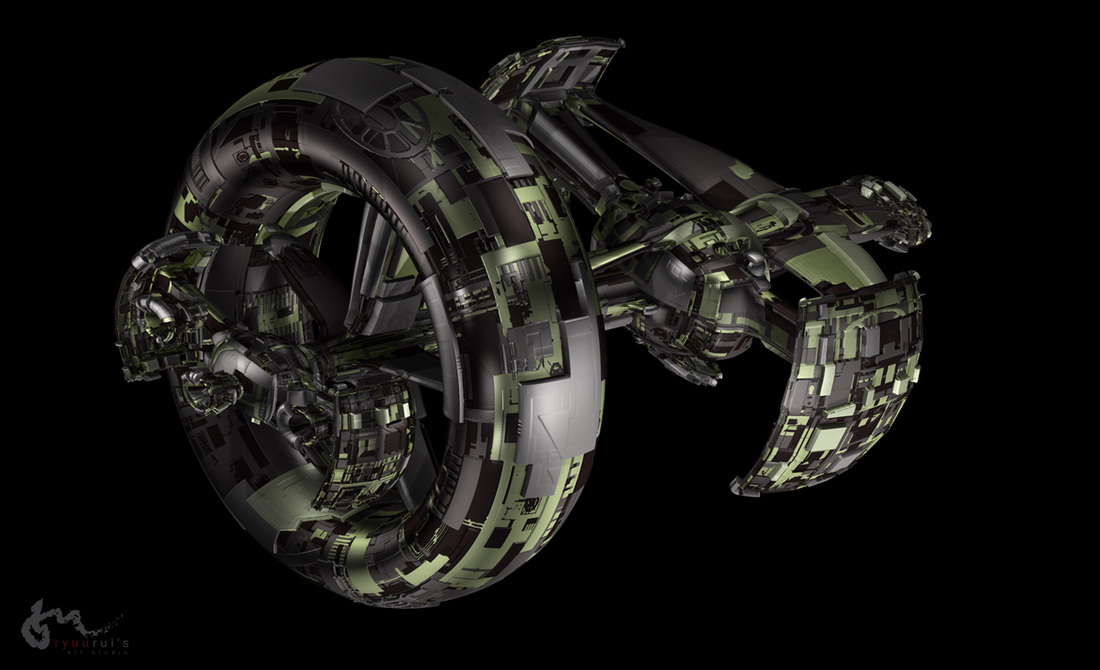
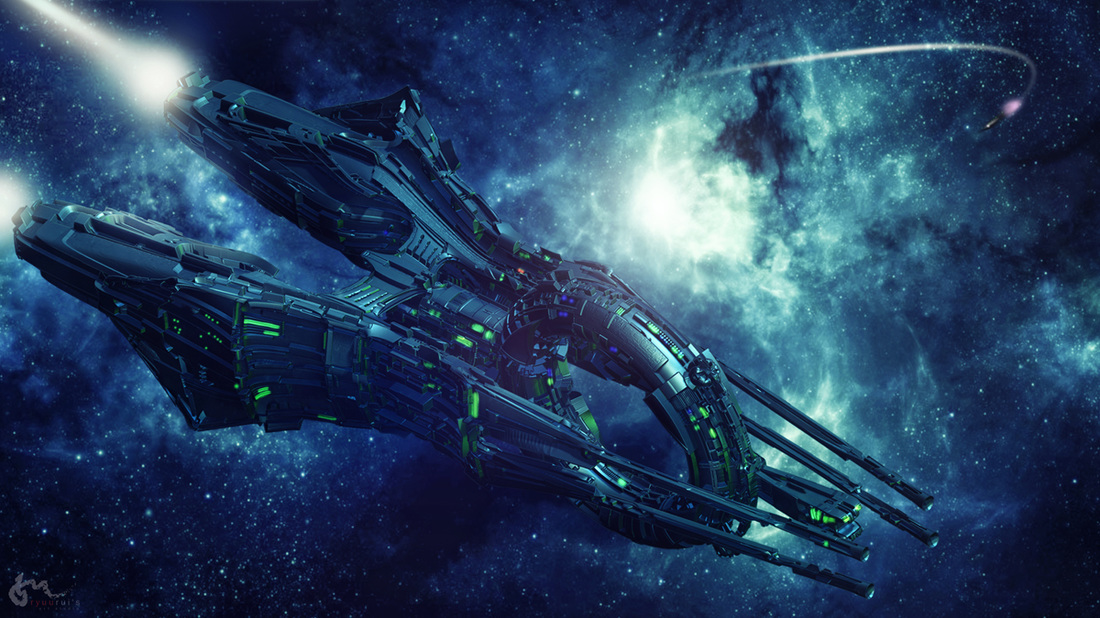
 The main purpose of this book is not to teach Japanese kanji, but help you to understand and appreciate the vast complexity and philosophical and cultural depth of Chinese writing system. I talk in details about the etymology of 50 chosen characters, at a speed of one character per chapter. There are over 400 illustration inside the book, and all of them are not only actual historical characters taken from ink rubbings of outstanding Chinese and Japanese calligraphy masterpieces, ranging from 1600BCE to 19th century CE., but each of those illustrations has a detailed description regarding who wrote it and when, with other interesting historical facts or trivia, either about the classic or the author. The true value of this book is that the key contents are based purely on Japanese or Chinese literature, and not translations into other languages. I bring you knowledge that is hidden behind the language barrier for most of the Western world. One of my main sources for this book were publications by one of the greatest modern scholars of the etymology of Chinese writing, Shirakawa Shizuka (白川静, 1910 - 2006), who sadly passed away in 2006. His books are hugely valued not only in Japan but also in China and Taiwan. Since his publications are quite encyclopedic, and are based on numerous abbreviations and connotations, even native speakers whose field is Japanese or Chinese language, find those books difficult to read. I invested a great amount of time and effort, and backed it up with my years of experience in the field of Chinese and Japanese calligraphy, to explore a lot of side topics and intriguing fact on the subject of origins of kanji, and included them in my book. Etymology of Japanese kanji - in-depth analysis of selected characters is a book aimed at anyone who is interested in Chinese or Japanese language, or history of ancient China and Japan, or any enthusiasts who appreciate the culture and philosophy or the Far East. The title of this book was the most difficult thing to decide on, since it is impossible to talk about Japanese kanji without discussing Chinese characters, which in some cases are the same thing, and in others are different. I decided on Japanese kanji in the title, mainly because I live in Japan and this is also where I study calligraphy. If you have any questions regarding the book, feel free to send them directly to me or leave a comment below. How to edit rough skin pores and mattify shiny skin in photoshop (detailed video tutorial)12/3/2015 In this photoshop tutorial I will show you how you can easily edit rough and bumpy skin pores and mattify shiny and reflective skin patches in photoshop. I am using two techniques: micro dodging and frequency separation. Both are used in professional portrait retouching and are really useful tools for editing not just portraits but other types of photography as well. I use them on a daily basis and although micro dodging can be time consuming if you want to do a really good job, but trust me, there is no better and more accurate method. If you are serious about your photography and wish to handle top notch magazine quality photos to your clients or add them to your portfolio, then both techniques are definitely something you should learn. Micro dodging allows for lessening the difference between dark tones and bright tones in the image, which helps to make skin appear healthy and smooth. Frequency separation allows for splitting tones and textures into separate layers which is essential if you want to keep the quality of tones and textures in your photo. Both techniques require photoshop or any program that allows for working on layers. This is why photoshop is vastly superior to lightroom. In this video tutorial I am explaining frequency separation and micro dodging in details, so you should be able to try both on your own photos without any issues. Happy editing! Anyone interested in private photoshop workshops via skype desktop sharing please contact me directly. My Youtube channel with free photoshop tutorials Photography workshops in Tokyo - click for more details. Hire a photographer in Tokyo Buy original Chinese and Japanese calligraphy art Check out my new portrait photography services in Tokyo website! I think I have discovered the ultimate combination of skills that will allow me to express myself artistically. The holy trinity of 3D art, photoshop madness and photography. I will be using photography for photo realistic textures and UV mapping, 3D for creating whatever the hell my brain comes up with during the day, and photoshop to fuse all those bits together. It is so much fun to sit and create a sci fi landscape from scratch by assembling a visual puzzle of parts and pieces, creating the missing bits and composing the final image. 3D will take time to master, but that is nothing comparing to the effort and time I have invested into studying Japanese calligraphy, so it should be fun. I have so many visions and ideas lined up that I am not sure I will be able to complete them all in one lifetime. I love fantasy and 3D so this will be the main theme for my artwork. I have plans to create a new photography service for those who crave for really unique images. It will be merging sci fi photoshop manipulation with 3D art and portrait photography. If you want a crazy portrait, then look no further. Today I was creating some sci fi structures, one of them you can see in the image below. The ship I created a few days ago in Zbrush and it is the same one as in this image here. Image was composited in photoshop. Anyone interested in private photoshop workshops via skype desktop sharing please contact me directly.
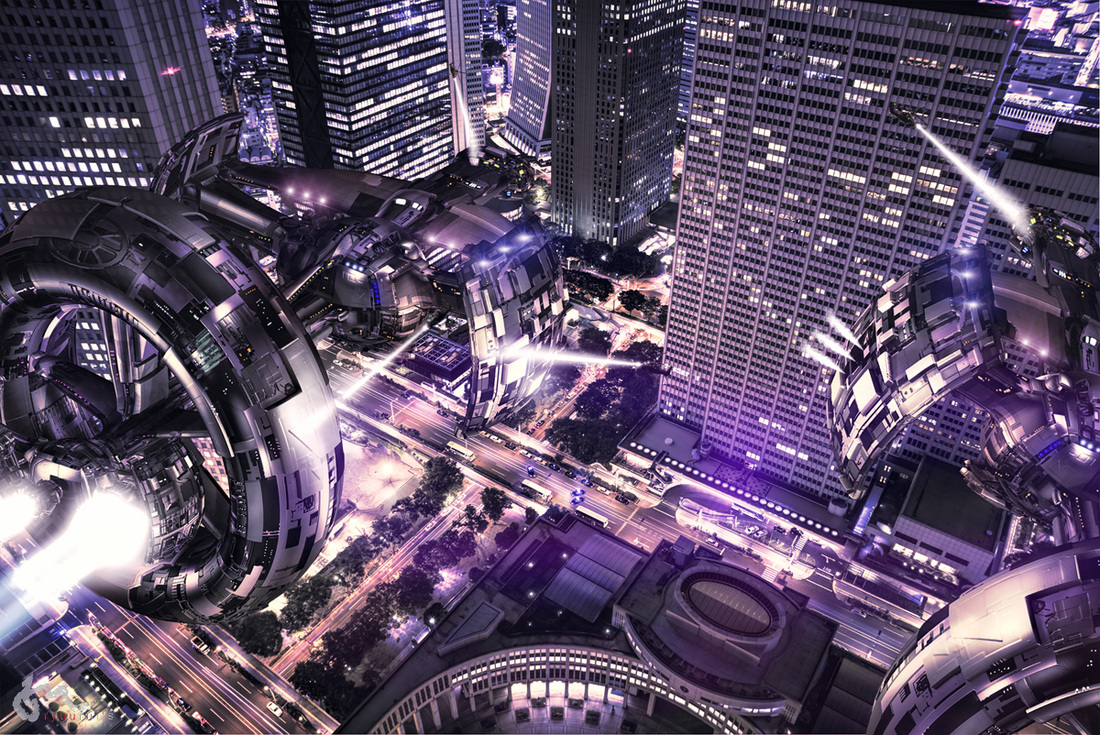
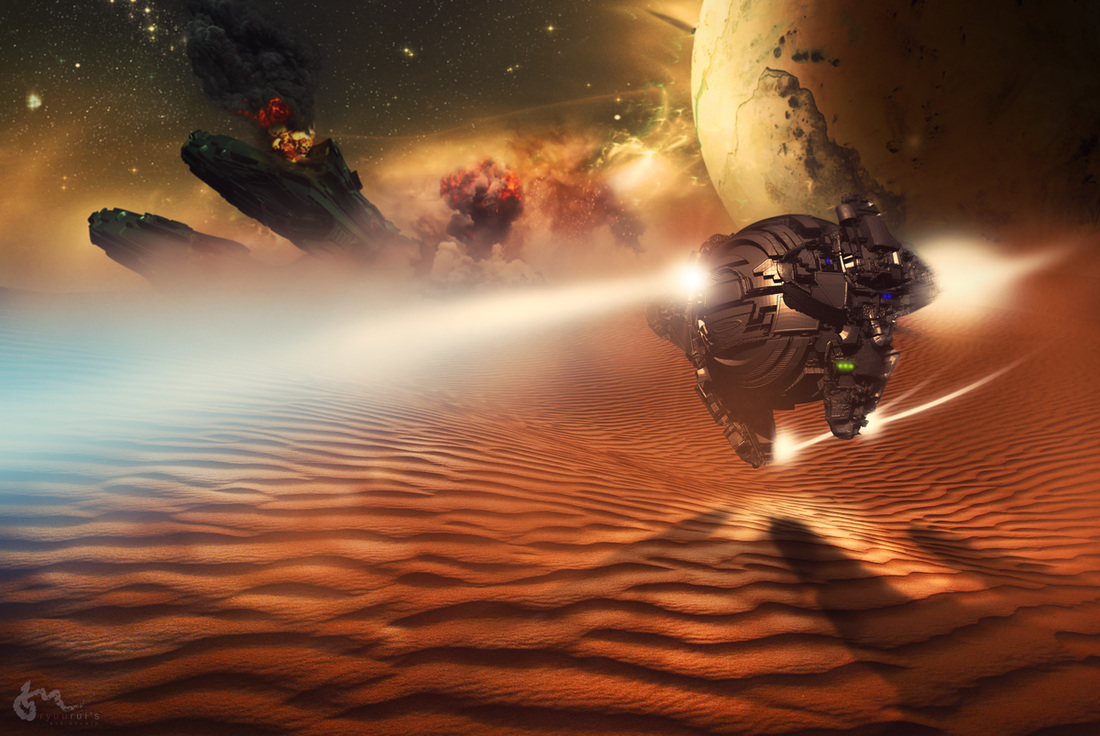
My Youtube channel with free photoshop tutorials Photography workshops in Tokyo - click for more details. Hire a photographer in Tokyo Buy original Chinese and Japanese calligraphy art Check out my new portrait photography services in Tokyo website! This video tutorial is for lazy people like myself who cannot be bothered reading. I wrote an article on my other page, Portrait Photography Tokyo, that gives tips on how to crop photos in photoshop and you can read it here, though this video is probably covering it in greater depth. Cropping is nothing else but an attempt at fine tuning composition. If you shoot on a tripod, your composition should be spot on, but if you shoot quick and hand held things may get a bit misaligned. I create many composite images and photoshop manipulations so for me cropping is a second nature. Cropping is a fantastic exercise for improving your composition, and composition is one of the most important things in photography, or any type of art really. So take your time, bring some photos into photoshop and try different ways of cropping one image, you may be surprised what you can learn. In this video I am taking one image and showing you a few ways of cropping it, and explain in details why I cropped it this way or another, which brings you behind the scenes and lets you understand my thought flow. You can apply anything from this photoshop tutorial to your photography when you are out and shooting. Enjoy! Anyone interested in private photoshop workshops via skype desktop sharing please contact me directly. If you are looking for a portrait photographer in Tokyo, check out my services menu tab. My Youtube channel with free photoshop tutorials Photography workshops in Tokyo - click for more details. Hire a photographer in Tokyo Buy original Chinese and Japanese calligraphy art Check out my new portrait photography services in Tokyo website! Here is my first 3D / photoshop manipulation art for the new project Tokyo 3017. I gave it a kinky title: "They have come!". I will be landing sci fi and alien ships all over the damn place. Ships will be rendered in 3D, and I expect them to become more detailed and crazy as the time goes. I will also be scouting Tokyo for perfect spots for landing or flying over my spaceships. 3D isn't easy and takes loads of time to learn and create art, but it is fun as hell and I am loving it! This image is based on my old photo that I took last year or so, it is a view from Shinjuku government building, they have two observation towers there. The view there is smashing so check it out when you are in Tokyo, I even shot this image of Mt. Fuji from there. The ships were made in Zbrush in 3D, well actually it is the same ship, just set in different perspectives. The only stock images I used were the helicopters. Lights, toning and compositing was done in photoshop. Together with the project I will be creating new videos, mostly on concept art, composition, compositing and photoshop manipulations, and possibly in the future on 3D art. You can see original images below. Anyone interested in private photoshop workshops via skype desktop sharing please contact me directly.
My Youtube channel with free photoshop tutorials Photography workshops in Tokyo - click for more details. Hire a photographer in Tokyo Buy original Chinese and Japanese calligraphy art Check out my new portrait photography services in Tokyo website!  First, by realistic I mean believable, ones that look like pictures and not a few images stitched hastily in photoshop. Composite photography and photoshop manipulations are a great fun, but they require patience, artistic sense, and knowledge of photoshop and other programs used for creating digital art. However there is more to it that this. So what are the key elements of great composite art or photoshop manipulations, then? 1. vision 2. perspective 3. light 4. colors 5. technical skills 6. database of images 7. patience Optional but helpful (in my opinion essential): 8. pen pressure tablet 9. calibrated monitor You need to have a vision of what you wish to create, the scene, the story, the composition. Concept art and photoshop manipulations are all about expressing yourself through imagery that does not exist or never took a place. It is all about what you want to portray. Next, if the perspective, camera angle and focal length of the lens do not match, it will be a very fake looking image and even though viewer may not be able to pin the issue down, the brain will notice that something is off. Now this is very much linked with the skills and knowledge of the software that you are using for creating composites, and the need for database of images. If you are impatient and want to create great art, then you can forget it. It is all about hard work and attention to details. The devil is in details, never forget that! If you want to have insane control use pen pressure tablet or drawing monitors like Cintiq by Wacom. A calibrated monitor will ensure quality in print. Also remember that all professionals use such monitors, so if you send any of your artwork or your folio to someone in hope of employment, then make sure your colors, contrast and black and white levels are spot on. If you would prefer private photoshop workshops via skype desktop sharing then contact me directly.
Programs used: Zbrush / photoshop CC 2015 My Youtube channel with free photoshop tutorials Photography workshops in Tokyo - click for more details. Hire a photographer in Tokyo Buy original Chinese and Japanese calligraphy art Check out my new portrait photography services in Tokyo website! 2D is too constrained, I am going 3D. After a long research and some trials with various software I have decided to begin my studies of Zbrush and Keyshot, two amazing programs for creating and rendering 3D art. Here is my first fully digital art and my first 3D model of a spaceship. Zbrush is a real jungle and the program is complicated and difficult like a school bus of frustrated women, but I am enjoying the creating process like a small kid a bar of chocolate that he was not supposed to eat. This also marks a beginning to a whole new project (and possibly some videos) whose current working title is "Tokyo 3017". That is right people, I will be landing my own spaceships all over Tokyo. The project will combine my photography art, photoshop manipulation and composite work, and 3D models. I may be throwing some cyborgs into the twist at some point. Hope you will enjoy it, and feel free to let me know what you think.
My Youtube channel with free photoshop tutorials Photography workshops in Tokyo - click for more details. Hire a photographer in Tokyo Buy original Chinese and Japanese calligraphy art Check out my new portrait photography services in Tokyo website! Street photography is not easy. You have to be observant, patient but at the same time quick and precise if needed. You have to know your gear inside out to be able to act fast. You should have good understanding of human behavior and psychology, just like in portrait photography, although street photography is not all about capturing people. Running around like a rabid dog with your camera will probably not grant good results. Most of the time street photography is all about finding the picture with one element that is missing. Then all you do is wait for that element to appear. Things happen in patterns, so if you saw something you liked, but it was too late,there is a good chance it may happen again. When I visited Narita temple complex north of Tokyo, there was some sort of traditional event going on. I did not really care what it was, all I cared about was that it was a feast for a photographer. So I found myself a spot, with a small shrine framed by a massive branch, and small stone figurines lined up along the path, and the only missing element was someone passing. I saw a few people pass but they did not fit the scene, so I waited some more. And then I saw this guy, not only was he dressed to match the noren (banner) on that shrine, but he even turned his head towards the light in a perfect moment. Patience really pays off when it comes to street photography. If you are looking for a photographer in Tokyo to take you on street photography workshops, then feel free to contact me.
My Youtube channel with free photoshop tutorials Photography workshops in Tokyo - click for more details. Hire a photographer in Tokyo Buy original Chinese and Japanese calligraphy art Check out my new portrait photography services in Tokyo website! How to start with photoshop #5 - layers & masks (photoshop tutorial series for beginners)11/15/2015 In this episode of free photoshop tutorials for beginners I will help you to understand layers and masks and how to use them in practice. The whole series is designed for photographers who either want to improve photoshop skills, or those of you who made the right decision of moving from Lightroom to Photoshop to do some proper photo editing. Photoshop layers and masks is what makes photoshop such a unique tool and what places it high above the abilities of Lightoroom. You can work non-destructively on your photos by stacking various effects as adjustment layers, on top of it you can fine tune those adjustments via blending, opacity and masks. Blending modes and opacity / fill are used for executing global shifts between layers, and masks are there for targeting certain areas of your image that you wish to fix or enhance. By the end of this video you will have a solid grasp on the basics of layers and masks and be aware of its massive potential. If you would prefer private photoshop workshops via skype desktop sharing then contact me directly. My Youtube channel with free photoshop tutorials Photography workshops in Tokyo - click for more details. Hire a photographer in Tokyo Buy original Chinese and Japanese calligraphy art Check out my new portrait photography services in Tokyo website! In this next photoshop tutorial for beginners I explain how to use vector tools on practical examples of photos. The most complex tool here is the pen tool, and it is also the most useful one. I coud not live without pen tool, it is an absolute life saver in editing of virtually any type of photos, but it is essential for making very precise selections in images portraying architecture, where there are many straight or curved lines and other selection tools simply fail. Pen tool is also amazing for editing portraiture and selecting body outline, or parts of the face, like eyes, lips, etc. I have a separate video on how to use pen tool in photoshop here. This part 4 of the photoshop tutorial series for photographers covers other tools such as color palette, pan tool, quick mask tool, and zoom tool. In next episode I will be discussing the basics of working with layers and masks, which lays at the very essence of photoshop workflow. If you would prefer private photoshop workshops via skype desktop sharing then contact me directly. My Youtube channel with free photoshop tutorials Photography workshops in Tokyo - click for more details. Hire a photographer in Tokyo Buy original Chinese and Japanese calligraphy art Check out my new portrait photography services in Tokyo website! This is especially true to street photography, but also in architecture, sports, and any other type of photography where things constantly evolve and happen all around you. You should make a habit of looking everywhere. If you stand in one spot and move only two steps, whole myriad of things changes: the perspective, angle, possibly light, shadows shift, time passes so new situations occur, reflections shift, people pass, and so on. You have to see everything to be able to capture that one thing worth photographing. There is a saying that goes "if you are good you will be lucky", but only via practice you can become better and better. Some of us are born with more natural talent than others, but every single professional will tell you the same thing - never stop studying, never stop trying more and more difficult things, never stop looking further than you think you should, never be satisfied with your current skill and knowledge. Be like water- keep moving, and while you move, look around you, because the best photos happen usually where others do not look.
My Youtube channel with free photoshop tutorials Photography workshops in Tokyo - click for more details. Hire a photographer in Tokyo Buy original Chinese and Japanese calligraphy art Check out my new portrait photography services in Tokyo website!  If you follow my blog you know how much I love photoshop, and experimenting with the myriads of possibilities and ideas. I have often re-edit my older photos either for fun or just t create a new fresh look. But there are shots that literally ask me to do something extra with them. Some of those pictures not perfect for stand alone regular photos, but are perfect for composite images. I have lots of shots like this mainly warm up shots from photoshoots with models. Here is an old shot of my wife, I this I took it two years ago or so. I created a photoshop manipulation with it but my skills with photoshop are far more superior now that they were at the time I was editing this image for the first time and I decided to redo it from scratch. The idea was to transfer her into a sorceress placed in some magic surreal environment, with dominant warm red and orange tones, lots of contrast, and I wanted to blend the reality with cartoon-like elements. This image is partially hand-drawn in photoshop. and partially a composite. Photography on its own is too limiting, for me it is only one of many tools and media that I will use to create visual art. If you enjoy photo editing and photo manipulation and you too think that photo editing is a form of art, then have a look at my private photoshop workshops page. My Youtube channel with free photoshop tutorials Photography workshops in Tokyo - click for more details. Hire a photographer in Tokyo Buy original Chinese and Japanese calligraphy art Check out my new portrait photography services in Tokyo website! Here is the third episode of photoshop tutorial for beginners that is aimed at photographers and explains basic photoshop tools and functions from a practical point of view based on actual photos. The idea is to help anyone who is getting started with photoshop and make this program appear a bit less intimidating. In this episode I am discussing the editing tools, which are: healing brushes, brush tools, clone stamp tools, history brushes, eraser, gradient tool, blur, sharpen and smudge tools, and lastly dodge, burn and sponge tools. This video is not meant to be in-depth tutorial on each of those tools, rather than a practical introduction that offers enough information for performing photo editing. Some of photoshop tools are more complex and some are more used than others so I will be creating separate videos on photoshop tools that I use the most in my day-to-day photoshop work. Next episode will cover vector tools and what I call complimentary tools, and then I will discuss how to work on layers and what are the most practical examples of using layer masks, then I will focus on editing an image from start to finish, and also show you how powerful is Adobe Camera RAW. If you would prefer private photoshop workshops via skype desktop sharing then contact me directly. My Youtube channel with free photoshop tutorials Photography workshops in Tokyo - click for more details. Hire a photographer in Tokyo Buy original Chinese and Japanese calligraphy art Check out my new portrait photography services in Tokyo website! Private photoshop workshops via skype - photo editing, composite photography and photo manipulation11/1/2015 If you know how to take photos, now it is time to learn how to edit them properly. If you want to learn how to give your photos a unique look and fine polished magazine quality finish, then contact me and I will design workshops according to your level and needs. My focus is portrait and architecture, as well as composites and photoshop manipualtions. I teach via desktop sharing so you can see what I do on my screen in real time, stop me or ask questions at any moment. All levels of photoshop users are welcome. See this link for more details, Click here to view below image in non-compressed version in full HD model: Lena
Depth is one of very powerful tools in your photography tool box if you know how to use it to make your photos stand out even more. Depth adds dimensions, expands a photo visually, enhances the story telling, adds movement and helps the capture the viewer's attention for much longer, by creating a visual puzzle. Depth can be achieved by use of many techniques. One of them would be simply photographing your subject in a way that the background is visible but not detracting, still reading and adding to the story but not in an overpowering manner. The Other way would be working with contrast, sharpness and saturation, which can be done in post production, but not only. If you know or can control your light while shooting, those three elements can be captured on camera and then enhanced even further in photoshopp or lightroom. You can achieve depth via other means, such as motion blur, compositing photos, photo manipulations, and so on. Naturally capturing as much as you can on camera will help a great deal, so whenever you are out there shooting, try not to focus only on your subject, but also what is in front of it, behind it, on each side, and also on what is about to enter or leave the frame.
My Youtube channel with free photoshop tutorials Photography workshops in Tokyo - click for more details. Hire a photographer in Tokyo Buy original Chinese and Japanese calligraphy art Check out my new portrait photography services in Tokyo website! |
Categories
All
AuthorPonte Ryuurui (品天龍涙) Archives
August 2020
|


 RSS Feed