|
I am working on a new sexy cyborg girl photoshop manipulation, and it looks like this one will be by far the most complex one have created so far. I am about half way through and I already started a 145th layer in photoshop. The more details are in a composite image the better, and the more work you put into polishing those details the better, and those details take a lot of time. I ve been working on this 6h so far, and it seems that another 5h or so should do it. Regardless the time spent, I love working on my hot cyber girl army and sci fi projects. Very relaxing and keeps me sane in this more and more retarded world. Anyways, I thought I will share with you an something that is being created at the very moment. If you want to learn advanced photoshop and photo manipulation / composite photography, then check my photoshop workshops (one to one and online via desktop sharing). My Youtube channel with free photoshop tutorials Photography workshops in Tokyo - click for more details. Hire a photographer in Tokyo Buy original Chinese and Japanese calligraphy art Check out my new portrait photography website! 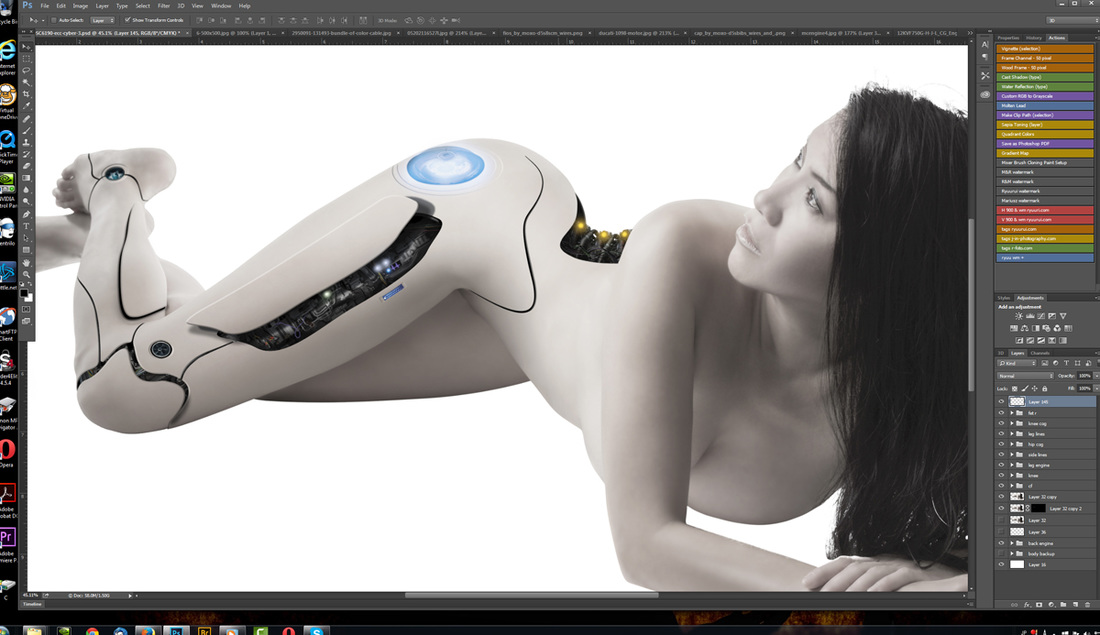 details 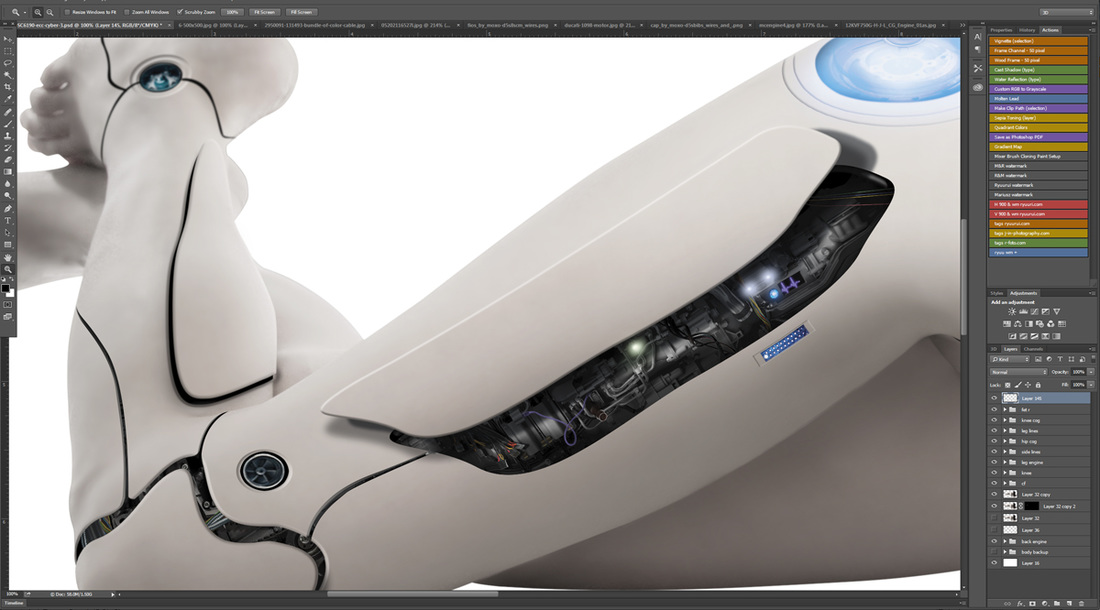 This is a re-edited version of a photo that I took back in 2013 with one of my most favorite texts - the Buddhist Heart Sutra. This is my copy of a classic by Wang Xizhi from the 4th century C.E. in semi-cursive script. I gave this photo an old distressed look, as if it was recovered from an old building or some forgotten drawer on an attic in the distant future. The scratched-like text to the right is in oracle bone script and reads "Tokyo 2015". I think the original mood of the photo fits perfectly for such a dramatic edit. This photo now tells many different stories. Girls interested in boudoir / nude / body art shoot please contact me directly (Tokyo area). My Youtube channel with free photoshop tutorials Photography workshops in Tokyo - click for more details. Hire a photographer in Tokyo Buy original Chinese and Japanese calligraphy art Check out my new portrait photography website! 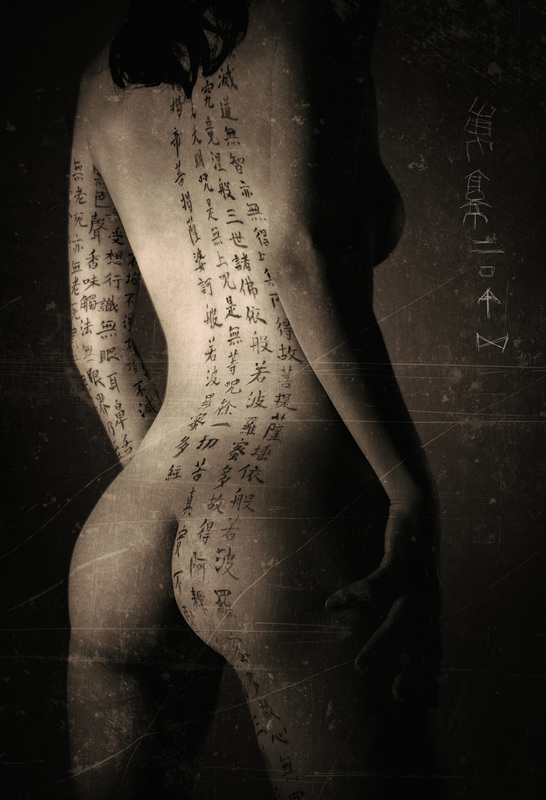 HDR stands for High Dynamic Range and in photography it usually refers to a scene that has a massive differences between the dark and bright tones. Unlike a human eye, most of the digital cameras, or any cameras, cannot capture extreme dynamic range scenes, though the technology is drastically improving (Alpha Sony 7s comes to mind). So if you cannot dish tens of thousands of dollars for a medium format camera, then HDR editing software is the way to go, or at least it was for me. I used to work with Photomatix and HDR efex PRO 2 from Google software, but to be honest I never was fully satisfied with the results. The process is mostly automated and relatively fast, even if you will make final adjustments in photoshop, but when I started to manually blend layers in photoshop, my photos are clean, artifact free, without any crazy micro contrast or fake looking pale washed out colors (mainly red). Below is a short video that I made today, I am revising some of my older photos and I re-edit them. You can see below the RAW file, then my old HDR edit, and at the very bottom a manually blended image. For full length tutorial on manual blending see my 50 minute long video here. My Youtube channel with free photoshop tutorials Photography workshops in Tokyo - click for more details. Hire a photographer in Tokyo Buy original Chinese and Japanese calligraphy art
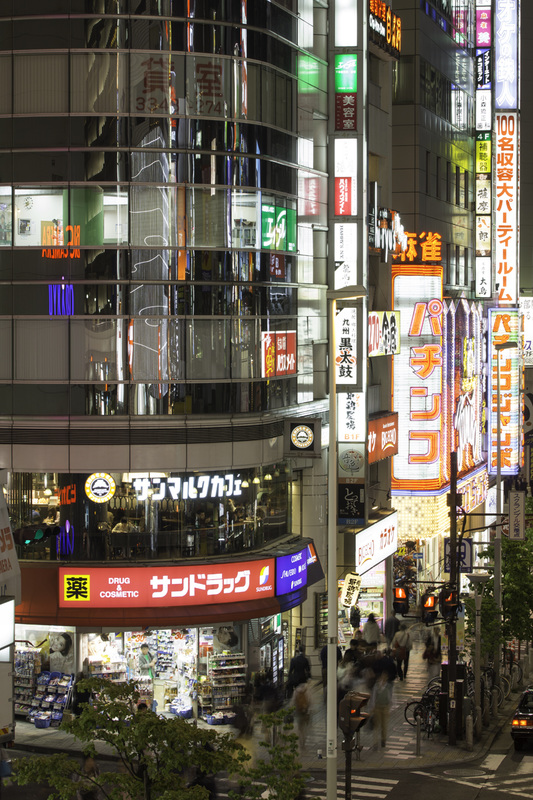
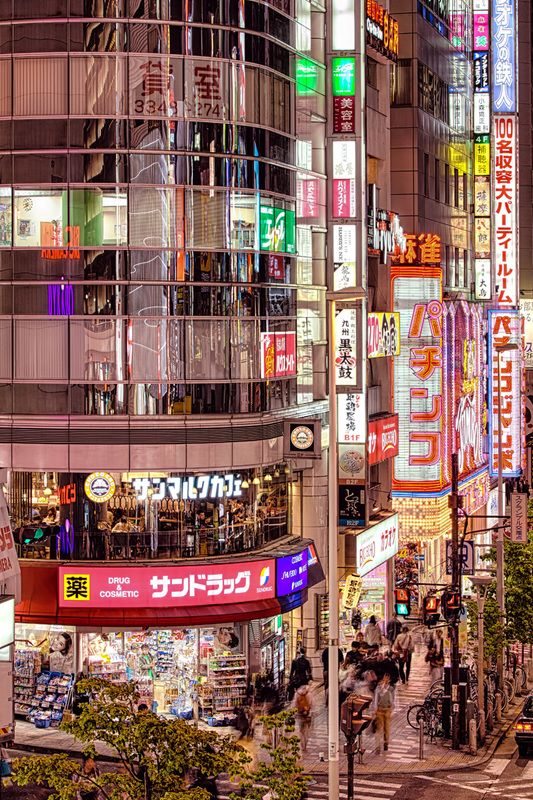
Manually digitally blended image 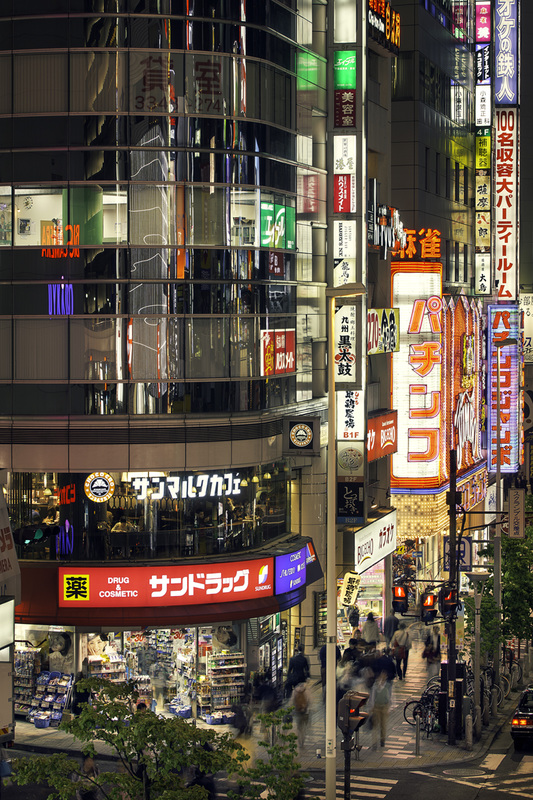 In this photoshop tutorial I will show you how you can easily edit and convert a photo inside Adobe Camera Raw without having to do absolutely nothing inside photoshop. Adobe Camera Raw is a very powerful tool, and it has many amazing options. In fact Lightroom editing options are build around Camera Raw functions. This tutorial will teach you how you can control contrast and colors of your photo, perform some simple dodging and burning, manipulate with light to direct the viewers attention to the place you want them to go, and finally how to convert the photo into a nice crispy and punchy black and white. My Youtube channel with free photoshop tutorials Photography workshops in Tokyo - click for more details. Hire a photographer in Tokyo Buy original Chinese and Japanese calligraphy art Tokyo is like a vision generator for anyone who is a fan of science fiction. Spaceships, hovercrafts, cyborgs, lasers - yes please! And Akihabara - the Electric City of Tokyo - is N.U.T.Z. God I love this place. When I was taking this shot, in my mind, it was a cut-scene from a sci fi flick. I mean come on, just look at it, it asks to be digitally meddled with. Anyways, the point is, when you shoot, always shoot with a vision of post processing, ALWAYS. And if you cannot post process your shots - learn it how to do it properly. No one is going to do it for you the way you would like to see your final photos. Got to have a vision guys, that is so important to your evolution as an artist. Taking photos is 50% of the fun, the rest happening inside your PC. There is a reason we all shoot in RAW, or at least you should, and it is to get the best ingredients possible and the most flexibility for your artistic cooking. So, learn how to cook, chicks dig it! My Youtube channel with free photoshop tutorials Photography workshops in Tokyo - click for more details. Hire a photographer in Tokyo Buy original Chinese and Japanese calligraphy art 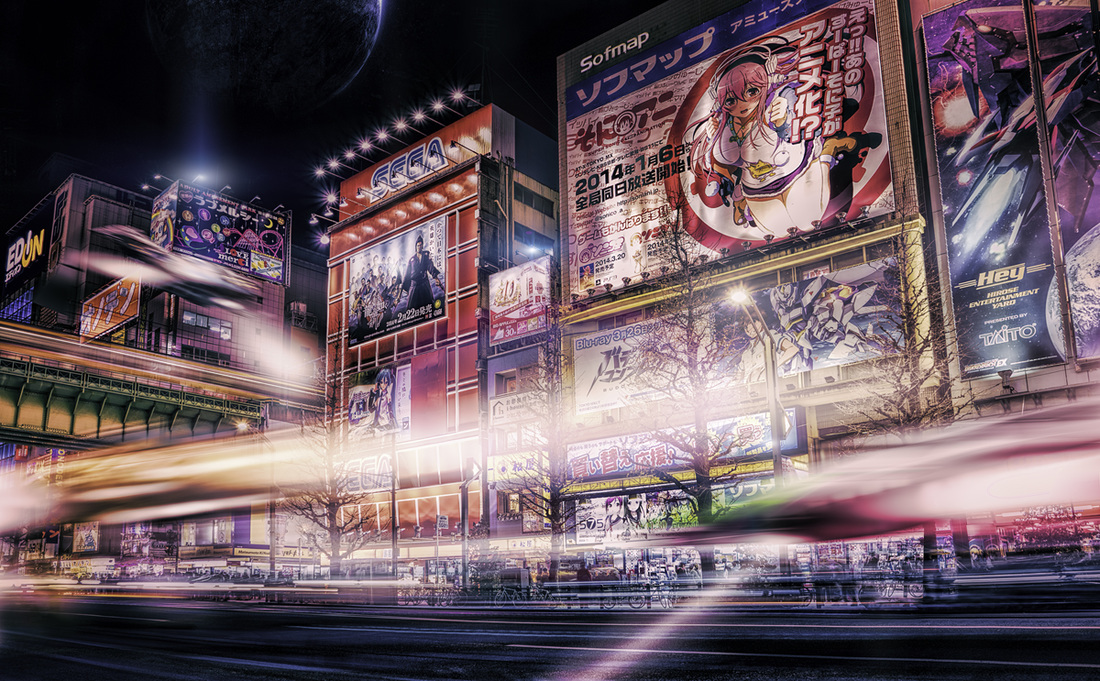 Working on photos and editing tons of shots may lead to tunnel vision and resulting in similar type of edits. Lots of people use presets, not even knowing what they do. That includes the professional photographers as well. Some people don't even possess the skill to edit their own work, which is pretty scary. It is like a cook who buys veggies on the market and calls for help to cook the meal. Learning and studying will develop your artistic vision, and it is most likely to change over the time. I learn new skills on a daily basis, and my photoshop techniques improve quite rapidly. I am often revisiting some of my favoring works and re-editing them applying what I have learned since I worked on them. Sometimes I give photos a new twist. All in all I love editing 1 photo in many different ways. It leads to amazing discoveries. In this case the reason for editing is complex. One, is that I love this shot. Two, is that I love this calligraphy classic, and three is that this very classic is one of the mandatory subjects for my Master Instructor exams in calligraphy this year. model: Asuka / Japanese calligraphy - my copy of a Chinese classic Shu Pu from the early Tang Dynasty (7th century) by Sun Guoting, who was an absolute genius of cursive script. 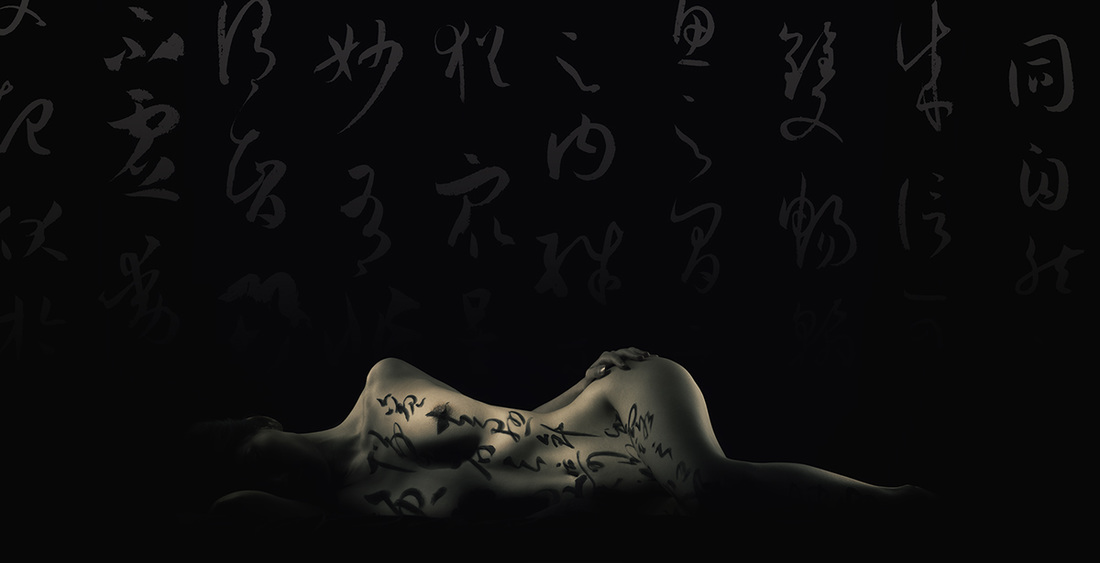 I wanted to do this photoshop manipulation for a long time, just needed a self portrait photo to be able to create it. Last week we were shooting some portraits with my wife and she took the photo you can see at the very bottom of this post. So today I found some time and changed myself into a werewolf. First I thought to composite myself into some horror scene or some dark dungeon, but all werewolf photos are the same, so, I sat down and wrote the calligraphy for it. It read 激情 which means FURY. I recorded the editing and photoshop manipulation so I will post it later on. Enjoy! My Youtube channel with free photoshop tutorials Photography workshops in Tokyo - click for more details. Hire a photographer in Tokyo Buy original Chinese and Japanese calligraphy art 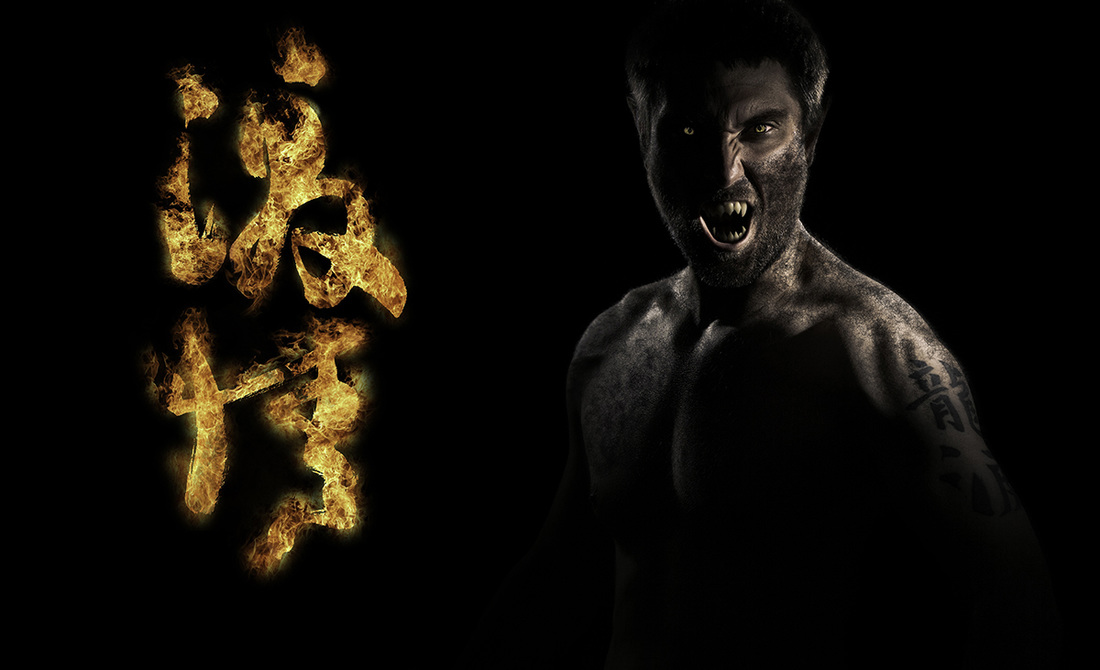 original photo 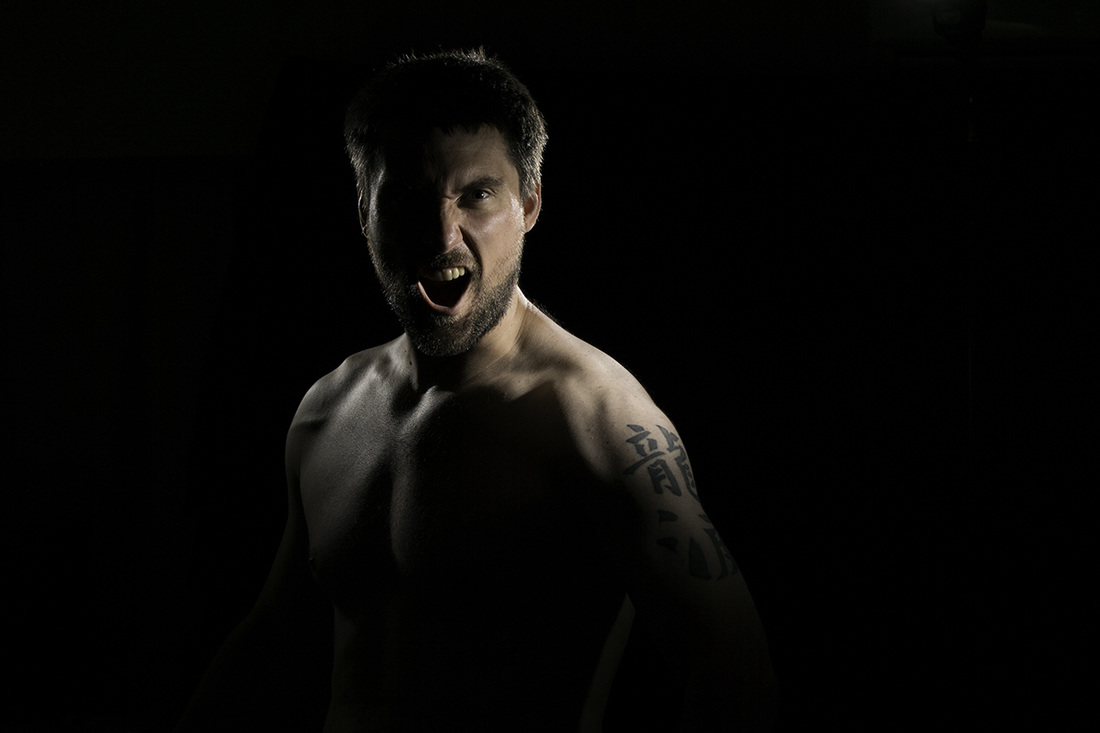 How to create a werewolf in photoshop - speed art If you always dreamed of having a really good portrait photo taken then you came to the right place. For me portraiture is not just a headshot, it is far more than that. I am not just a photographer, I am an artist. I seek the real personality, the character, the mood, the perfect lighting, this one unique moment when I can capture who you really are. On top of this I offer high end photo retouching, so you will not only be portrayed looking at your best, but also will receive a fashion magazine quality level of photo retouching. Each client wants something else, and I tune and adjust my photography style and setup as well as the editing process and strength to every person individually. I ofer service for both those who live i Tokyo and those who travel to Tokyo. Contact me to book your photoshoot! My Youtube channel with free photoshop tutorials Photography workshops in Tokyo - click for more details. Hire a photographer in Tokyo Buy original Chinese and Japanese calligraphy art 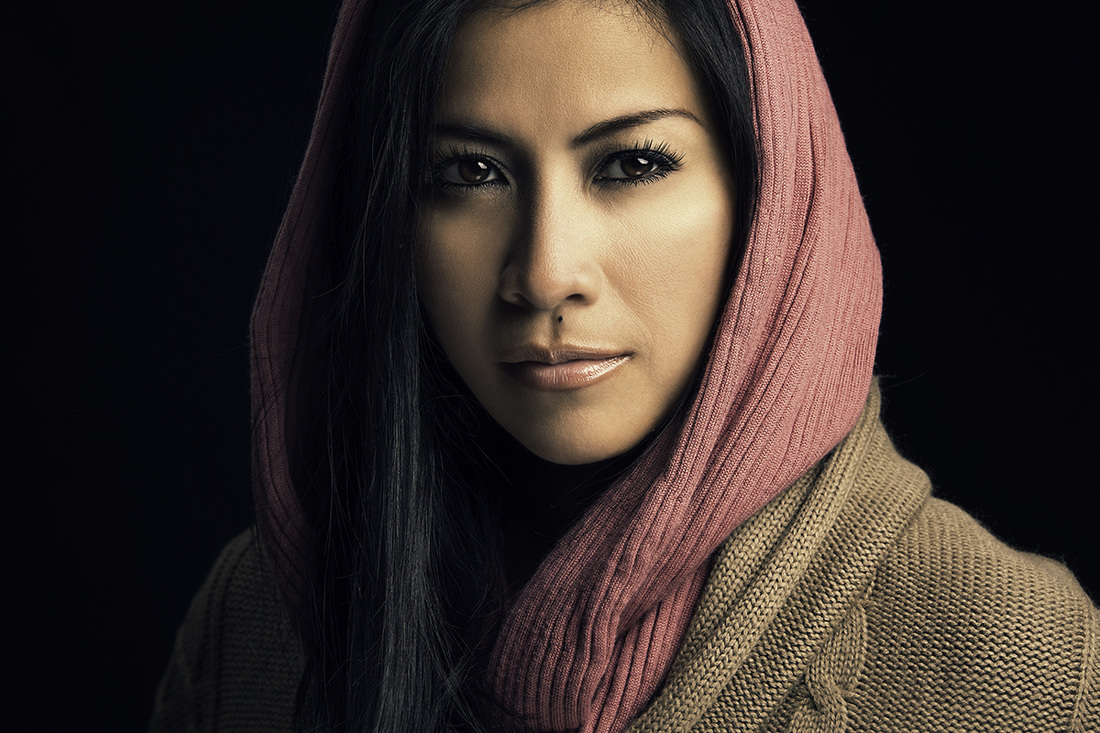 Finally I had some time to play around in photoshop and create some concept art based on my photo of Tokyo. The whole thing is hand painted in photoshop, except a few of those spacecrafts, which I grabbed from Deviant art page stock images. I took this photo some time ago waiting for the hazy sunset near my place, and as usual I took few more photos just in case. I had a few ideas of creating a similar image, and this is an outcome of my today's doodling in photoshop. Photoshop manipulations and composite digital art usually takes a bit of time, this one was not too bad, I think I finished it in 2.5h Anyways, enjoy and more is coming! My Youtube channel with free photoshop tutorials Photography workshops in Tokyo - click for more details. Hire a photographer in Tokyo Buy original Chinese and Japanese calligraphy art 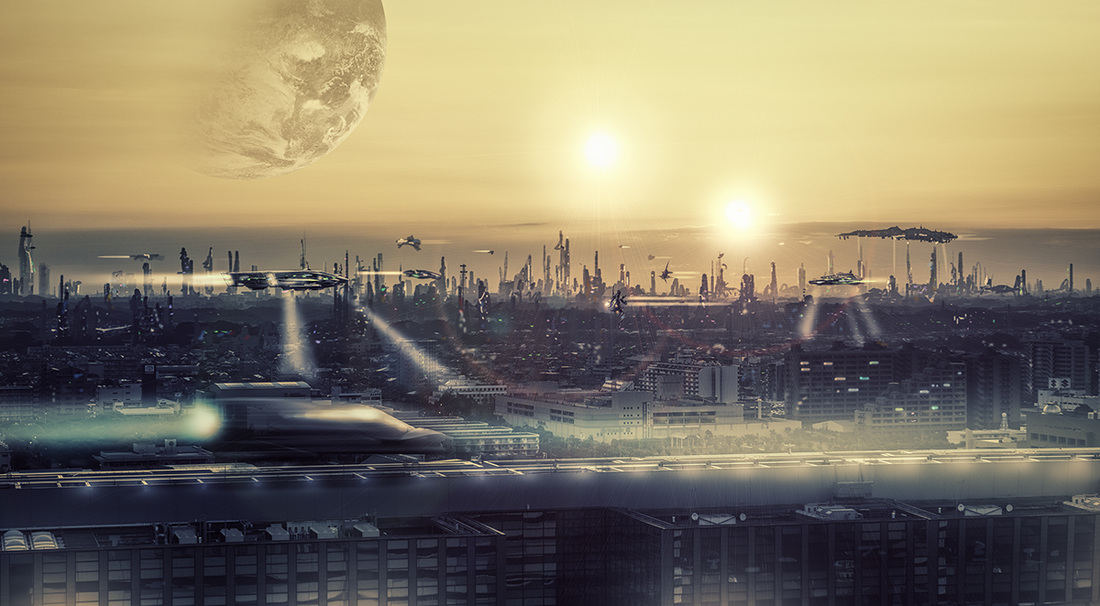 Original image 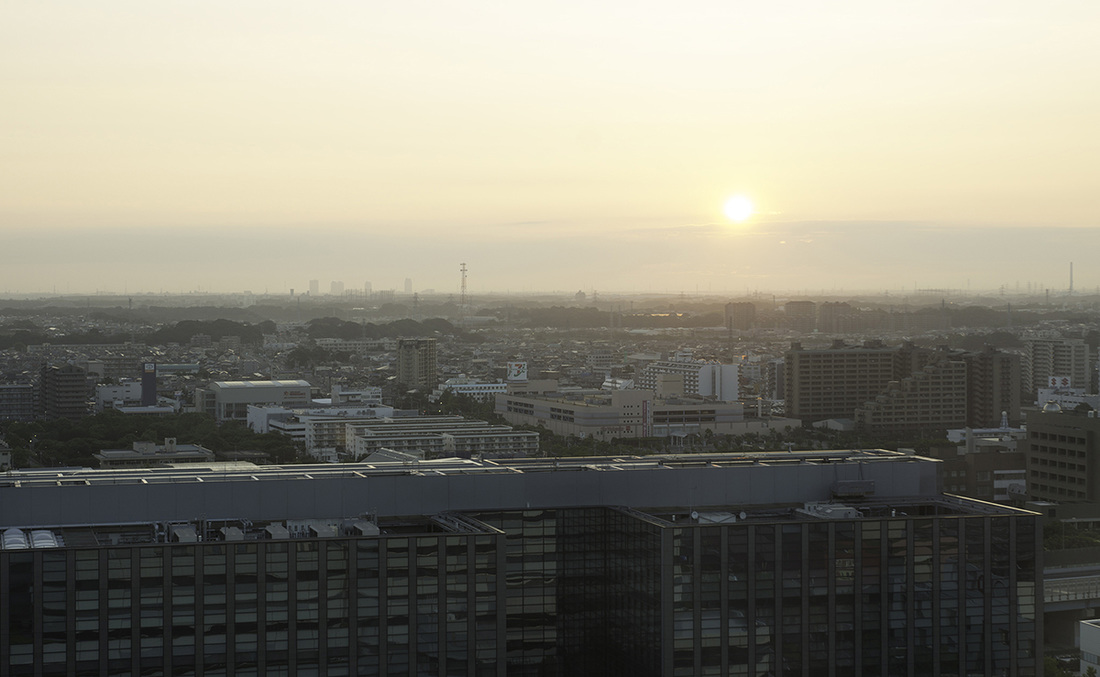 It often happens so that during photo editing in photoshop or lightroom we tend to overdo the editing. Whether it is saturation, contrast or sharpness, after having a second look we see that the photo is overcooked. This is exactly what I did to this portrait shot of my wife, so I went back in to photoshop and fixed it. Then I decided to create ansho0rt tutorial for you guys. If you find it useful make sure to subscribe to my channel for more photoshop tips and tricks. My Youtube channel with free photoshop tutorials Photography workshops in Tokyo - click for more details. Hire a photographer in Tokyo Buy original Chinese and Japanese calligraphy art My favorite type of portraiture - shadows, drama, moody lfeel and the mind soaring far. I was testing some light setups today and asked my wife to pose for me, and here is one of the shots that we took. I think we will continue tomorrow so maybe there will be more cool photos to come. I have added my Japanese calligraphy to the photo, which reads 翔心 - i.e. soaring mind. I also added some bokeh (from Japanese word 暈ける, which means to fade or to blur) and lens flare to make it more stage like or even cinematic. My Youtube channel with free photoshop tutorials Photography workshops in Tokyo - click for more details. Hire a photographer in Tokyo Buy original Chinese and Japanese calligraphy art  Here is my another photoshop manipulation fun, this time I wanted to keep it simple and the composite is not as complex as the previous one, but I think the message is pretty strong, and that was the intention.Photoshop manipulations can be quite time consuming, but are a lot of fuin and a great way to push further your photoshop skills. I learn more during compositing then during any photo retouching. New techniques, new tricks, etc. Photoshop manipulations are great for learning light, composition and coloring. My Youtube channel with free photoshop tutorials Buy fine art photo prints at my store on SmugMug. Photography workshops in Tokyo - click for more details. Hire a photographer in Tokyo 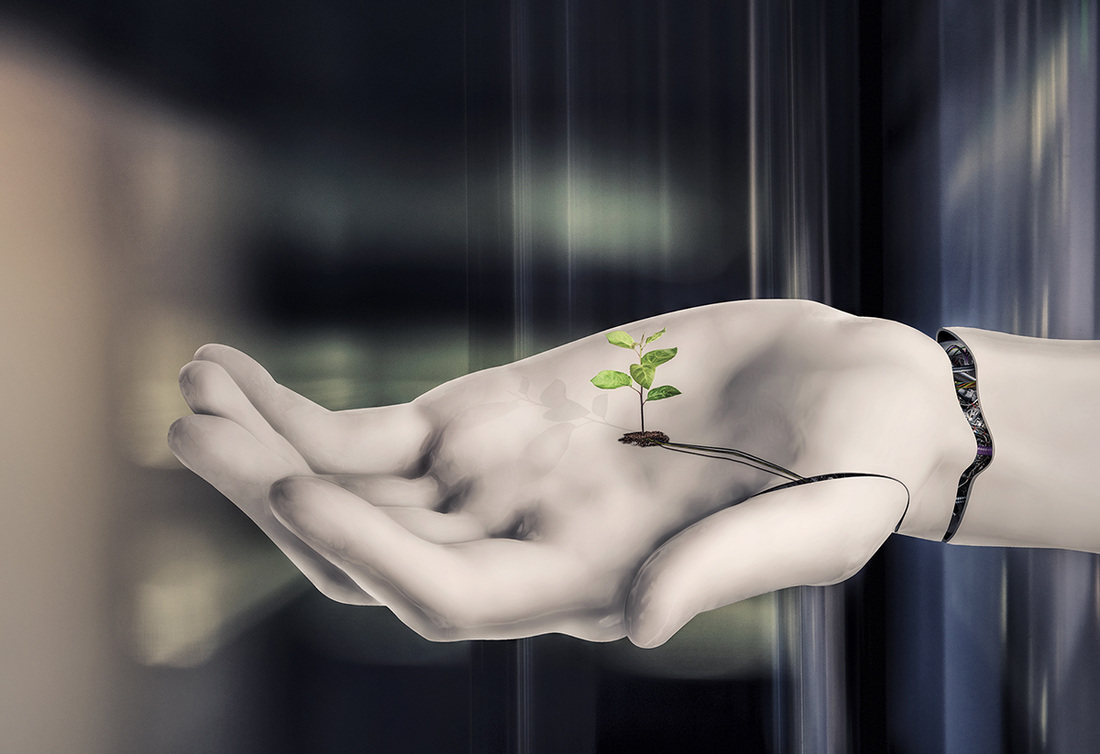
In this video tutorial series I will show you how you can easily create a time lapse in photoshop. I will be using Bridge, Adobe Camera RAW, and Photoshop. Tutorial is split int part 1 is about preparing the files for the time lapse, and the second part will explain how to assemble a time-lapse in photoshop. Time lapse photography is great fun, it does require a lot of patience though, and quite a bit of post processing, but thanks to photoshop and other tools, it can be automated to a great degree. If you want to learn how to create a time lapse with ease, then watch my video tutorials. My Youtube channel with free photoshop tutorials Buy fine art photo prints at my store on SmugMug. Photography workshops in Tokyo - click for more details. Hire a photographer in Tokyo In this photoshop tutorial I will show you how to create an action in photoshop, and then how to use a photoshop action to add metadata to your photos. Photoshop actions are extremely powerful tools, and can automate a lot of mundane work, and repetitive tasks that you would normally have to perform manually. I use photoshop actions mainly for adding metadata to my pictures, but I used to apply actions that were adding watermarks, sharpened my photos and resized them with one click. Actions are a must learn thing if you want to improve and speed up your workflow in photoshop. I spend anywhere between 4 to 12h (or even longer) editing photos nearly every day, depending on how much work I have, and I do a lot of manual editing of my without certain procedures being automated I would simply be unable to accomplish so much within one day. My Youtube channel with free photoshop tutorials Buy fine art photo prints at my store on SmugMug. Photography workshops in Tokyo - click for more details. Hire a photographer in Tokyo In this video I am showing you my entire workflow of fine art black and white photo conversion in photoshop. This is a sped up video, but even so it is easy to follow and understand all the steps. I am using pen tool for selections and blending 3 different exposures, then I am adjusting colours and contrast, and finally I add two small birds to the photo, so you can see some elements of composite photography. Last steps are a conversion into black and white in Silver Efex Pro and I add a vignette. If you are into black and white photography, I have yet another video tutorial on the subject, with commentaries. My Youtube channel with free photoshop tutorials Buy fine art photo prints at my store on SmugMug. Photography workshops in Tokyo - click for more details. Hire a photographer in Tokyo In most cases, brush tool is used for masking in photoshop, and brushing with white or black colour on the layer mast to reveal or conceal the layer below. Brush is also used for skin retouching, also for dodging and burning, and so on. However, it can also be used for removing unwanted items from a photo, in places and instances when the content aware tools and clone stamp tool fail to do the job. In this photoshop tutorial I will show you how you can use the brush in conjunction with layer blend modes to remove things that have to go from your photo, and improve the impact the and the composition of your shot. My Youtube channel with free photoshop tutorials Buy fine art photo prints at my store on SmugMug. Photography workshops in Tokyo - click for more details. Here is my next photoshop tutorial. This time I am giving you guys a simple tip on levels adjustment layer, and how to use them in conjunction with masking and digital blending. Recently I create more and more fully manual HDR images, I still use Photomatix and HDR efex pro 2, but not as often as I used to. It seems that manual blending, although more time consuming, produces (most of the time) better results or me. Levels in photoshop is a simple but very powerful tool, just like curves. I use levels and curves when editing nearly every photo. It is good to know how it works. Enjoy the video! My Youtube channel with free photoshop tutorials Buy fine art photo prints at my store on SmugMug. Photography workshops in Tokyo - click for more details. In this photoshop tutorial I will show you how you can easily combine texture of what is in a photograph, with any text. Most of photoshop users knows how to use the text tool, but in this video I will teach you a few cool tricks that will make any added text look really cool. By embedding the very texture of what is in a photo with the shape of the text, new tools and possibilities open and you can use your creativity to personalise any caption that you want to add to the picture. This tutorial is short and not difficult so even if you are a photoshop beginner you should have no problems with following it. My Youtube channel with free photoshop tutorials Buy fine art photo prints at my store on SmugMug. Photography workshops in Tokyo - click for more details. In this video I will show you my full workflow of how I deal with complex backlit cityscape photos. I am editing photo that contains 3 levels of depth: city at the back, bridge half way between the city and the camera, and a view deck with people just in front of me. In addition the photo is backlit during sunset hours. I will be dealing with ghosting, manual digital blending from a few exposures, removing unwanted objects with clone stamp tool and healing brush, using some content aware fill, too. I will be changing colours and saturating the photo selectively, using pen tool, and other selection tools. I will also work in Lightroom and Photoshop together, and finish it all off with some filters from Topaz and Nik (current Google software). Video tutorial on how to digitally blend images in photoshop - full workflow with many great tips Buy fine art photo prints at my store on SmugMug. Photography workshops in Tokyo - click for more details. In this photoshop tutorial I will show you how to use channels in order to make very complex selections that would be impossible to accomplish with other photoshop tools, like magic wand, quick select, quick mask, pen tool, or even special plugins, like Topaz ReMask. Each of photoshop selection making tools has its use, and it is good to know which one to use in what circumstances. Channels are perfect for making complicated selections of areas where colour contrast is quite substantial, though there is a way of combining channel selections via calculations menu in photoshop, but this is a subject for next video tutorial. I will use channels to select sky in photoshop, and separate it from the trees, and rooftops. Enjoy! I always wanted to record one of my photoshop manipulations to give you an idea on how it looks like. It is a few hours shrunk into 12 minutes, showing the whole process, from the RAW file to a final image. Photoshop manipulations are a great fun, and also the best way to advance your photo shop skills from good to great. This type of art is also very helpful for any composite photography editing. Finding the balance and harmony between the perspective, light, and colour, is the key to a successful photoshop manipulation. Incidentally, I am launching new service menu - photoshop manipulation and photo retouching. If interested please contact me directly.  For all of you who wish to advance your photoshop and photo retouching skills, I am announcing photoshop workshops in Tokyo. I will create a special menu tab on my website this week, with all the details. For the time being I am offering only private lessons (one to one), either at your place, mine or via internet (online desktop sharing). You can view my photography and photoshop manipulation portfolio here. If interested please feel free to contact me and book your lessons! Left: original photo, that I took yesterday (model: Asuka), and below is a photo manipulation created in photoshop. 
Contrast of tones and colours is often an overlooked step in post processing, but in certain photos, like night photography, contrast makes a HUGE difference in the final appearance of the shot. I usually apply contrast twice or three times during post processing, and in this video I am showing you my final touches in regards to contrast.in this video, I am using curves selectively, which means that I am limiting the tonal range of curves level adjustment layer effect. Curves are an extremely powerful tool, and a photo can be actually accomplished by exclusive use of curve layers, so it is really important to master this and include them in your post processing workflow. I use curves for contrast, tones, colour correction, cross processing, and so on. Here is part 2 of my in-depth tutorial on how to create realistic HDR photos. In part 1 I mainly used Photomatix and then I made a few simple adjustments in photoshop. Part 2 focuses mainly on my workflow in photoshop, though I also add a few adjustments in lightroom. Part 2 is mainly about contrast and colour adjustments, then manual blending of certain areas of the photo from other exposures, adding a few filters from Topaz Labs and Nik software, and then blending those effects with the photo layers in photoshop. Last part of this video is about perspective correction. Part 1 and 2 together are a full on in-depth HDR photo tutorial, so if you are into HDR photography, I hope you find them helpful. Enjoy! This is part 1 of two video series on creating realistic HDR images in HDR software and photoshop. Although I am using HDR Efex Pro 2 as much as I use Photomatix, this video is about the latter, and then part two focuses on adjusting details in photoshop. I have a separate video on digital blending, which is a fully manual process used for creating HDR photos, and ou can watch it on my Youtube channel. HDR is great for creating amazing phoptos when your camera cannot capture the entire dynamic range of the light that is present in the scene that you captured. Blending a few exposures is then essential to be able to bring all the details back. |
Categories
All
AuthorPonte Ryuurui (品天龍涙) Archives
August 2020
|
 RSS Feed