|
HDR stands for Hight Dynamic Range, and it is a method quite common in today's photography. HDR concept is based on capturing few different exposures (usually it is 0, +2 EV and -2 EV, where EV stands for exposure value). So what does this mean? Well, human eye can see 11 stops of light, or more, whereas camera can see only 3 or 4. So when you stand staring at the sunset, your brain will register much wider range of light (dynamic range) than the camera. So, by capturing and merging together different exposures, one can create a photo which has much more data in both highlights and shadows. In this video tutoprial, I will give you 10 great tips on how you can improve your HDR photography experience. If you want to watch a full length tutorial on HDR image editing, please see this video. This video is a bit long (approximately 45min. long) but the aim was to show not only my full workflow, but also how i think and perceive the image changed throughout the whole process of photo editing in photoshop. The bonus information are all the tips that I give you on portraiture photography, and additional hints of postprocessing, that go outside the subject of this tutorial. The pace of the video is not fast, and I did not want to rush it on purpose, so it is easy to follow for anyone who starts in photography. Photo editing techniques are quite basic as well, and I also introduce you to some photoshop plugins, which I am using all the time, in nearly every photo. The trick to using the photoshop plugins like Topaz or Google software (former Nik software), is to know how to tweak the presets, and how to stack the filter effects. For more free photoshop tutorials please visit my Youtube channel. I bet you saw many images online that were shot during daytime and you were puzzled how come the skies are so smooth or water is so silky. Well, that is a trick used by photographers for many many years now, and it is usually achieved by attaching an ND (neutral density) filter to the lens. ND filter is nothing more but a piece of glass that reduces the amount of light that travels through the lens onto the sensor, which allows for slowing down the shutter speed. However, even though using ND filter gives probably the best and most natural looking results, you can fake that effect in photoshop, and it is not difficult at all! Watch this video tutorial to find out how it is done. For more photoshop tutorials visit my Youtube channel. Recently I finished gathering all the audio equipment for creating video tutorials. Absolutely love that new toys. Anyways, today, while I was waiting for one of my photoshop tutorials to be uploaded to Youtube, I grabbed the telephoto lens, one flash with a rogue grid, radio flash controller, my Manfrotto magic arm, and shot a few photos of the mic. Then I brought the images into photoshop and created this photo. It is a monochrome blend of 4 images, shot at different exposures, one light source. Hope you enjoy the game of light and shadows! Learn more about creating artistic black and white photos, by watching my photoshop tutorial.  Here is my next composite photo manipulation created from a boudoir shot of a Japanese model Asuka that I shot last week. If you want to learn more about composite photography, see this article and video tutorial here. Composite photography can be lots of fun so if you have photoshop, go ahead and have some photo manipulation fun. It is a great way to learn composition, light, colour management, and photoshop tools. 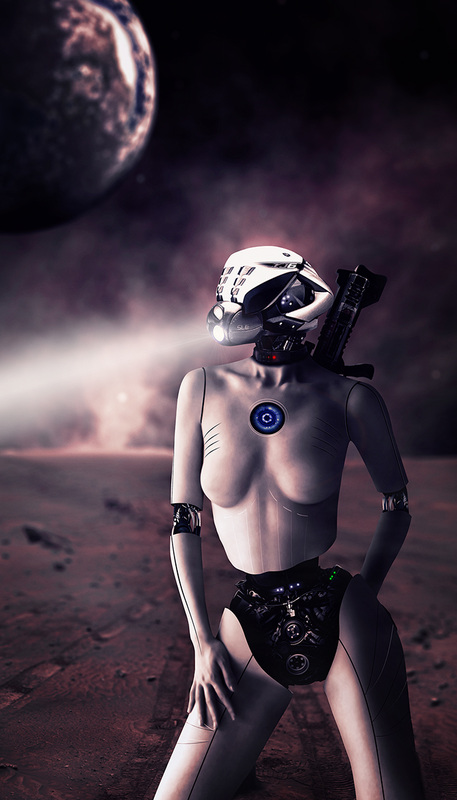
I caught this shot from my balcony in the very early morning hours. I am not sure what time it was exactly, my guess it must have been around 5am. I was working overnight on editing photos, and when I came up to the window to open the curtains, there is was - a moon lit by the morning sun. One of my favourite nature's phenomena, the Yin and Yang of Mother Nature, staring at one another from the opposite sides of our world, in silence. Moon and Sun were core "ingredients" of occult and rituals performed in ancient China. Consequently, both Chinese characters, one for Moon (月) and the other for Sun (日), are amongst the oldest ones in Chinese writing. The calligraphy that you see on the photo was written by me some time ago in small seal script, and it reads 唯心, which stands for "spiritualism", in both Japanese and Chinese. Literally translated, the phrase means "only mind", or "only spirit". 
Composite photography is one of the most creative types of this amazing visual art. It allows for manipulating not just one photo but putting many photos together. It is a great way not only to learn composition of a photo, developing one's artistic skills, but also mastery of the photoshop tools. In this tutorial I am using a background photo and another complex composite shot of a Japanese model, which I converted into a cyborg or an android sci fi vision. Just so you know, both photos were shot by me in Tokyo, so this makes it even more cybertron-like. Anyways, I hope that this tutorial will help you guys with creating better composite images. This is the eights photo of the recent Chinese calligraphy body art photo shoot series, with a Japanese model Asuka. Here, I decided to go heavier down the vintage path, by maintaining the some contrast between shadows and highlights, but at the same time I smoothed the tones and selectively blurred the edges of the photo. I really like the final result, hope you guys enjoy it as well! It looked quite nice crossed processed in a motion picture style (blue shadows / orange-ish highlights), but black and white is much more classe and allows for the eyes to focus on the writing, rather than the whole scene. 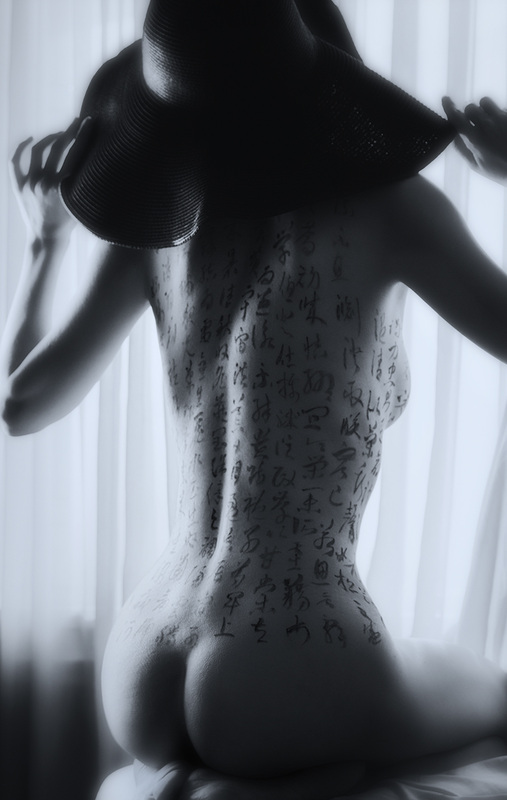
Clone stamp tool is one of the most powerful tools in photoshop, and I am sure you all use it quite often during photo retouching. Personally, I use the clone stamp tool a lot when I edit my urban shots or architecture shots, where the patterns are geometrical and precise. In such cases the use of content aware based tools is usually not the best idea. But most of the architecture shots will involve a perspective, meaning, that objects that are further away will appear smaller than those closer to us. So, if you use a clone stamp tool as it is in photoshop tool menu, then when you sample a given area, no matter where you stamp it on the canvas, the size of that sampled area will not change. In other words, the sampled area close to the camera, will match the same pattern positioned further from the camera. In this video I will show you how to use the clone stamp tool in conjunction with the vanishing point filter in photoshop, and teach you how you can clone stamp in perspective. For more photoshop tutorials and photo editing tips and tricks, please visit my YouTube channel. This photo was not shot in high key, but I made it look like it was. The morning light was backlighting the whole body frame of the model, and the sides of the photo (curtains) were drawing too much attention, so I decided to brighten up the skin and bring the entire photo to similar brightness level, and them create the contrast between the background, skin and the writing, framed by the undies and the head. Now the eyes are trapped in Chinese calligraphy written on a slender curvy body. Enjoy! If you are into photo editing, please view my photoshop video tutorial with tons of photo editing tips and tricks. 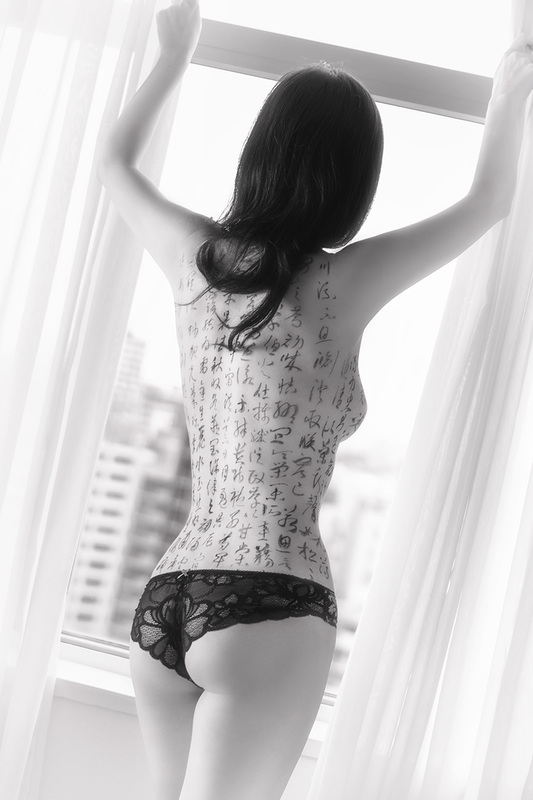
Here is yet another shot from my recent Chinese calligraphy body art photo shoot with a Japanese model Asuka. When I was editing this photo I aimed at creating a contrast between the skin and the Chinese characters, and then the skin and the background, yet I still wanted to maintain a subtle tone transitions across the entire image. Majority of work was done manually, though I used a few filters from Topaz and Nik software. Enjoy! 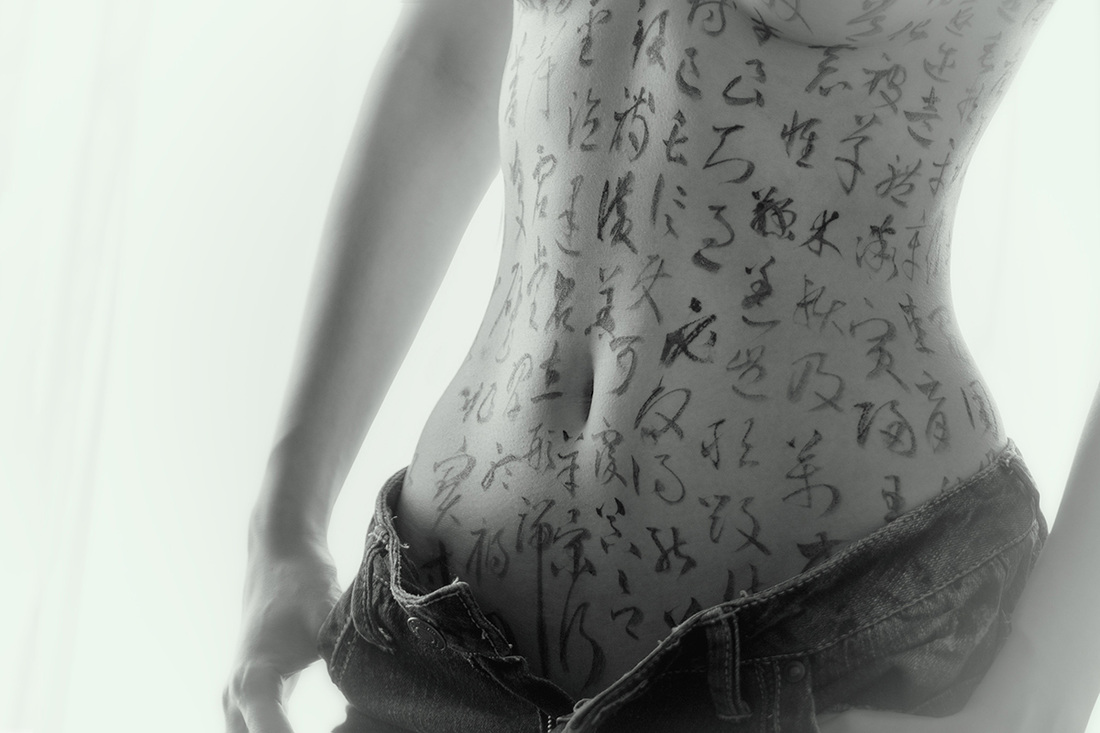
Pixelation and pixel bending can be quite annoying and ruin visually the most amazing photos. Issues with pixels appear either when the editing was pushed far enough to damage pixels, or tonal transitions in the photo range from very dark to very bright tones, and vice versa. There are a few ways of dealing with pixelations, and I discuss all the methods that I use in this video tutorial. I show there a few tricks that you can easily apply in photoshop during post processing, or even saving the final file. I also talk about DeNoise plugin from Topaz Labs, which is a phenomenal piece of software, and I use it for noise reduction and dealing with pixelation and pixel bending. For more photoshop tutorials and photo editing tips and tricks, please visit my YouTube channel. Here is another capture from my recent boudoir photo shoot with a Japanese model Asuka in Tokyo. A subtle game of curves, light and brush strokes. I love seeing Chinese or Japanese calligraphy on woman's skin, I think it looks very alluring and elevates the feminine nature of such photos to another level. Toned down and non-invasive post processing method is crucial here, and it is important not to overdo it. Girls currently residing / visiting Tokyo, who interested in a photoshoot, please feel free to contact me directly. 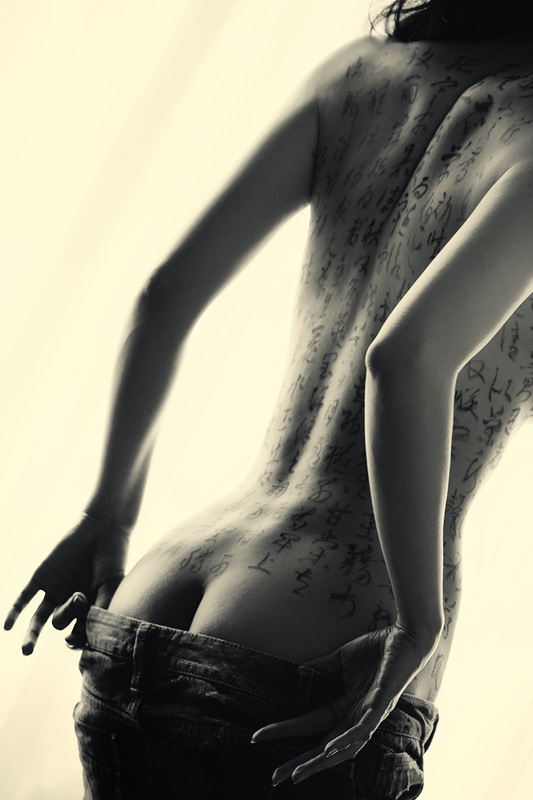
Here is my new photoshop manipulation based on a photo of a Japanese model Asuka that I took recently. For those of you who do not know what a photo manipulation or a photo composite is I offer a short explanation. A photo composite is a photo that is composed out of few images, and photo manipulation refers to a photo that was altered digitally in post processing software, such as photoshop. The photo you see here is a combination of the two, where the main photo is the shot of the model holding a phone, and then I added the background, all the skin surface alterations, helmet and the pipes, the hologram, and I finished with lights, shadows and colour blending. Photo manipulations and photo composites are usually time consuming, and require lots of patience, but are a great fun for anyone who enjoys creating. 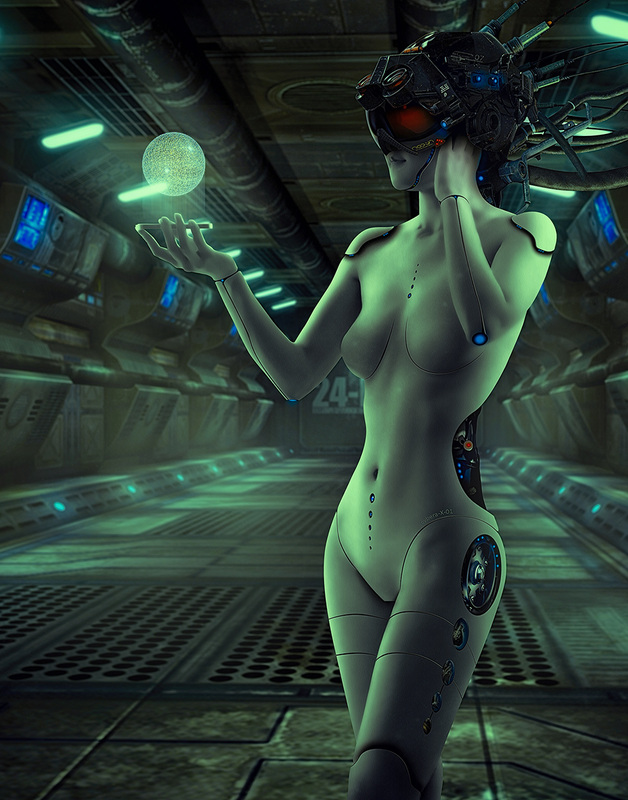
I had lots of fun with this photo. It was a tricky shot to take, as the background was very bright (morning sun at a steep angle), but the main subject was back of the model covered in Chinese characters. I also wanted to utilise those beautiful delicate shadows that sculpted the body form. I added some flares and bokeh`ed lights to make it more dreamy, and lazy-early-morning-like. Model: Asuka. Girls in Tokyo area interested in boudoir or Chinese calligraphy body art photo shoot, please contact me for details. 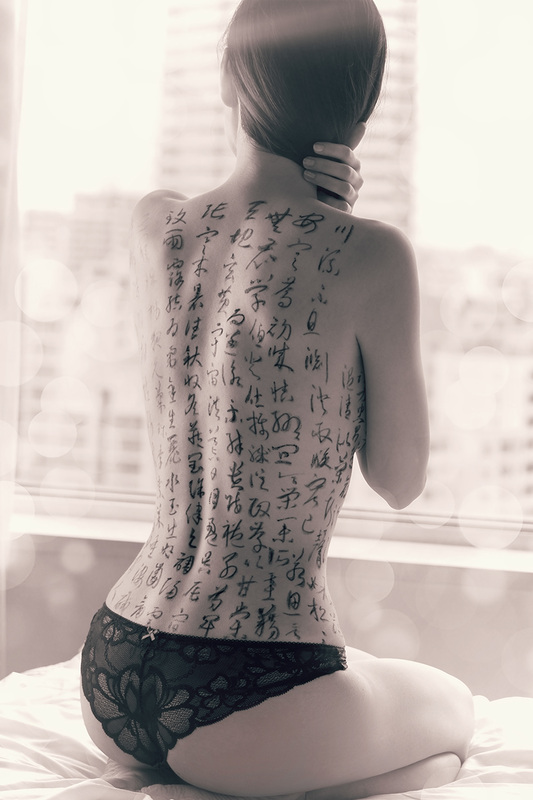
Here is another photo from this week Chinese calligraphy body art session with a Japanese model Asuka. I had a general idea to create something delicate and sensual with this photo and I decided to merge the light tone vignette with the new blur tools in photoshop CC. There are many changes in the new photoshop version, and I highly recommend you to play around with them. The blur filters menu was expanded and new features appeared. I was trying out the new field blur, which has quite a few different options, and then masking it out with layer masks. By combining it with a bright, sort of misty vignette, it gave a very dreamy look to this photo. 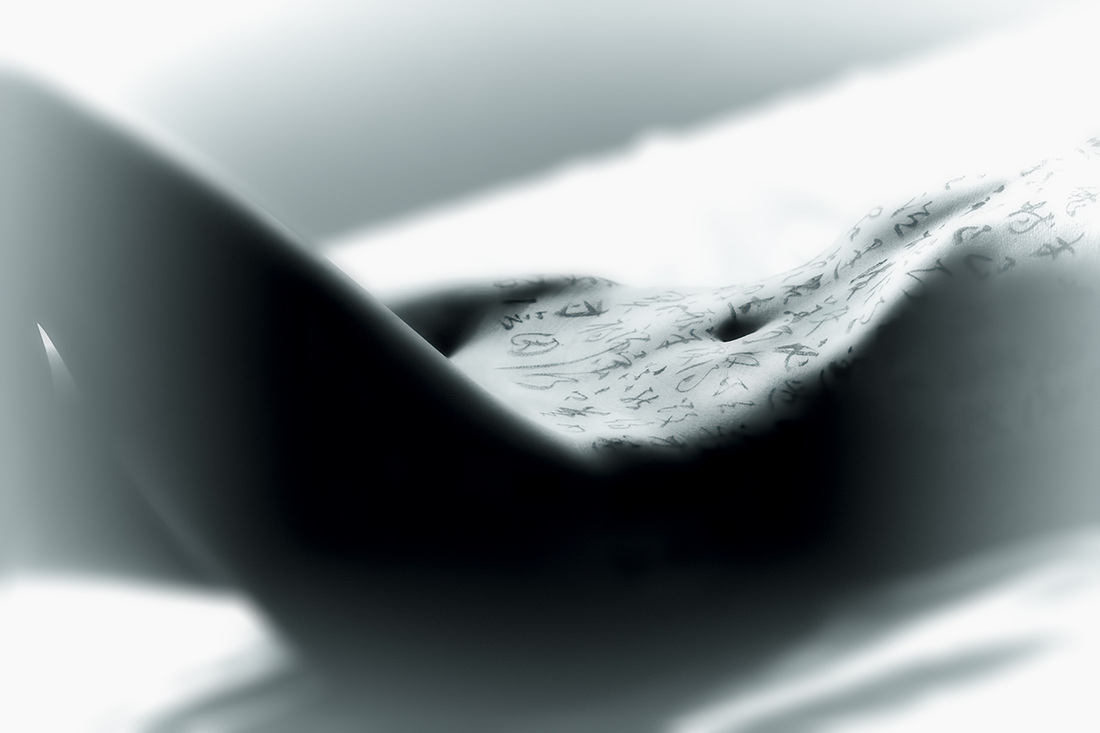 Here is another photo from a Chinese calligraphy photo shoot with a Japanese model Asuka. They say that picture says a thousand words, so it would seem appropriate to let the photo speak for itself. In addition, here is a translation of the first chapter of this classic, transcribed Nathan Sturman, MA. The sky was black and earth yellow; space and time vast, limitless. 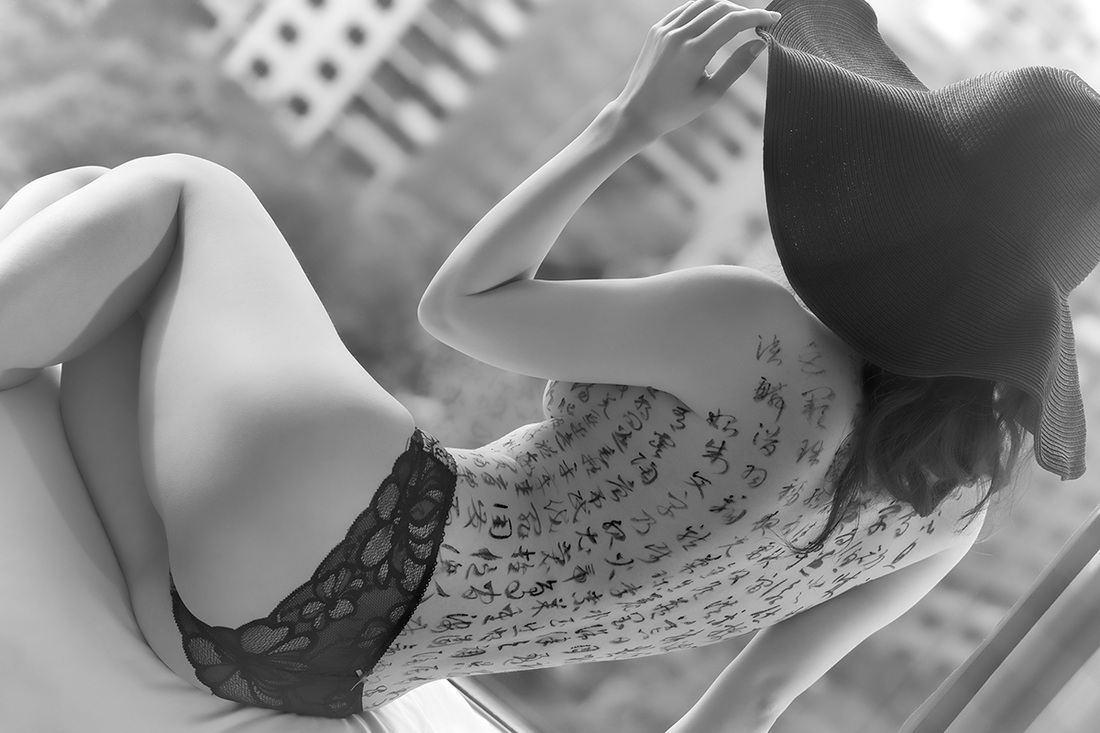
Black and white photography is timeless. Its simplicity and beauty, which is based only on 256 tones, is unsurpassed. However, it is not an easy task to create a good black and white photo. In order to do so, one has to think and see in black and white before the shot is taken. Certain colours, such as green, red, brown, or blue, will distinguish themselves in a colour photo, but once converted to black and white the visual difference between them may be dramatically reduced, causing the whole scene to look bland and boring. The key to a good black and white photography is knowing how to manipulate with light and dark tones and the contrast between them. Post processing of a black and white photo may take much longer, and may require much more precision than one would normally need for a colour photo. Why? Watch this video and find out. In this photoshop tutorial I will show you how you can massively improve the visual impact of your photo by using simple photoshop tools, such as curves, or layer blending. In this tutorial I am using two photographs, one in black and white, and the other one in colour. It is a simple method, and suited for everyone, both the beginners and more advanced photoshop users. By simple adjustments in contrast, or the difference between saturation levels in the photo, you can make huge changes and alter the look of your photo tremendously. It is always good to go back to your photo after some time, and see if you can improve it, too. Perspective distortion is often an overlooked step in photo editing. I often see online great shots with great composition and lighting, but the distorted perspective ruins everything at the end. In this short video tutorial I will show you how I fix perspective distortion in photoshop. Three methods of dodging and burning in photoshop that I find to be the most effective ones6/15/2014 In this next photoshop tutorial I am talking about three different dodging and burning techniques that I use whenever I retouch my photos. I discuss the dodge and burn too which is a built-in function of photoshop, also the doging and burning via applying curves layers, and lastly, frequency separation based dodging and burning. Dodging and burning is a crucial step in every photo retouching, yet often overlooked. It really gives the photo the refined and polished look, and it is one of those photo retouching techniques that should be learned. I am creating 2 photoshop tutorials per week. If anyone has a question regarding any of my tutorials, or wishes me to discuss any particular photoshop technique, please feel free to leave a comment under this post, or contact me at ponte@ryuurui.com Here is my new tutorial on photoshop techniques and photo retouching. In this episode I will show you another method of making skin smooth without destroying all the texture. If you want to watch a video on more advanced skin retouching technique, then please see my video on frequency separation on my YouTube channel. I have finished my next android photoshop manipulation. I just love making those. I think I need to start hunting for models just for my new cyborg ideas? Girls in Tokyo area - please contact me if interested. Talking about cyborgs, I would like to recommend you guys a website created by Mpaolo Almeida, a photoshop artist from Brazil. This guys is really talented and has amazing ideas for his photo manipulations. On top of this he is a really down to earth guy. Have a look at his site, www.tutoriaisphotoshop.info, and his youtube channel. He is also selling tutorials on various types of photo manipulation, including cyborgs, steampunk, fantasy and dark art. Although the tuts are in Portuguese, his photoshop is in English, and it is quite easy to follow his moves, as long as you know photoshop at least to a certain degree. Mpaolo speak English, so you can look him up on FB and ask about the tutorials. I actually have a few of them myself, and they are really very very helpful indeed. 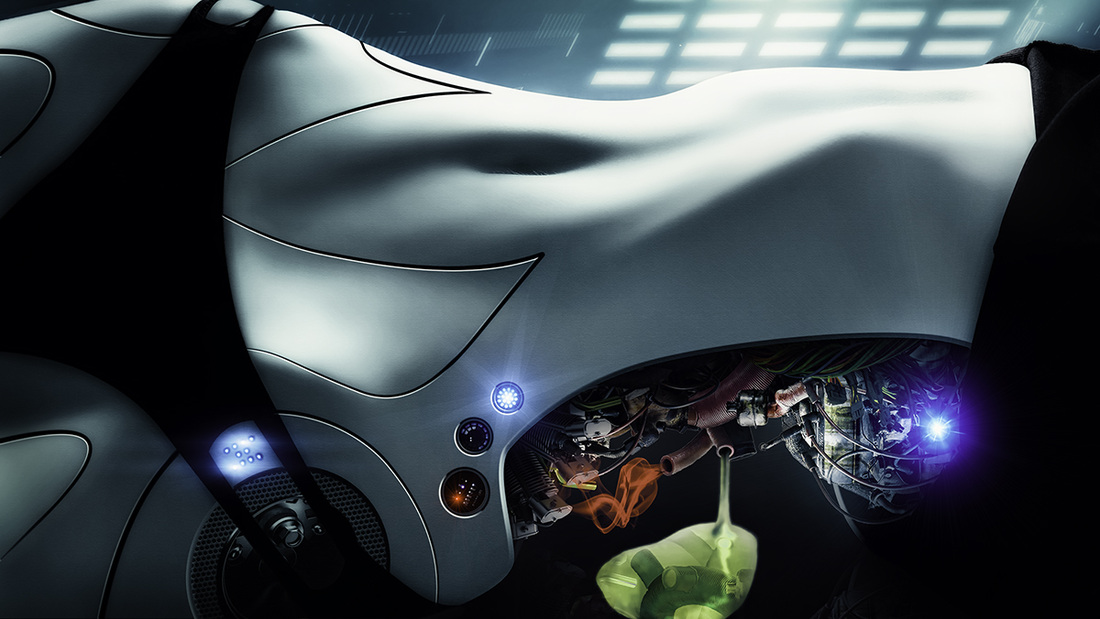 Here is another photoshop tutorial in which I will discuss the issue of composition in photography and its importance. I am talking a bit about the rule of thirds, and general idea of how to compose a photo, based on one of my own captures. I am also explaining how to deal with composition issues in photoshop through blending layers, ands using tools such as "blend if", layer masking, etc. For more video tutorials on photoshop please subscribe to my YouTube channel. I am currently looking for new models (any nationality / skin tone) in Tokyo area, for boudoir and calligraphy body art photo shoots. Girls interested in working with me, please contact me at ponte@ryuurui.com / FB: Ponte Ryuurui, or via google+. The ony restriction is that for calligraphy body art I need to work with skin that is tattoo free, though it depends on type and quality of the tattos, their placement, size and colour. I do not require a model to have any experience, I can guide you through the photo shoot. 芸術的な写真に興味がある女子はご連絡ください(経験なしでもOK) Photo below / model: Asuka 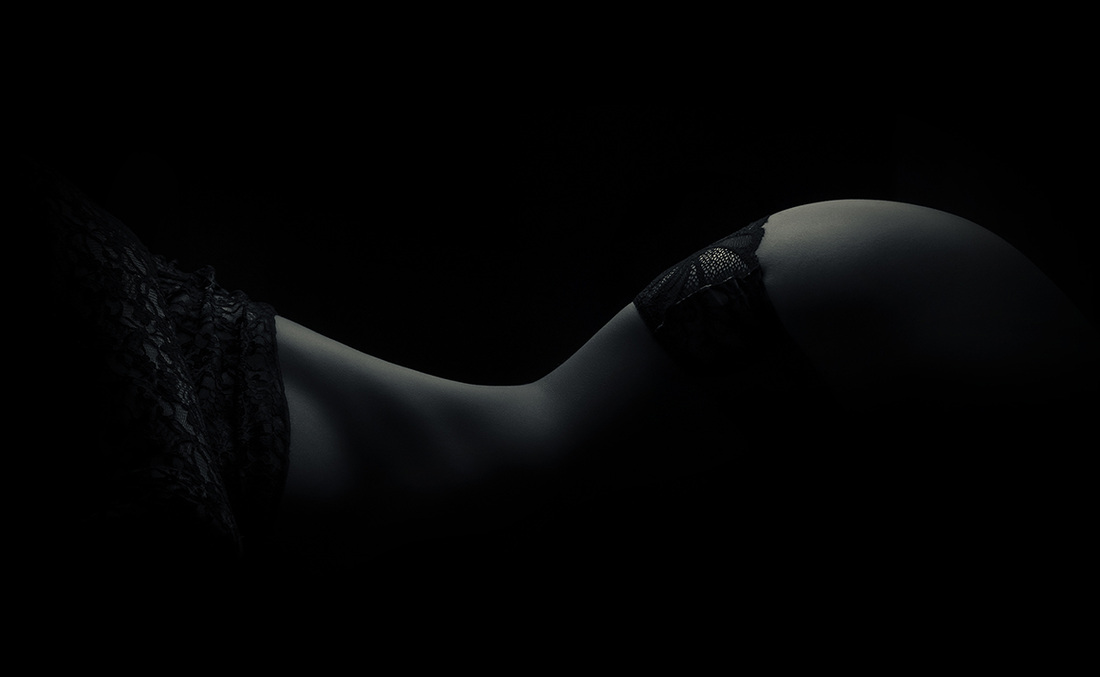 |
Categories
All
AuthorPonte Ryuurui (品天龍涙) Archives
August 2020
|
 RSS Feed