|
Here is a new edit of a shot from last year, with a Japanese model Asuka. My pohoto retouching style has evolved so dramatically, that I am re-editing all my photos taken 6 months ago and before. Lots of work, especially that new photos are coming in nearly on a daily basis. It is important to keep the portfolio up to date and all photos there should be consistent in style. Anyways, I enjoy editing photos, so I am having fun, especially that it is really cool to see new editions and new versions, and having a chance to compare how I evolve as an artist. This is a fragment of Heart Sutra, it is a copy of a masterpiece from Tang Dynasty by a great calligrapher Ouyang Xun, in standard script. Female models in Tokyo area interested in a photoshop, please contact me directly. Photo editing & Chinese and Japanese calligraphy tutorial videos Buy fine art photo prints at my store on SmugMug. Photography workshops in Tokyo - click for more details. 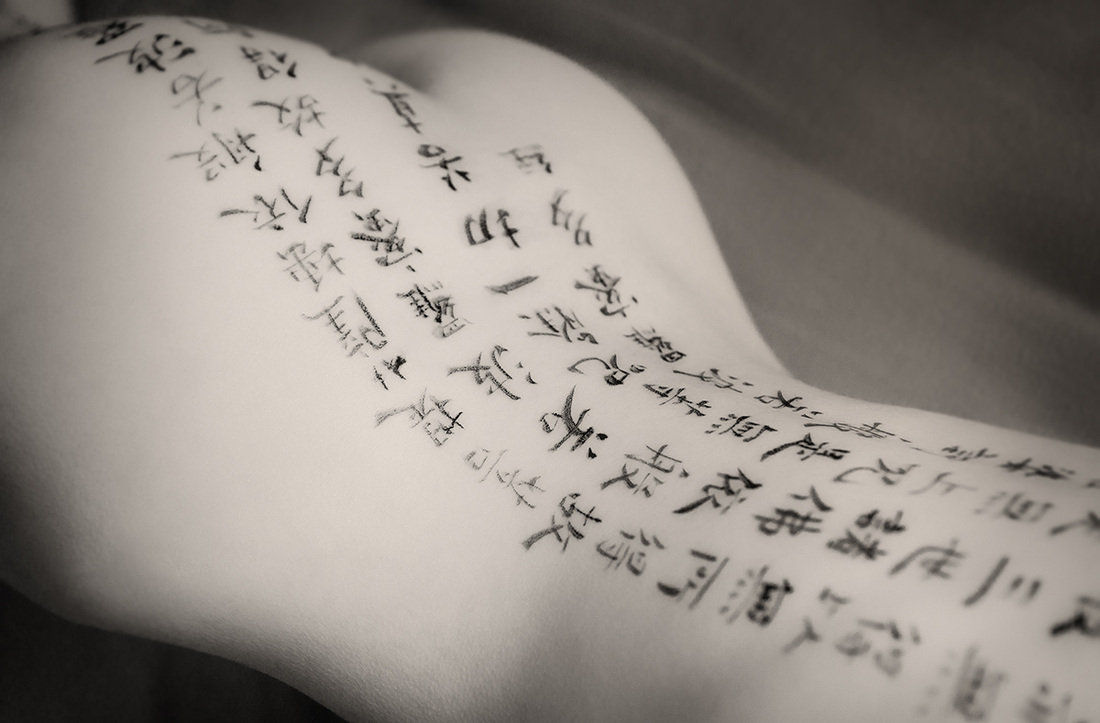 In this photoshop tutorial I will show you how to use channels in order to make very complex selections that would be impossible to accomplish with other photoshop tools, like magic wand, quick select, quick mask, pen tool, or even special plugins, like Topaz ReMask. Each of photoshop selection making tools has its use, and it is good to know which one to use in what circumstances. Channels are perfect for making complicated selections of areas where colour contrast is quite substantial, though there is a way of combining channel selections via calculations menu in photoshop, but this is a subject for next video tutorial. I will use channels to select sky in photoshop, and separate it from the trees, and rooftops. Enjoy! Lots of artists use watermarks or signatures to mark their art, and they do so for various purposes. Some want to protect their work, some simply add a signature as a final touch, and others use it a business card, a sort of stamp to make it easy to find them, in case someone wishes to buy their art. Whatever the reason it might be, and if you are one of those artists that want to add a watermark to their photo or a painting in photoshop, this video is perfect for you. I am showing you how to add a personal signature to a photo, and then some cool effects options that you can play with, like bevel and emboss, or textures. If you enjoy the video, please make sure to like it and subscribe to my channel for more free photoshop and photography tutorials! I always wanted to record one of my photoshop manipulations to give you an idea on how it looks like. It is a few hours shrunk into 12 minutes, showing the whole process, from the RAW file to a final image. Photoshop manipulations are a great fun, and also the best way to advance your photo shop skills from good to great. This type of art is also very helpful for any composite photography editing. Finding the balance and harmony between the perspective, light, and colour, is the key to a successful photoshop manipulation. Incidentally, I am launching new service menu - photoshop manipulation and photo retouching. If interested please contact me directly.  For all of you who wish to advance your photoshop and photo retouching skills, I am announcing photoshop workshops in Tokyo. I will create a special menu tab on my website this week, with all the details. For the time being I am offering only private lessons (one to one), either at your place, mine or via internet (online desktop sharing). You can view my photography and photoshop manipulation portfolio here. If interested please feel free to contact me and book your lessons! Left: original photo, that I took yesterday (model: Asuka), and below is a photo manipulation created in photoshop. 
Contrast of tones and colours is often an overlooked step in post processing, but in certain photos, like night photography, contrast makes a HUGE difference in the final appearance of the shot. I usually apply contrast twice or three times during post processing, and in this video I am showing you my final touches in regards to contrast.in this video, I am using curves selectively, which means that I am limiting the tonal range of curves level adjustment layer effect. Curves are an extremely powerful tool, and a photo can be actually accomplished by exclusive use of curve layers, so it is really important to master this and include them in your post processing workflow. I use curves for contrast, tones, colour correction, cross processing, and so on. Clerical script is one of my favourite scripts in Chinese calligraphy. It is raw, abstract and powerful. It feels ancient and sacred. It allows for the brush to glide on paper back and forth in a beautiful rhythm. The reverse brush technique is very soothing and relaxing, and allows for entering a meditating state of mind. Text: 古霊 / ancient spirit /soul. 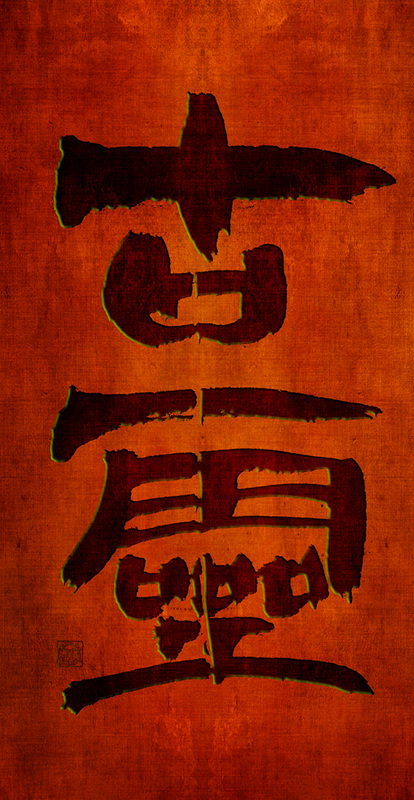
Here is part 2 of my in-depth tutorial on how to create realistic HDR photos. In part 1 I mainly used Photomatix and then I made a few simple adjustments in photoshop. Part 2 focuses mainly on my workflow in photoshop, though I also add a few adjustments in lightroom. Part 2 is mainly about contrast and colour adjustments, then manual blending of certain areas of the photo from other exposures, adding a few filters from Topaz Labs and Nik software, and then blending those effects with the photo layers in photoshop. Last part of this video is about perspective correction. Part 1 and 2 together are a full on in-depth HDR photo tutorial, so if you are into HDR photography, I hope you find them helpful. Enjoy! This is part 1 of two video series on creating realistic HDR images in HDR software and photoshop. Although I am using HDR Efex Pro 2 as much as I use Photomatix, this video is about the latter, and then part two focuses on adjusting details in photoshop. I have a separate video on digital blending, which is a fully manual process used for creating HDR photos, and ou can watch it on my Youtube channel. HDR is great for creating amazing phoptos when your camera cannot capture the entire dynamic range of the light that is present in the scene that you captured. Blending a few exposures is then essential to be able to bring all the details back. One of my older Japanese body art shots, from a photo shoot back in 2012 wiith a Japanese model Asuka. Text reads: 櫻吹雪, i.e. - snowstorm of sakura petals. I gave this photo a new look, much more moody, dramatic but at the same time intimate and mysterious. High contrast, low key and slight blur on the edges. Girls interested in body art photo shoot please contact me directly (Tokyo area only). You can view some of my other body art photos, as well as boudoir shots on my portfolio on SmugMug, here. 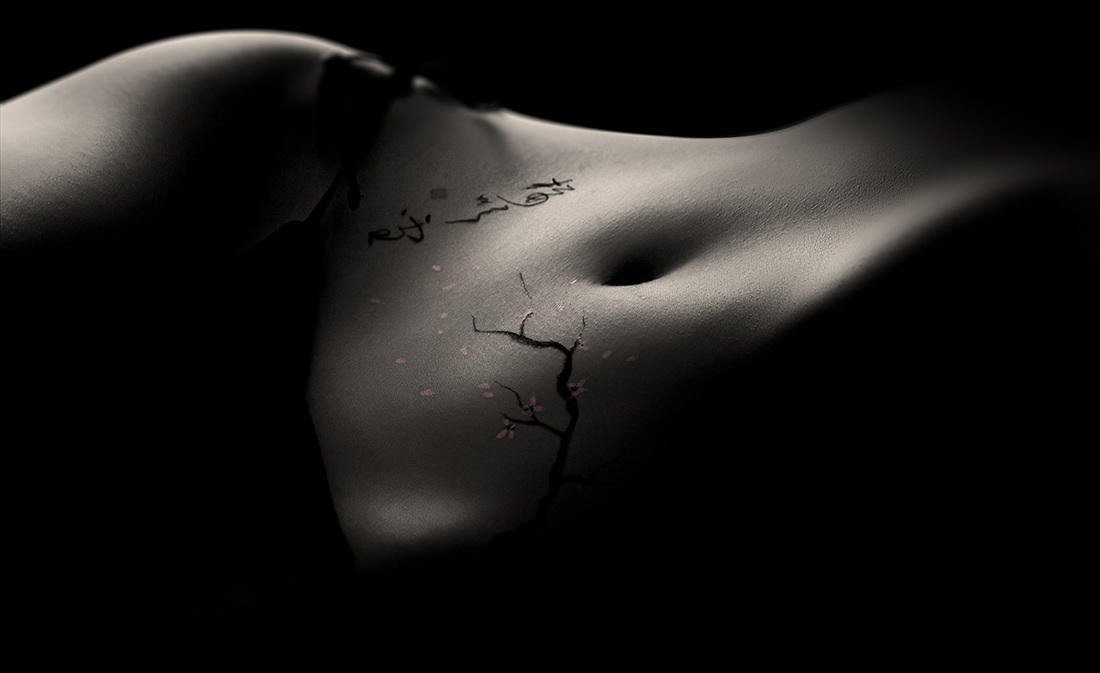 Whenever you lift your camera to your eyes and think of taking a photo you should already know which direction you want to go with it artistically speaking. When I press the shutter, I have a complete vision of the final shot. I usually know exactly what I want to do with it in postproduction, whether it will be an HDR image, or a straight forward editing in photoshop, I can see those final touches in the RAW file before I apply them. Having a vision is crucial in any type of art. Night photography is fantastic for this, as you need to take your time. Use the tripod to slow things even more. Compose, align, feel the scene, read the light, dive in the shadows, and live the scene. This video tutorial discusses my thought flow reasoning behind taking photos, and then the editing process. Incidentally, if you want to watch a detailed tutorial on digital blending, then watch this movie here. Here is another photo of Tokyo Tower at night, on a humid, rainy and hazy day. I added modern Japanese calligraphy in highly stylised seal script, which reads 夢中, i.e. within a dream. Anyone interested in viewing my Japanese calligraphy gallery, here is a link to my portfolio. My Japanese and Chinese calligraphy prints can be ordered via my fine art online store, here. This photo is a blend of two exposures, one was a standard shot of the tip of Tokyo Tower, and the other one was defocused, so I could catch some of that wonderful bokeh (blurred lights). Merged together they look way more dreamy. Post processing was done in photoshop, with a bit of help from Silver Efex pro from Google Software, which is a fantastic black and white conversion plugin for photoshop. 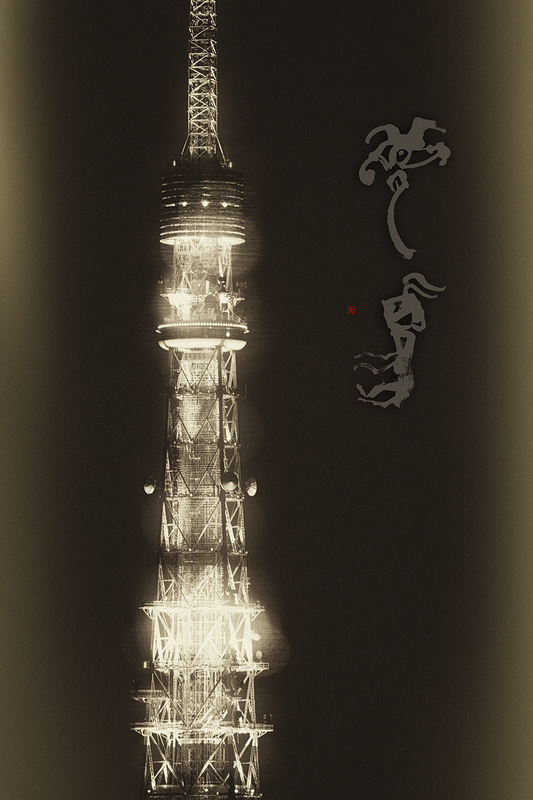
This short photoshop video tutorial is about adjusting and tuning your Adobe Camera Raw for best performance and results. I will show you which colour profile to pick, what resolution you should set and which bit range to work in. Also, the second part of this tutorial is about synchronising and saving settings and image adjustments, so that you can use them with other images, or apply the same settings to any image at any time in the future, without the necessity of guessing and redoing the entire process from scratch. For more free photoshop tutorials and photography tips, subscribe to my YouTube channel. Here is re-edited photo from a Chinese calligraphy body art photo shoot that I had with a Japanese model Asuka some 1.5 year ago. I have redone this shot from scratch and gave it a fresher look. I also added some textures, delicate bronze tones, and engulfed it in deep shadows, to add a bit of mystery. Asuka is Buddhist, and she actually asked me to write the Heart Sutra on her skin for protection. It is a copy of a stunning masterpiece by Ouyang Xun, a brilliant Tang dynasty calligrapher, who excelled in standard script. I edited this photo in photoshop, trying a few filters from Google software and Topaz labs 
Removal of colour cast or luminosity shift is often necessary, especially when a photo underwent a few steps of editing, and had a few filters, levels, curves, or other changed applied to it. Whether you stack photoshop effects or adding textures to your photo, at some point you will run into an issue that the photo becomes too saturated or too bright, has too much contrast, etc. That is when the technique shown in this photoshop video tutorial comes in handy. It is an easy trick that can be applied to any photo, at any stage between two layers in photoshop, via layer blend modes. I have redone this portrait of Nicole today, added make-up, reshaped the face lines with shadows, and added some skin texture. This is the first time I actually had to increase and amplify skin texture. This was shot in high key, plus the model's skin is insanely smooth, so the skin texture was very shallow. A tricky photo to edit but lots of fun. Also, since the eyes are now more powerful and strong due to make-up, and colour splash, I cropped the photo tighter to make the image even more intense. 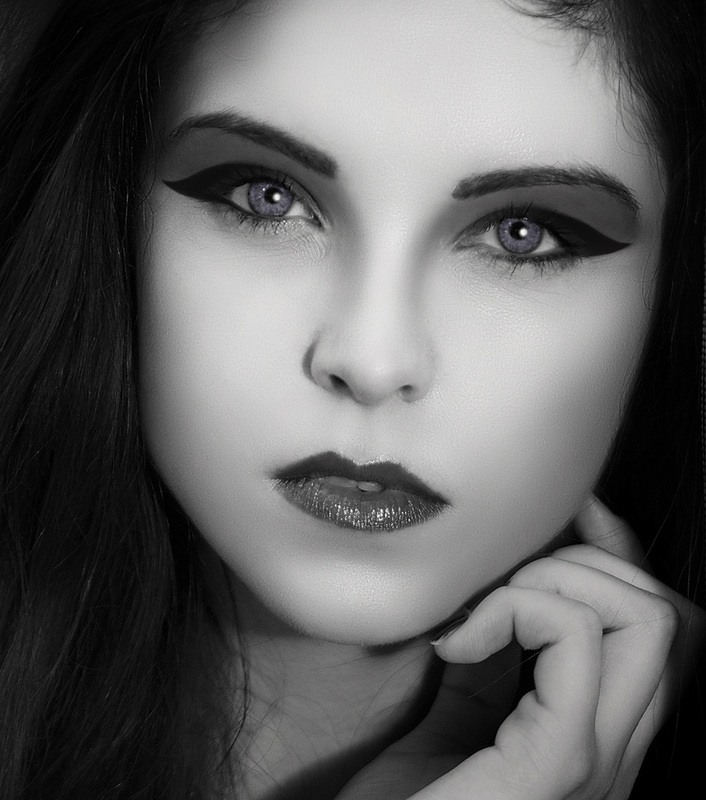 previous version 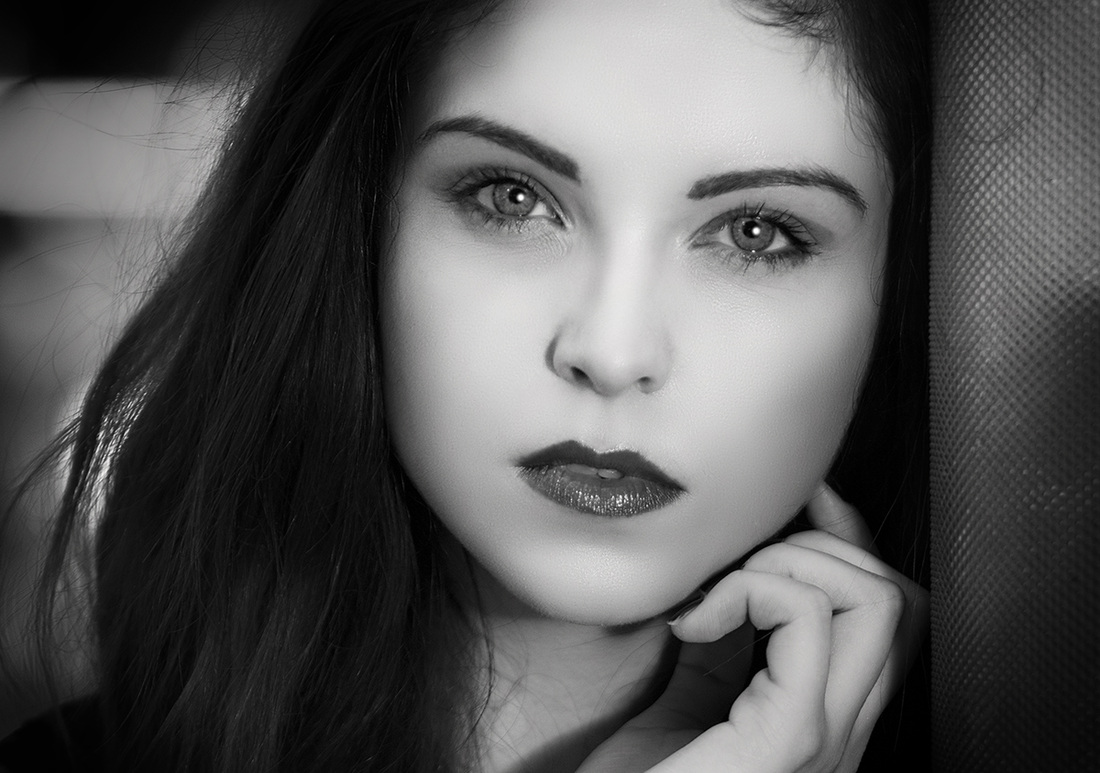 All right ladies, if you wish to have beautiful sexy yet delicate and tasteful photos, feel free to contact me for a photo shoot. Whether it is portraiture, sensual portraiture, delicate and feminine boudoir or simply casual portraits or head shots, I can easily adopt my skills and style to your needs. Do not worry if you are not a model, or have no experience, in fact, I prefer it sometimes, as I can capture some very raw and sincere images. Just like when I am studying Japanese calligraphy, the same in portraiture, I am always seeking the person inside you, the real you. I will make you look and feel radiant and gorgeous, so you will have a wonderful memory for years to come. I work mainly in Greater Tokyo, but can travel too, it is just a matter of discussing the details. model: Eccaia 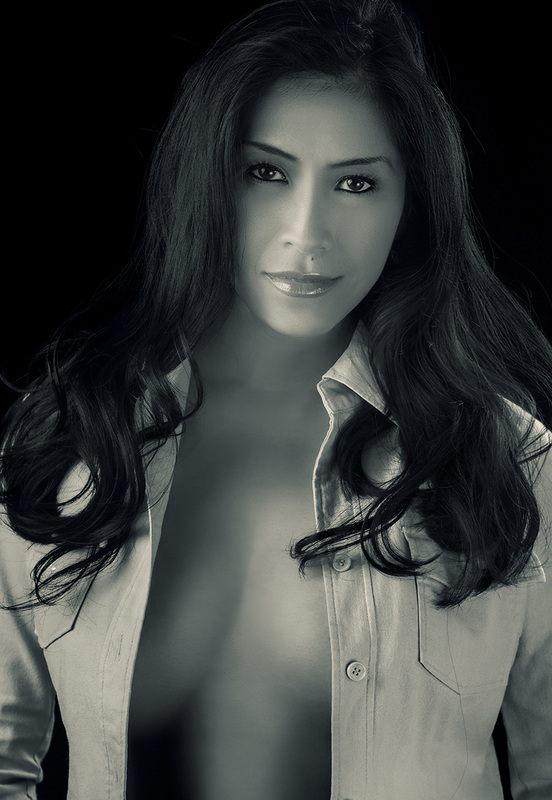
In this tutorial I will show you my full workflow and how I created this image of a night scene in central Tokyo, that I took yesterday. The video shows not only what I do but also why I do it. Digital blending is a very powerful though time consuming technique, then again, if you want to bring your photo editing to another level, the best shortcut is no shortcut at all. Digital blending is a fully manual process, where an HDR photo is created from scratch, by masking and blending a few exposures in photoshop, or any other program that allows it. All of my HDR photos are manually blended to some extent, even if I am using HDR Efex pro 2 or Photomatix to creat the HDR image base. I find that digital blending give the best and most realistic results, though as I said, it can take time and requires patience, even though the technique itself is not that complicated. Final photo in full HD can be viewed here. 氣 has many meanings, which is not uncomon for Chinese characters, but it could be translated as "spirit" or "energy". I wrote this calligraphy using the youngest script of Chinese calligraphy - the semi-cursive script, and by youngest I mean the last one to appear. However the character shape is based on its clercial script form, eaily over 2000 years old. This work will be soon available in various printed forms in my store, here. 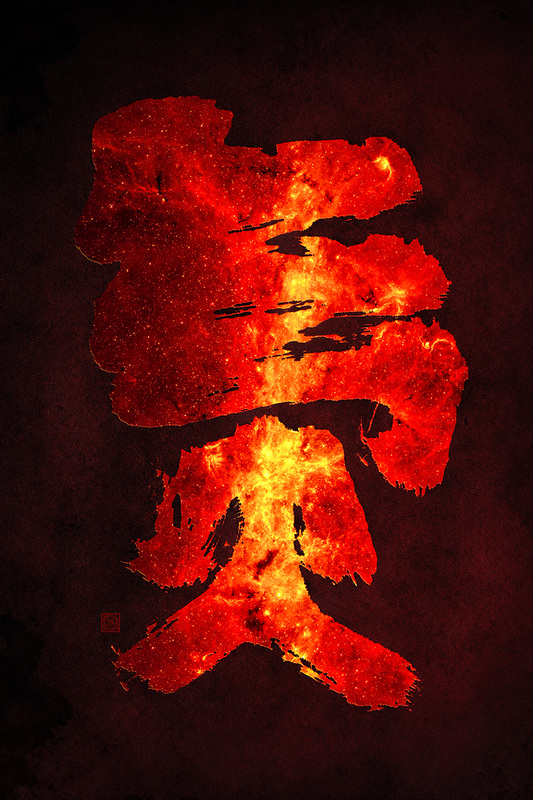
This photo is one of the shots that I took last year during a Japanese calligraphy body art marathon with a Japanese model Asuka. I gave this photo a new look today so I decided to post it. I gave it a nice brown finish with a bit of grain, and I really like how it turned out. If you want to see my other body art work, visit my portfolio on SmugMug. Text: 幸せは旅。目的にあらず。 / Happiness is a journey, not a destination. Models in Tokyo area interested in a body art or boudoir photo shoot please contact me directly via my email. 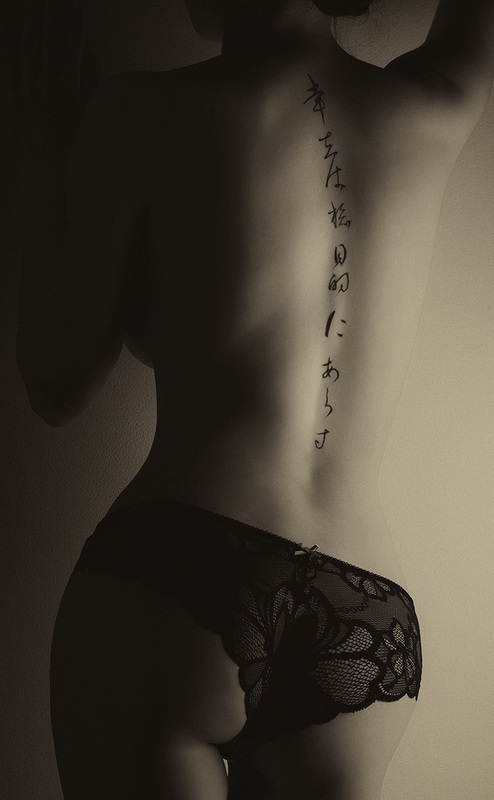
My art studio in Tokyo offers professional portraiture photography services, for individual clients, corporate clients, as well as custom services for artists. In addition to portrait photography services I can create an original Japanese calligraphy artwork that you can use for your business logo. You are guaranteed not only top quality photography and calligraphy services, but also high end photo retouching. I approach each of my clients differently, depending on their needs, personality, what they expect from me as an artist, the purpose for which they require my services, etc. What you can expect from me is non-commercial, original, and creative art. For more details on services and service pricing please visit my Ryuurui Foto Studio website, or contact me directly. To read more about me, please visit "about" tab on this website. Photo: Japanese artist Yuki Mori / calligraphy art: 雪森苑 (lit. Snow Forest Garden) 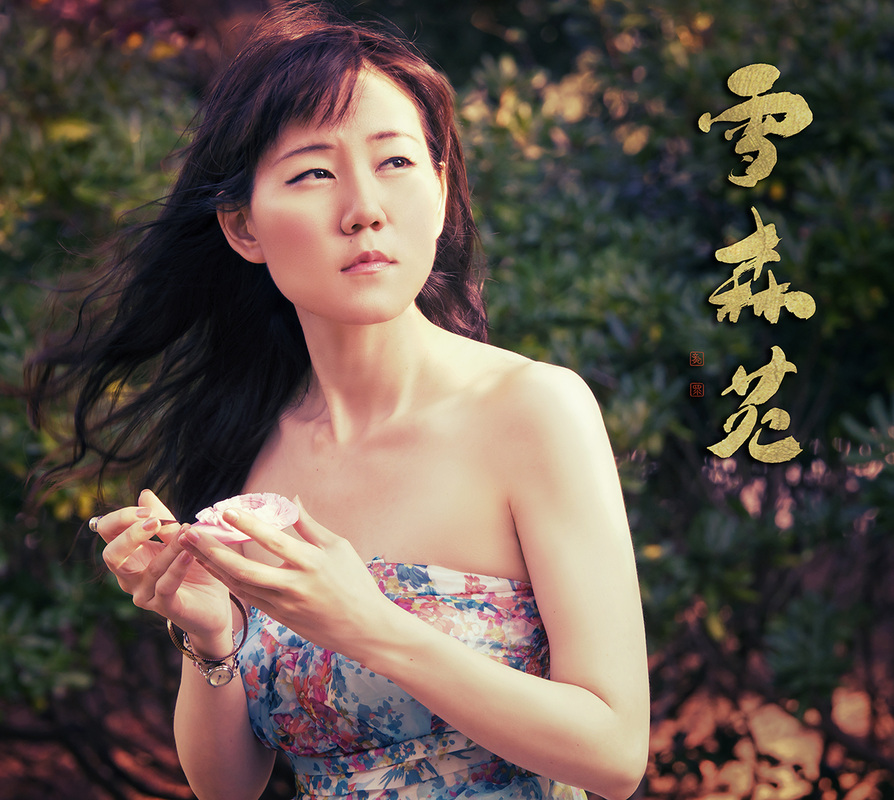
Summer is at its full and fireworks shows are happening all over the northern hemisphere. In this video I will give you tips on what equipment you need to shoot great fireworks photos, how to set up your camera (ISO, aperture and shutter speed), what techniques you can use to make your fireworks shots look different, and finally I will edit one of my photos in photoshop, and show you my workflow. In fact, the photo that I am editing is a composite phot, meaning, it is made of two different shots. So you get three tutorials in one. Enjoy! Wang Xizhi (王羲之, 303 - 361) - the Sage of Calligraphy and possibly the greatest Chinese calligrapher that has ever lived. His masterpieces are often a great challenge, as his skills with the brush were unreal. The most striking thing for me is his unbelievable sense of the balance in writing, combined with an extremely intuitive ability of adjusting shape of the characters so they fit together, but at the same time pushing that harmony to the limits of distortion. A true genius artistic indeed. Here is a short video that I captured during my daily Chinese calligraphy studies, I am copying a 興福寺断碑 (Xingfusi duanbei), which is a calligraphy text composed in 721 C.E. out of characters in semi-cursive script (行書) taken from various masterpieces by Wang Xizhi. I have another video of me copying the same classic, but I am using a different brush holding technique, you can see this video on my YouTube channel, here. If you want to learn more about Chinese calligraphy, please see the section of this website with learning materials. Here is another photo of Nicole that I took a few days ago in Tokyo. If you are shooting portraits of models or clients in a rather busy place, and you wish to separate them from the surrounding rush, the best way to do it is to use telephoto lens at a relatively wide aperture (this photo was taken at F3.5 / 100mm). Be careful with going too wide on aperture in cases where the models eyes are not parallel to the front of the lens, as then the narrow plane of depth of field might not be enough to have both eyes in focus (unless you are going for that particular effect, which is also fine). Another thing you can do is to convert the photo to black and white in photoshop or lightroom. 256 shades of grey are much less of a distraction that millions of colours. Lastly, tight framing of the portrait will remove even more unnecessary things from the frame, especially if there are any oddly shaped structures or objects (like lamp posts or trees) directly behind the model's head. Happy shooting! 
|
Categories
All
AuthorPonte Ryuurui (品天龍涙) Archives
August 2020
|
 RSS Feed
