|
Posing is such a broad term, abused, feared, and totally misunderstood. How do I pose models for portraits - this is the most common question I get during photography workshops. And my answer is - I don't. Imagine that your model is a prey and you are the hunter. What you are hunting are her emotions, moments she forgets she is being photographed, gestures evoked by memories, thoughts in her eyes, the way she moved her head to fix her hair, eyes running away briefly to yesterday's events, in short you are hunting for anything and everything, but nothing in particular. You are stalking her for a perfect synergy between light, background and foreground elements, and body language. That is where you press the shutter. By posing a model the way you want you will ruin her natural way of positioning, moving, influence her face expressions possibly in a negative way which will make her look fake or uncertain. Instead let he do freely what she wants with her body, then sit back and observe. Once you learn their body language and get to know their personality, then you can start fixing slight issues that you see through the view finder before shooting. This is what I mean by saying that you should pose yourself instead of posing the model. You should find the spot that is perfect for shooting a particular mood in certain lighting conditions by simply moving around and searching. She is the Sun, you are the planets. Move. This does not mean that I do not give instructions and ask my models to do certain things, move this or remove that, curve, bend, whatever I need her to do really to complete my composition. I search not for a perfect but natural and undisturbed energy flow throughout the image. That is what I pose. I do not pose the model, I pose myself so the lens shows me a fluid and beautifully lit image with relaxed body language.
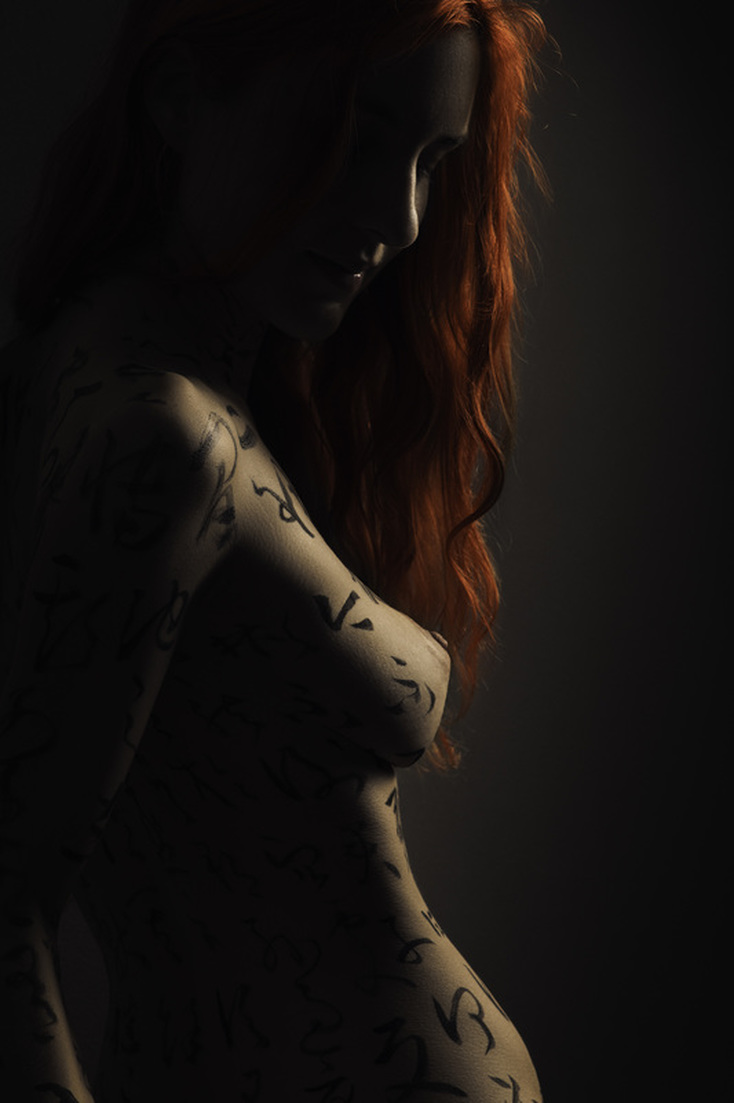
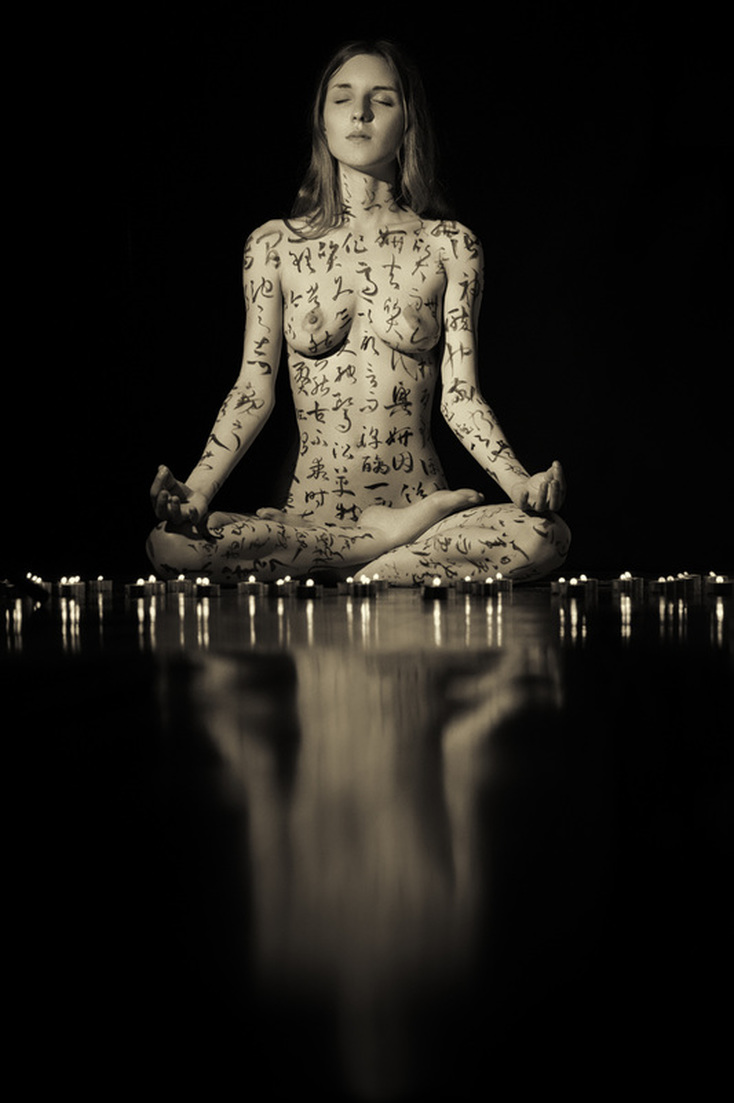
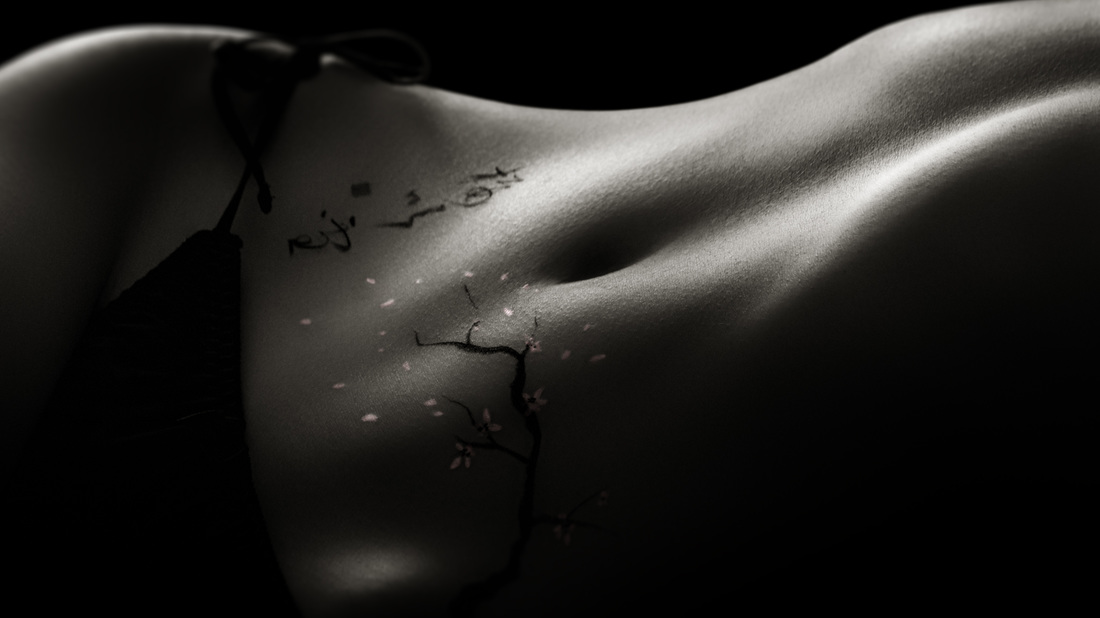
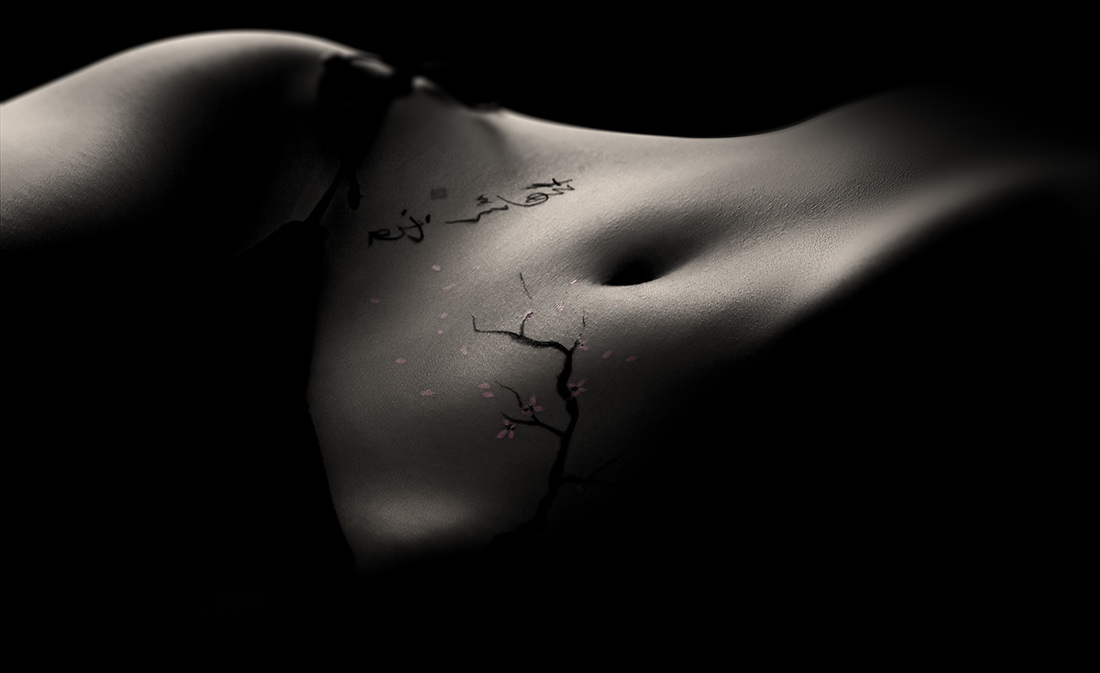
Contact me directly for one-to-one online photoshop tutorials via desktop sharing. Portrait photography service, Tokyo - website http://www.portrait-photography-tokyo.com/ Photography workshops in Tokyo: http://www.ryuurui.com/photography-workshops.html Hire a photographer in Tokyo: http://www.ryuurui.com/hire-a-photographer-in-tokyo.html Photo blog: http://www.japan-in-photography.com/ Facebook: https://www.facebook.com/ponteryuurui Twitter: https://twitter.com/PonteRyuurui Google+: https://plus.google.com/u/0/+PonteRyuurui/posts For more tutorials and how to videos check out my photoshop and photography tips and tricks YouTube channel: https://www.youtube.com/channel/UCEOVGZ2rpLhR7gSPvaexxxQ Fine art nude photography is hands-down one of the most difficult types of photography out there. There many factors that have to play in harmony together for the final image to be sensual, powerful, intriguing, natural and sexy at the same time. Your first barrier is your attitude as a photographer or an artist (or both in one, preferably). Model not only has to trust you implicitly, but she also has to feel completely relaxed and safe. Her body language has to be fluid and tension free, otherwise you are both wasting your time. If you work with professional nude models then they are used to posing nude and some of them are more comfortable nude than posing to portraits. But don't be shy asking models, who even specify in their folio or website that they do not shoot nudes, if they would be interested in such photoshoot. Remember that women (especially attractive women) are bombarded with all kinds of advances on a daily basis. Most of those advances are shocking or just plain sloppy, so naturally their defense and self preservation instinct kicks in, and rightly so. So what can you do then. Build your folio with quality images only: solid composition, good lighting and skilled editing. Those do not have to be nude shots, just images that will tell the model what type of person you are, what artistic sensitivity you have, and what drives your passion for photography. Let your images talk for you. If a model likes your photographs she will most likely be interested in working with you. Then make an effort to look through her folio and see what she likes. Ask her to send you sample images from the net or her own, so you can learn what is appealing to her. I cannot stress enough how important that is. Get to know your models' personality. It not only is essential for you to understanding them, but more importantly shows that you actually care about them as human beings, and not just as a subject for the lens. Then just ask her if should be keen on shooting portraits or street fashion, which will give you a chance to meet and connect. When you meet in person you have a ground to judge when (or if) is the right moment to ask her about a nude shoot. Remember, it is not what you say but when and how. Make absolutely clear what is the purpose of the shoot, how you will use the images and what images you will be publishing and where, and what she is getting out of it. Whether it is money or photos, you have to be clear about it. Just put all cards on the table so there is no guessing or misunderstandings. Do not surprise them with something they did not expect during the shoot. In best case scenario it will create a barrier and you will have to deal with fake and stressed body language. Remember they are nude, respect that. Next, you should have some knowledge of human anatomy and how light can affect it. Learn how muscles move and align, how body moves, what poses or angles are in symbiosis with give type of light. Watch professional dancers in slow motion and see how graceful their movements are. Observe women on daily basis and learn, how they react, what they do with their hands, how they tilt heads and what emotion caused it, how they smile or fall deep into thoughts. Those emotions can be evoked or ruined by words. Choose them carefully. You will be posing the model, yes, but photos should appear not posed and natural. Real life reactions are your best school of what is natural, but there are other sources of inspiration. Try to deconstruct fine art nudes from world class photographers (they don't have to be famous, they just have to be bloody good), especially the light and how it falls. Watch how women photographers capture nudes, they have different sensitivity and you can learn a ton. Unlike dancing, the trick here is to capture that balance in a single frame, a frame that is still, and viewer's eye has to glide through the image without abruptly colliding with composition issues. Stop thinking like a man, start feeling like an artist. If you really passionate about light and shadows, forms and creating, you will forget you have a nude model posing for you. You will need at least basic understanding of how light works and what can be done with it. In fact becoming obsessed with light is your aim. For me nude photography is all about game of shadows. I do not see body parts, I see lines, shapes and the power of composition. Imagine that light falling on model's skin is like lingerie. Dress your model with it in away that she is sexy as hell but sublime and feminine, she doesn't excite but intrigues and stuns, she is not revealing but alluring, she ceases to be a model and becomes a wonder of light and shadows. Contact me directly for one-to-one online photoshop tutorials via desktop sharing. Portrait photography service, Tokyo - website http://www.portrait-photography-tokyo.com/ Photography workshops in Tokyo: http://www.ryuurui.com/photography-workshops.html Hire a photographer in Tokyo: http://www.ryuurui.com/hire-a-photographer-in-tokyo.html Photo blog: http://www.japan-in-photography.com/ Facebook: https://www.facebook.com/ponteryuurui Twitter: https://twitter.com/PonteRyuurui Google+: https://plus.google.com/u/0/+PonteRyuurui/posts For more tutorials and how to videos check out my photoshop and photography tips and tricks YouTube channel: https://www.youtube.com/channel/UCEOVGZ2rpLhR7gSPvaexxxQ Oracle bone script is the oldest officially recognized Chinese calligraphy script, and it goes back all the way to Shang dynasty, starting around 1600 BCE. It appeared on animal bones (mostly ox shoulder blades) and turtle shells. It was used by priest diviners who were acting as oracles, and also were responsible for recording important state events. Texts were carved onto the bones and then heated up in fire until they cracked. Those cracks, their shape, and the way they visually interacted with the text were considered and interpreted as signs of the gods. Oracle bone script is often seen as pictographic writing but only a small percentage of characters that have been deciphered are actually of pictographic nature. You can read about this in greater details in my article on oracle bone script here. This is the first time I actually wrote oracle bone script on skin. I have been studying it a few years ago during master classes organized by a Grand Master Kajita Esshu of the All Japan Calligraphy and Literature Association, who happens to be my calligraphy teacher. It was a small group for those who wish to go beyond regular studies of Chinese calligraphy. It was a great experience to actually translated some of this ancient writing and find out more about ancient Chinese civilization. Oracle bone script, and any type of great seal script really, requires patience. Writing should imitate chiseled characters with fairly sharp lines well defined strokes. It should appear raw and unpolished, irregular yet harmonious. Writing on skin imposes many challenges. Skin is uneven, it stretches too especially when model changes her pose. Writing itself is quite tiring because positions I have to write in are uncomfortable. Models lay down for the most part of it, first reason is that it is comfortable for them (in fact it is so comfortable and relaxing that literally all of them fall asleep in a process) and second is that it minimizes body movement and heaving. Calligraphy that you see on pictures took me about 3h to finish. We had a great two days shoot with Naomi, who flew all the way from Kyushu to Tokyo. This type of shoot requires lot of preparations, especially on my side, and also photo retouching is not as easy. Skin retouching is time consuming and one needs a lot of patience for it, but skin covered in writing is on entirely different level. It is not just down to splitting tones and textures in photoshop via frequency separation, but also separating tones from one another and lots of fine tuning and very local and taxing dodging and burning, etc. Nude photography is unforgiving as there is no chance to hide body language imperfections with clothing. There is no fancy dress that will draw attention away from the model like in fashion photography. Working with flashes that offer no modelling light one has to know how light works and predict its effect. Low key dramatic photos are based on shapes of shadows, light fall off is usually quite dramatic so shadows are well defined and rapid. A centimeter of movement can ruin or improve a photo. Last but not least, if the model does not trust the artist it will show in the photos clear as day, just like a lack of skill and knowledge shows in writing of a Chinese or Japanese calligrapher who has not mastered his art yet. Models interested in Chinese or Japanese calligraphy body art please message me directly. You can find my portfolio here. Contact me directly for one-to-one online photoshop tutorials via desktop sharing. Portrait photography service, Tokyo - website http://www.portrait-photography-tokyo.com/ Photography workshops in Tokyo: http://www.ryuurui.com/photography-workshops.html Hire a photographer in Tokyo: http://www.ryuurui.com/hire-a-photographer-in-tokyo.html Photo blog: http://www.japan-in-photography.com/ Facebook: https://www.facebook.com/ponteryuurui Twitter: https://twitter.com/PonteRyuurui Google+: https://plus.google.com/u/0/+PonteRyuurui/posts For more tutorials and how to videos check out my photoshop and photography tips and tricks YouTube channel: https://www.youtube.com/channel/UCEOVGZ2rpLhR7gSPvaexxxQ Take care of the small things and the rest will fall into place. Shadows are one of those "small " things. To tell the truth shadows are everything when it comes to photoshop manipulation. In one of my previouis articles titled " How to start with photoshop manipulation and composite photography " I have mentioned the most important elements of composite photography but I think that shadows are so important they just deserve a separate article. In any photoshop manipulation that is a collage of few photographs or 3D models, etc. you will have to deal with perspective, lighting and colors. Now, perspective and color matching are extremely important, but if you do not get the shadows right things will look completely off. You can still get away with mismatched perspective and colors, but if you mess up the shadows then your photoshop manipulation will look fake. And by shadows I also mean the lighting, because there is no shadow without light. You simply cannot separate those two. Shadows are complex and the more light sources you have the more taxing your job will be to have those shadows being cast correctly. You have to match the light direction on all the pieces of the photoshop manipulation puzzle, i.e. all images have to be lit from the same angle and with similar strength and color, but then if you decide to add your own light sources you will need to take that into consideration. The best way to do it is to build around your subject or model. Some people like to start with the background, mostly those who are not using their own model images. If I create a photoshop manipulation with a person in the photo then I always use my own images. I know how I lit them, what lens I used, what perspective I shot from, etc. But it does not really make things any easier, the only advantage is that I can work on RAW files and get as much info out of them as possible, but I still need to create my own shadows. When you create shadows in photoshop pay attention to light direction, light strength, number of light sources and the light ratio between them (which one is the key light, which one is a back light, etc.), angle of light (low angle light will cast longer shadows, just like a sunset or sunrise). you also need to consider how shadows affect the textures (textures are less visible when in shadows), color temperature (shadows are colder, so often have blue-ish cast), then there is length of the shadows and their definition, so you will have stronger shadows near anything that casts them and they will dissipate the farther they cast. Shadows have shapes and if they are cast over other things in the image, they will wrap around them and become deformed. Stand near a wall and place a light behind you and you will know what I mean; the shadow on the floor will be different than on the wall. Warp, puppet warp, distort and skew will be most helpful tools there. Last tip that I will give you is extremely important. Build shadows in layers. Do not try to do it in one go, it won't work. Just like with skin editing, or any type of photo retouching for that matter, the more detailed and patient you are the better results it will yield you.
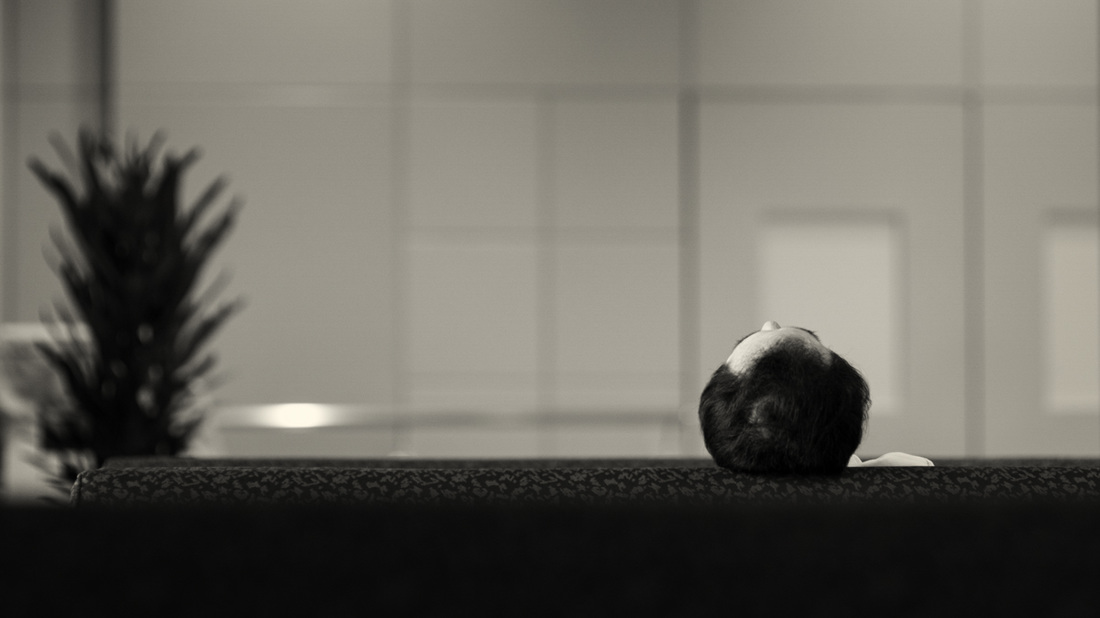
Contact me directly for one-to-one online photoshop tutorials via desktop sharing. Portrait photography service, Tokyo - website http://www.portrait-photography-tokyo.com/ Photography workshops in Tokyo: http://www.ryuurui.com/photography-workshops.html Hire a photographer in Tokyo: http://www.ryuurui.com/hire-a-photographer-in-tokyo.html Photo blog: http://www.japan-in-photography.com/ Facebook: https://www.facebook.com/ponteryuurui Twitter: https://twitter.com/PonteRyuurui Google+: https://plus.google.com/u/0/+PonteRyuurui/posts For more tutorials and how to videos check out my photoshop and photography tips and tricks YouTube channel: https://www.youtube.com/channel/UCEOVGZ2rpLhR7gSPvaexxxQ Photography can be very simple in its form yet contain a powerful message. It is not how many or what type of elements you decide to frame with your lens but how all of them composed together will make the viewers feel, or what they will make them think of. Photography, or even art in general, is like flirting, you either click immediately or not. You either relate to what you see or you don't. Art is there to make you feel, not think. Once you start analyzing it it loses its charm and elegance. Leave thinking and pondering for snobs. I took this image yesterday during private photography workshops in Tokyo. I like to challenge my students bu placing them in front of tricky to compose views, or just asking them to find me a photo in surrounding chaos. We were inside Tokyo Big Sight in Odaiba and I have noticed this salary man resting on a couch. He was checking his phone and I took a few shots, but I was not fully happy with them. Then I saw him pass out and that was the moment I was waiting for. Perfect image to summarize Tokyo, with faint and very organized geometrical pattern (symbolizing Japanese life style by the manual) in the background, lots of negative space (traditional simplicity), a tiny bit of white shirt sticking out suggesting an office worker, bald spots on the head - a result of stress perhaps, and the plant that slightly resembles bonsai (traditional pass time), tucked in a corner because no one has time here in Tokyo for having fun.
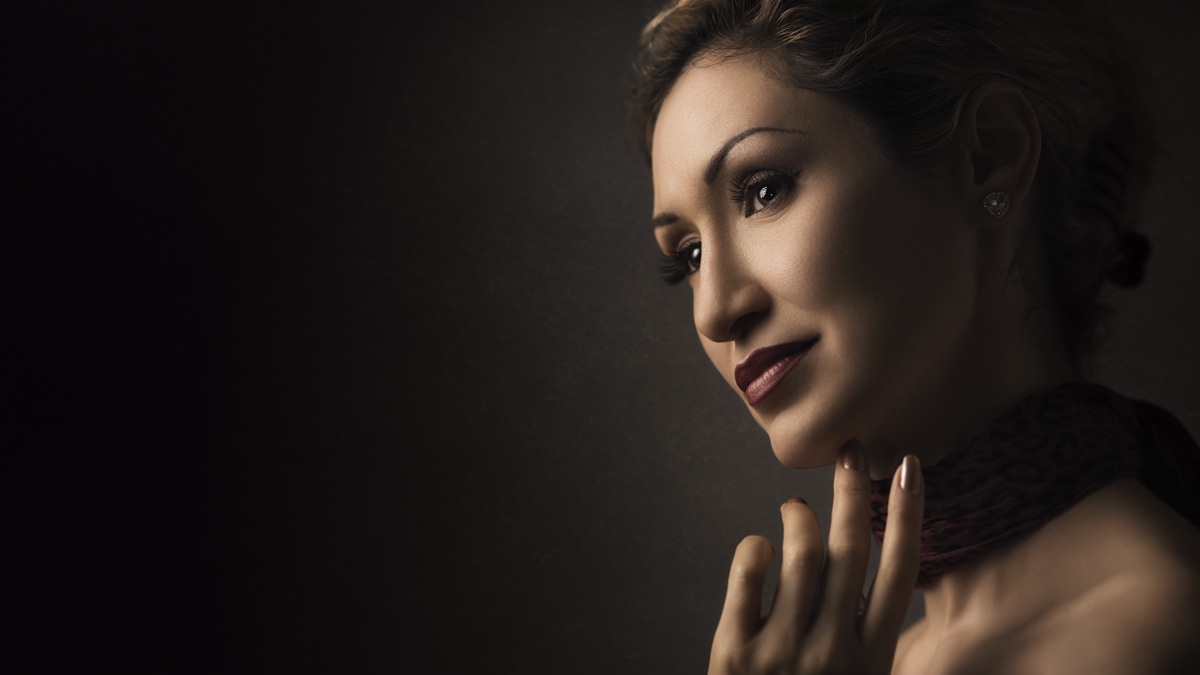
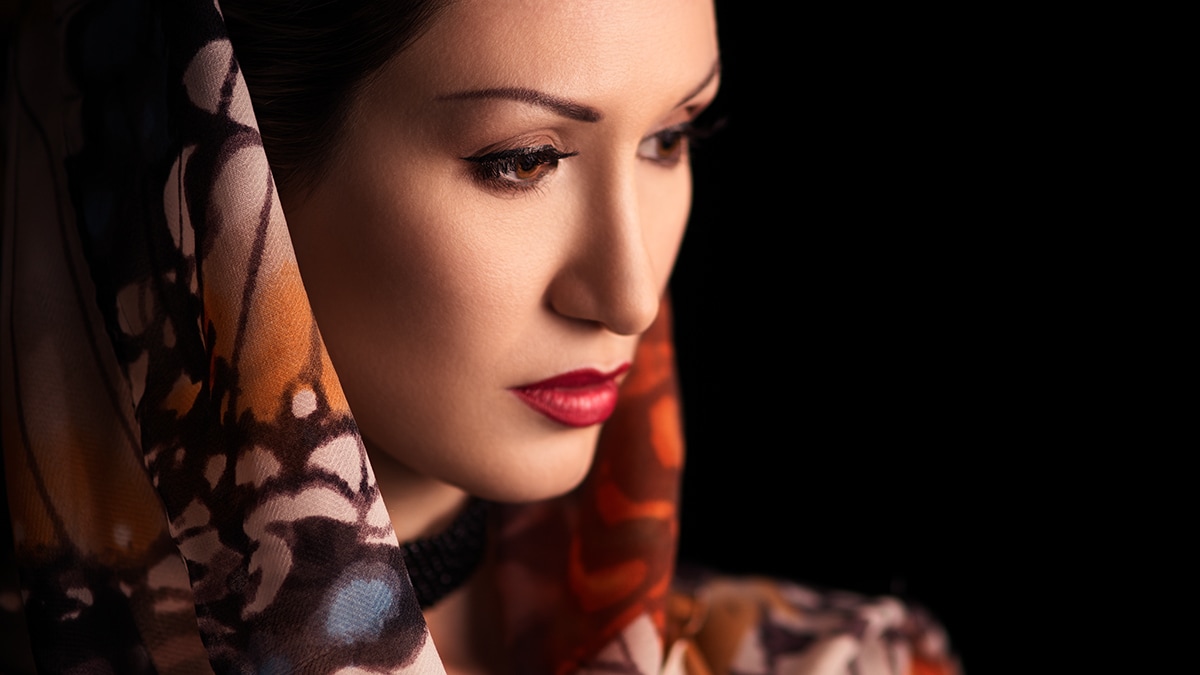
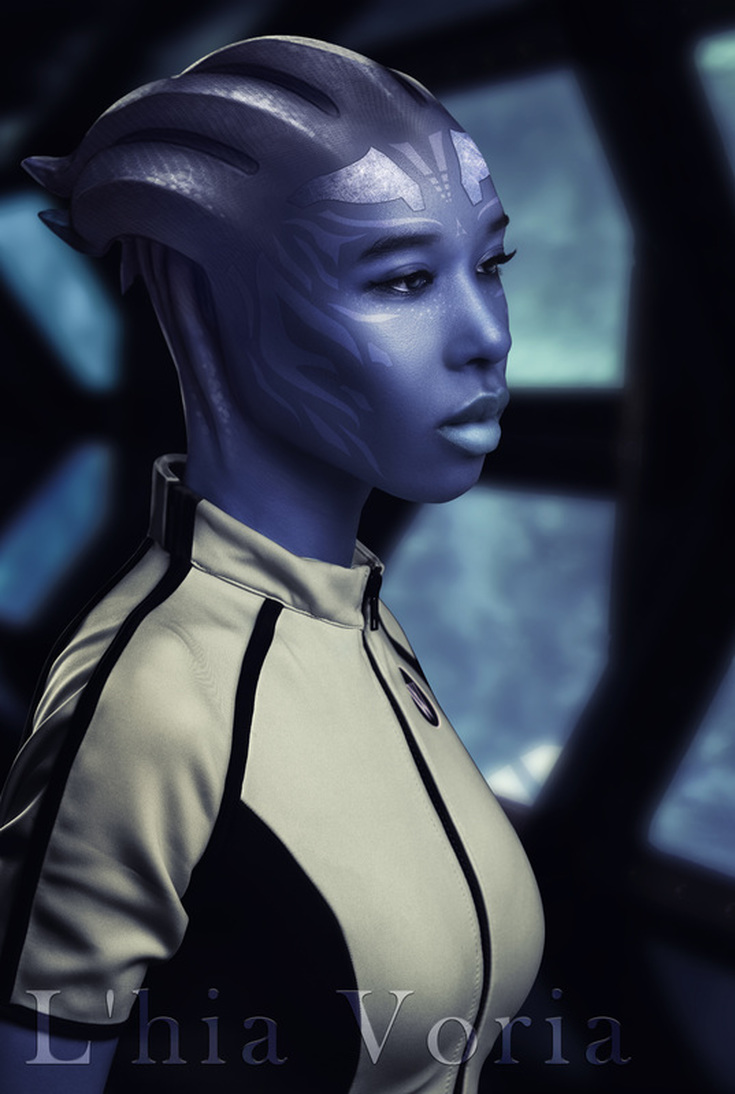
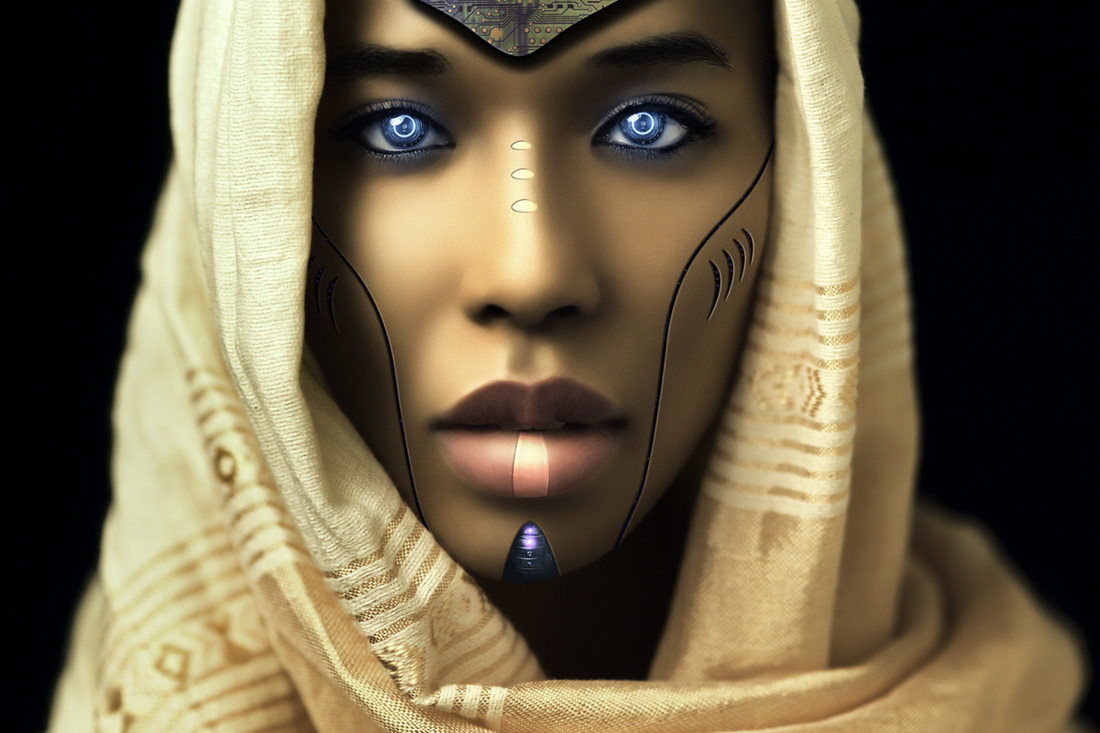
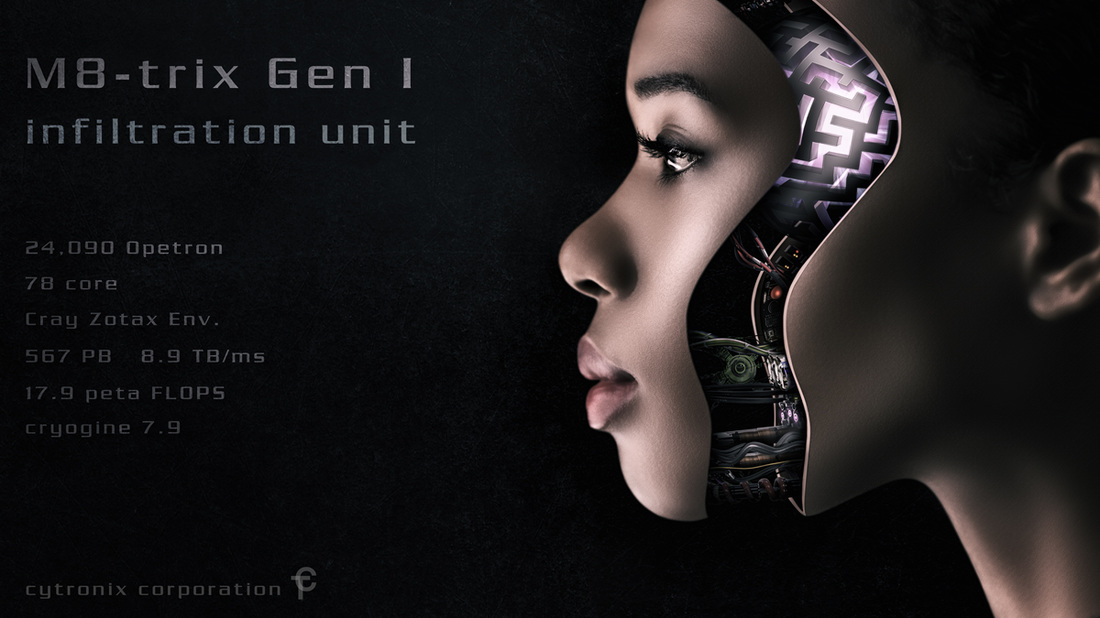
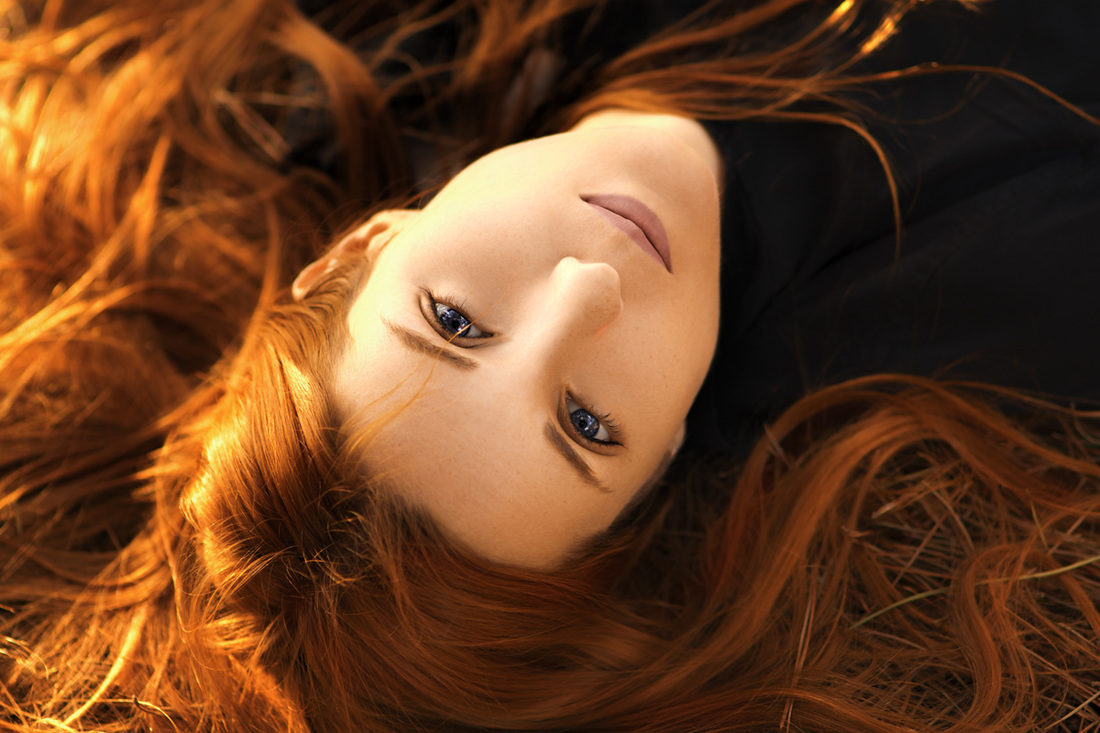
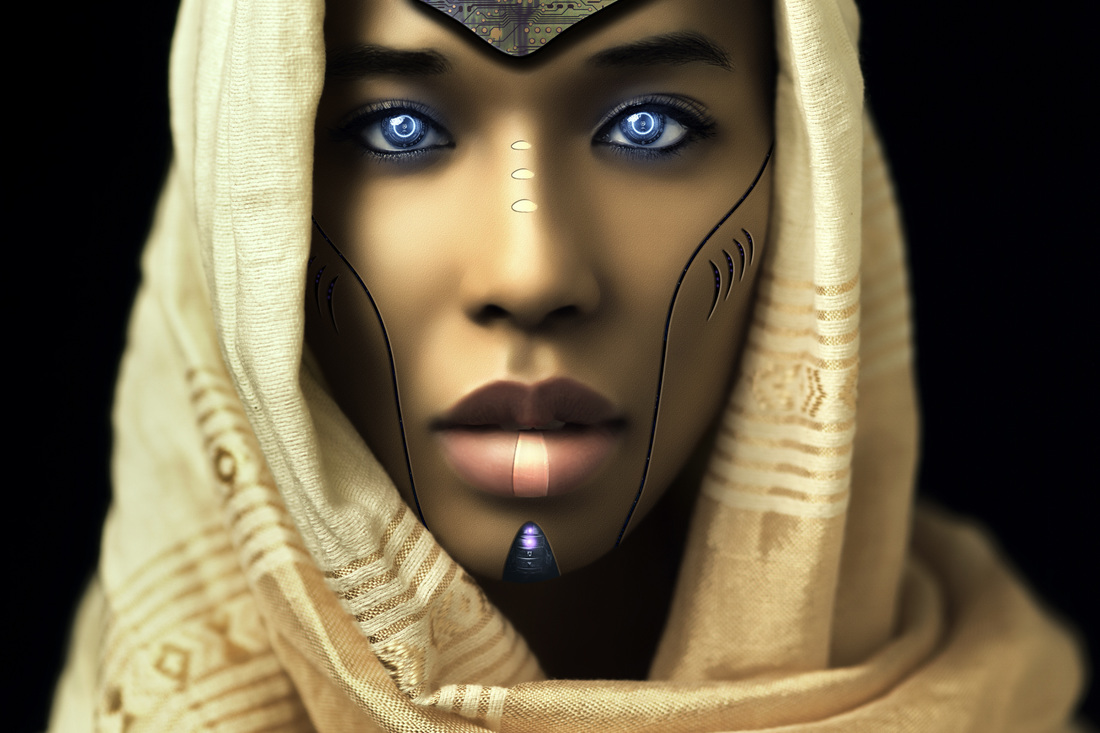
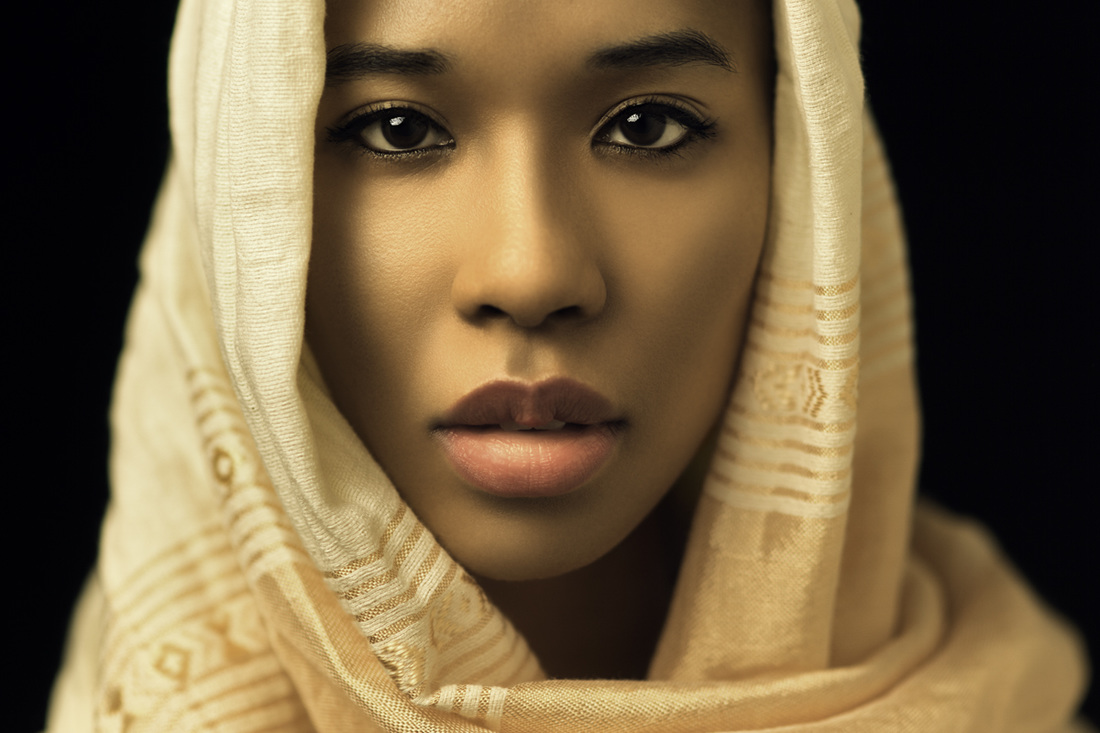
The fewer the elements on the photo the less distractions for the mind. Viewers are immediately drawn to where you want them. Eyes do not wander about and subjects really stand out. It is a bit like writing in capital letters. Such images are harmonious but at the same time striking and powerful. There is no room for error or unnecessary elements. Even that reflection plays a role of an anchor that helps you to bounce back and forth between that highlight and easily recognizable shape of human head. Square to the top right of this guy's head is contrasting with its roundness, helping to frame it but it does it in an abstract and misaligned manner. The couch top provides a slide for the eyes to move left and right. Always look around you because great photographs are happening everywhere, it is just a matter of being able to see them. Some of them can be anticipated, some need time to happen so you will have to be patient, and some just happen right in front of you. If you feel like something would make a good image then take it, do not waste time on thinking, your inner child's intuition is most likely right. Buy prints with my photography and calligraphy art Photography workshops in Tokyo Hire a photographer in Tokyo Photography blog about Japan Google+ For more tutorials and how to videos check out my photoshop and photography tips and tricks YouTube channel Everywhere. The most important thing is to always follow your heart. For example, I never ever shoot with a story board. I hate story boards. For me they are too limiting. They constrain me in frames of an idea and I would be obligated to stay within certain parameter. I refuse do that and I cannot do that. When I shoot I react to the light that surrounds me or emotions on the set, personality of the model or maybe something that was said or happened, a deja vu or a memory, a distant sound or an instant thought that just popped inside my head. I can change my mind during the shoot and start working with a completely fresh idea that just presented itself. You should flow not follow. My planning is very general and loose. I can have a very focused shoot, theme wise, like a body art shoot for example, or a portrait session with a model that is tagged as "shooting for sci-fi photoshop manipulations". But it is never 100% decided. An average photographer will shoot with a firm idea because it is safe and logical to hold on to something. An artist will adapt, search, and evolve. Inspiration should be like seeking order in chaos. If you are out doing some street or architecture photography you are dealing with chaos, and your job as a photographer is to find peace harmony and order in the mess and commotion of shapes, shadows and highlights, corresponding elements, or even subjects, etc. You are the composer, editor and performer in chief. Let your instinct lead you and learn how to react to what is around you rather than showing up with a goal. I had a photography student ask me a question recently "what camera setting do I use to shoot portrait?". I replied "I do not know. Only you can answer it. Think of what you want to achieve artistically and that will tell you the camera settings" . Inspiration could be found in work of other people. They do not have to be well-known artists or masters of their craft. Only because someone is unknown it does not mean their art cannot be amazing (in most cases popular things are commercialized and common, and real art is discovered by the next generation or so, after the artist dies). All that is important is whether what you see connects with your soul and speaks to you or not. Do not be a sheep and follow others. They are called others for a reason - they are not you. They are different. We are all different. Stay different. Art is a very self centered and egocentric discipline. This is why artist are aloof and often anti-social. You should follow what YOU like without any need of pleasing others. I do not care who likes my art. I do and that is all that matters. You should absorb all and anything because you never know which direction it will lead you. It is like a survival game, only on an emotional level. The very fact that you are different and alone creates peace and seclusion, which is essential to developing the ability to reading and listen to self. This does not mean that you should not learn from, listen to or share your ideas with others. I am not worried about someone else stealing my ideas. The moment they do I am already 10 steps ahead creating something new. Focus on creating, the rest is irrelevant. Stay true to what you feel is right and instead of wondering where to look for inspiration search yourself first. Once you know who you are, what you want and what drives your creativity, inspirations will start popping up all around you. Do not decide, but react. Do not think, but feel. All 3 images you see in this article are from a single shoot. I had a rough idea what I want to do with each of those portraits, but it was not until I opened them in photoshop and started editing them when I "saw" the final images. It was either colors, face expression, angle or lighting that inspired photoshop manipulation. See, if I followed a story board I would be compelled to complete "a task". Art is a profession only because we need to pay the bills. If I did not have to, I would not give a monkey about the business side of it. I die a bit inside every fucking time I have to tag my photos or check my social media. Most of us care only about creating. The moment you stop thinking of photography art as a type of profession (even if it is your job) the whole new level of inspirational thoughts and ideas will present itself. The key to finding a real inspiration is staying true to oneself.
Buy prints with my photography and calligraphy art - http://ponte-ryuurui.pixels.com/index.html?tab=galleries Photography workshops in Tokyo: http://www.ryuurui.com/photography-workshops.html Hire a photographer in Tokyo: http://www.ryuurui.com/hire-a-photographer-in-tokyo.html Photo blog: http://www.japan-in-photography.com/ Facebook: https://www.facebook.com/ponteryuurui Twitter: https://twitter.com/PonteRyuurui Google+: https://plus.google.com/u/0/+PonteRyuurui/postsFor more tutorials and how to videos check out my photoshop and photography tips and tricks YouTube channel: https://www.youtube.com/channel/UCEOVGZ2rpLhR7gSPvaexxxQ Portrait photography is one of the most difficult types of photography out there but at the same time it is extremely rewarding. In modern era when anyone has a decent camera attached to their belt buckle or earrings but it does not mean that anyone can take a good portrait photo. Great portrait photographer is very quick and accurate in reading people and connecting with them. In addition an impeccable sense of composition is needed because unlike in landscape, architecture, or even some types of commercial photography, etc. the composition is very dynamic, and there is no tripod to slow things down that allows for careful composition setting. The face expression is there and it is gone in a blink of an eye. You need to be either quick as hell or have the skill to evoke one. Composition in portraiture is on intuitive level. What's more framing of the shot has to complement and remain in sync with the face expression and body language of the model. There has to be a harmony and symbiosis of the two. Portrait photographers often work with very shallow depth of field and telephoto lenses. Those are creative tools that can deliver stunning powerful images but they impose new challenges such as extremely narrow areas of focus. At aperture of 1.4 on 85mm lens you are working with about 1cm of area that is in focus. It is so narrow that if you or the model take a breath things that were meant to be sharp are blurred. This is also why manual focusing is portrait photographer's best friend. Portrait photographer has to deal with moods, various characters and attitudes, or wishes and desires and be capable of blending those with his or her own style. Portrait photography is extremely time consuming and requires a lot of effort during and after the shoot. A lazy photographer will pass you .jpgs processed by the camera (or even RAW files...) or generic edits processed in bulk with few movements of adjustments sliders in Lightroom. A professional portrait photographer who really cares about the quality of the images will spend about 1-3h on each image individually. Every single image will be different because it is portraying various moods and is linked to a memory of the moment. A close-up image will take far more time to edit than a full length portrait. If I decide or (client's wants me to) manipulate the photo in photoshop then it can take not hours but days to complete it. This is behind the scenes work that is rarely taken into consideration, especially by those who have no sense of quality or no knowledge of how the entire process looks like. The same goes to the photoshoot. There are too many factors to determine the length needed for acquiring 6 or 7 great shots. It could be 200 photos or 1000. It could be 3 hours or 7. So let us say that the shoot lats for 5h and there are 7 images to be processed. So that is 5h of shooting (plus the preparation and commuting time, which in Tokyo could be even as long as 3-4h in total), and then 2h x7 images inside photoshop. That is about 24h n total. Aside the time required there is a skill and talent involved in photo editing. One has to have a vision of post processing while capturing the photos, and superb knowledge of photoshop, or any other professional photo retouching program, to be able to finalize that vision. Photo editing is an art and only an artist can do it well. Portrait photography can be extremely rewarding. You can literally change people's life with your images for better. You can inspire them, pour confidence in them, or simple capture elusive moments that are unrepeatable. You can help them discover themselves or make them realize something they were not aware of. At the same time it is a huge responsibility, because you could do the reverse with poor images. As a professional portrait photographer it is my job to make anyone look at their best under the lighting and environmental conditions I have to work in. The true challenge is to capture who they really are, but imbue the photos with my own photography and photo editing style. People are very vulnerable in front of the lens (even professional models). They get very tense and self-conscious and it is up to me to gain their trust and do not lose it by cutting corners. There is no room for excuses, only solutions.
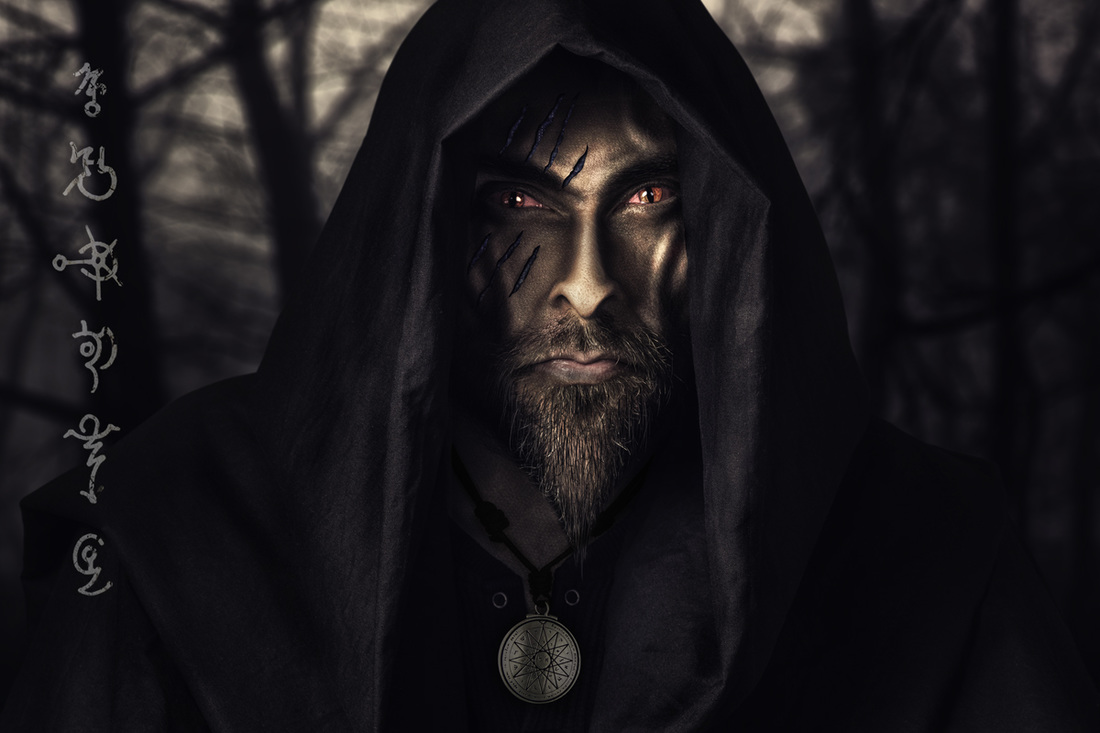
Buy prints with my photography and calligraphy art - http://ponte-ryuurui.pixels.com/index.html?tab=galleries Photography workshops in Tokyo: http://www.ryuurui.com/photography-workshops.html Hire a photographer in Tokyo: http://www.ryuurui.com/hire-a-photographer-in-tokyo.html Photo blog: http://www.japan-in-photography.com/ Facebook: https://www.facebook.com/ponteryuurui Twitter: https://twitter.com/PonteRyuurui Google+: https://plus.google.com/u/0/+PonteRyuurui/postsFor more tutorials and how to videos check out my photoshop and photography tips and tricks YouTube channel: https://www.youtube.com/channel/UCEOVGZ2rpLhR7gSPvaexxxQ How to improve your portrait photography through photo retouching and photoshop manipulation6/23/2016 I do not bother with story board when I shoot. I leave it for those who need guidelines find it difficult to shoot without following a plan. I do not plan, I react. It is the combination of what I see with what I know and the light that is being cast that makes my brain go creative mode. However, when you shoot for a specific concept, such as photoshop manipulation, it is good to know how to bring the base photo to as close as possible to what you need as your digital clay. Below you can see my latest photoshop manipulation of my self portrait. I wanted it to be dark and mysterious, like a scene from a fantasy game (think in terms of Greybeards from Skyrim). What I needed was a head and shoulders portrait of myself in something that would imitate hooded rags (I wrapped around myself black muslin cloth that I use as a backdrop for studio portraits), and a blend of evenly lit image with deep well defined shadows at the same time. I knew I will be going for an older and wiry face, with accentuated face features so that I can push those even further in photoshop via dodging and burning. But I also knew that I cannot make the photo too dramatic (too low key) because contrast is something that I will adjust as I create the photoshop manipulation. At the same time I needed my face to be lit well enough so I can easily edit it. It is much easier to darken things down rather than brighten them up. Shadowed areas have less defined textures and are less three dimensional. If you watch the below video, you will notice at the beginning the original photo, straight from the camera. I lit my face from a slightly elevated angle so the shadows amplify my cheek bones and jaw. I wanted the light more or less in the center so the face features will be more symmetrical and more powerful. I knew I will be cutting this photo out of the frame and since I did not have to deal with masking out hair I could get away without a back light. I used grid on my main light and the light that separates me faintly from the background is whatever light bounced off of the wall behind me. I needed catch lights in the eyes so I placed the softbox right above the field of view of the lens. Shooting with 85mm I had enough compression to get the light into a fairly low position. It was important because I did not want to use any fill light from underneath (it would ruin the shadows under the hood at the top of my head, and on the sides as well). Working with flash guns is tricky, because every centimeter of movement counts. You can ruin or completely change the mood in the photo or its composition by moving the light by literally a centimeter or two. Studio photography is amazing for teaching precision and understanding the light and how to control it. Photoshop is like a tripod. It will slow you down and allow you to analyze the photo you are editing. People who do not like to edit their photos and just run and gun will never ever truly understand the depths of composition. It is a mixture of talent, ability to sense the energy flow between the elements of the photo and hours and hours of hard work. Do not neglect your photo editing - it pays off and will aid you in growing artistically, not to mention it will help you a lot in improving your technical skills as a photographer. And remember - photo manipulation or editing is not there to rescue bad images, but to complete your artistic vision and imbue your photos with personal style.
Buy prints with my photography and calligraphy art - http://ponte-ryuurui.pixels.com/index.html?tab=galleries Photography workshops in Tokyo: http://www.ryuurui.com/photography-workshops.html Hire a photographer in Tokyo: http://www.ryuurui.com/hire-a-photographer-in-tokyo.html Photo blog: http://www.japan-in-photography.com/ Facebook: https://www.facebook.com/ponteryuurui Twitter: https://twitter.com/PonteRyuurui Google+: https://plus.google.com/u/0/+PonteRyuurui/postsFor more tutorials and how to videos check out my photoshop and photography tips and tricks YouTube channel: https://www.youtube.com/channel/UCEOVGZ2rpLhR7gSPvaexxxQ Photography is a type of art, but not all photographs can qualify as artists. In the age of digital photography everyone thinks that photography is easy. Internet is flooded with terrible images on Instagram, Facebook, Twitter and so on. Human brain registers anything that our eyes can see in repeating patterns as normal and acceptable standards, which is why modern society is all about quantity not quality. We live too fast and are too jaded to notice art around us. We are trained to react at the cost of losing the ability to pause and feel. But how is this related to photography? Professional photographer is someone who performs a craft. It is a job and that is it. Most are, or should be, proficient in knowledge on how to use their gear and how to capture technically correct images. An artist is someone who can take it to a whole new level. Photographer will follow the rules, and artist will break them with finesse. Photographer knows what he or she should do in given situation, and artist senses the mood and reacts. Photographer will apply generic photo post processing techniques and follow a workflow that is a second nature, and artist will adapt and treat every single photo individually, explore the energy, mood, moment, and let the imagination show the way. Professional photographer is dedicated and will most likely accept any work that brings money, artist is passionate about his or her work and cares about images far more than people who pay for them. True artist will tell you to get lost if whatever is on the menu feels insulting to the artistic quality of their work. You will be refused point blank, regardless of the money involved. Professional photographer is more of a businessman, whereas artist is a child who plays with wonders of lights and shadows. Photographer will plan, artist will react to circumstances intuitively. Photographer will follow a commonly accepted and socially approved style that should be profitable and popular, an artist will discover and pursue their own, regardless of how many people appreciate or understand it. Photographer will compose a photo using elements they can see, artist will create an image using elements others cannot see. Photographer will ask you to pose the way they know it should look good (or acceptable) an artist will insist on exploring and experimenting and pose you according to the moment, your personality and the light. Photographer will capture images with their gear, an artist will do the same with the soul. Professional photographer will work with subjects, whereas an artist will get emotionally involved, try to connect with another human being, enter your personal space and encourage you to co-create. You are the part of the image, definitely not a subject. Working with professional photographer is a bit like ordering a pizza, where you pay and hope that you get what the picture in the menu looked like. Artist will take you for a journey to a realm that no one else can see or even imagine.
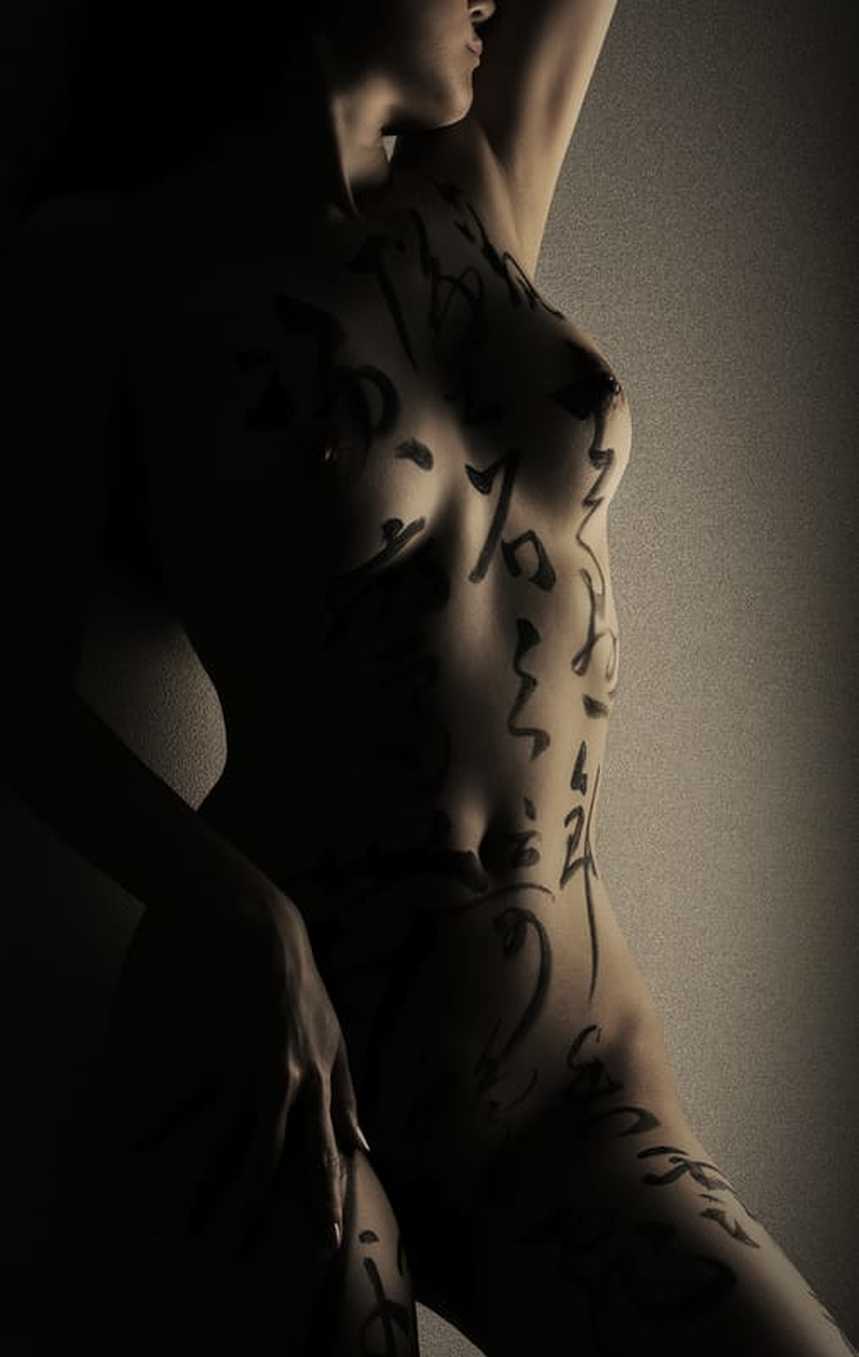
Buy prints with my photography and calligraphy art - http://ponte-ryuurui.pixels.com/index.html?tab=galleries Photography workshops in Tokyo: http://www.ryuurui.com/photography-workshops.html Hire a photographer in Tokyo: http://www.ryuurui.com/hire-a-photographer-in-tokyo.html Photo blog: http://www.japan-in-photography.com/ Facebook: https://www.facebook.com/ponteryuurui Twitter: https://twitter.com/PonteRyuurui Google+: https://plus.google.com/u/0/+PonteRyuurui/postsFor more tutorials and how to videos check out my photoshop and photography tips and tricks YouTube channel: https://www.youtube.com/channel/UCEOVGZ2rpLhR7gSPvaexxxQ Chinese calligraphy is an ancient art, one of the oldest types of art practiced by human race. Its origins go back thousands of years back to Yangshao culture in China, or perhaps even earlier than this. Traditionally, calligraphy is practiced on paper, although poverty of some of the greatest Chinese calligraphers forced them to be creative with media. Some of them used palm leaves, others wrote with mud on temple walls. I often combine calligraphy with modern technology, and create custom backgrounds for my works inside photoshop. Occasionally you will see my calligraphy art on female skin. This type of photography art is very rewarding, but also really exhausting and time consuming. Skin is a very difficult media to write on. it is uneven, does not absorb ink well (if at all) and skin alignment changes depending on person's movement or position. Writing full body length in reasonably small characters takes anywhere between 2 to 4h. Writing position is extremely uncomfortable and unnatural. I ask my models to lay down so they can relax. It would be too tiring for them to stand for 4h and then still have enough of zeal and spark to do a few hours shoot. Photo shoots are long and can even take 10h or so in total.
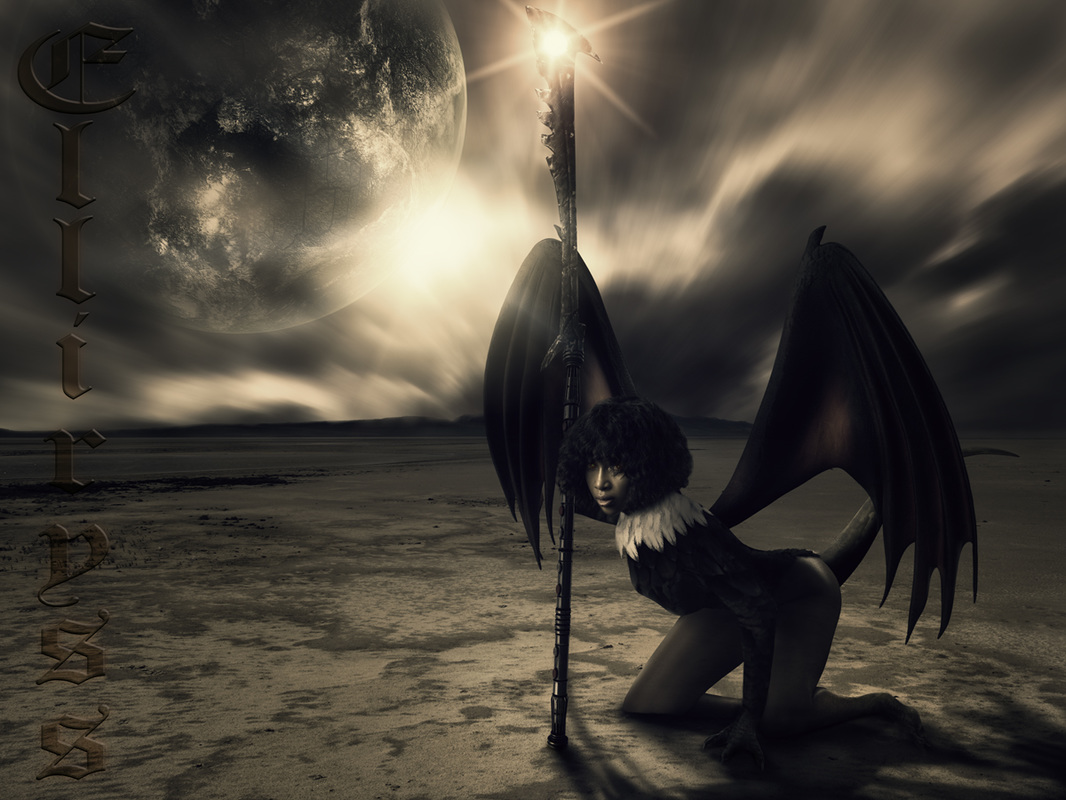
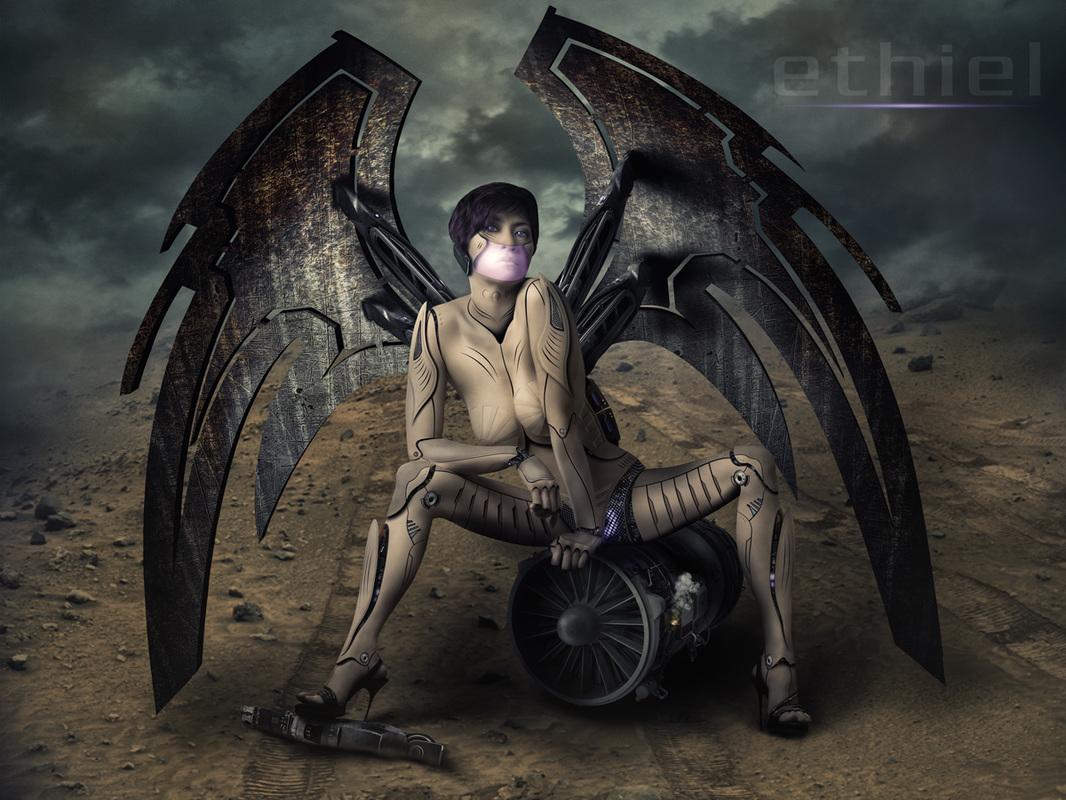
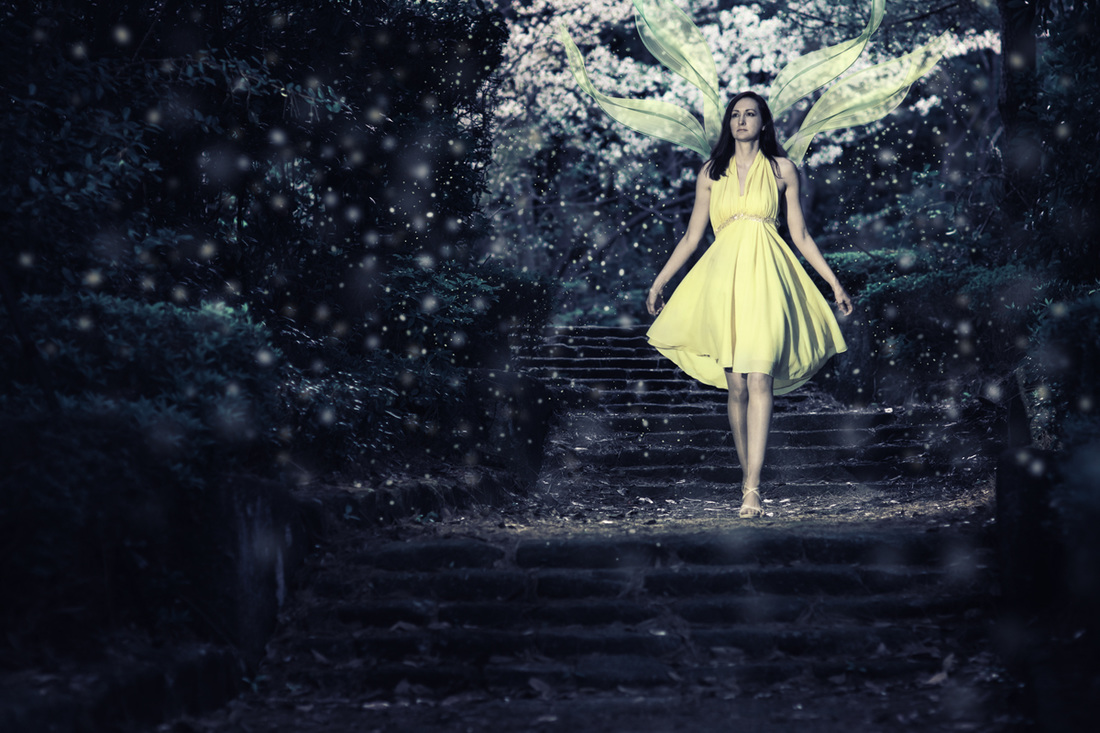
Nude photography imposes other challenges. It is extremely difficult to capture well balanced and naturally beautiful body language because there are no clothes to hide any imperfections. I am not talking here about body imperfections but issues caused by highlights and shadows. Working with flash guns that do not have modeling lights in very confined spaces that we have here in Japan (the smaller the space the harder is to control light bouncing in the room), it is extremely tricky to capture the image I envisioned. I often work with deep shadows, low key and drama, and even a centimeter of movement, either of the light or a model, can change the entire mood of the photo and ruin the shot. My advice to anyone starting with nude photography would be to find a model that feels comfortable around you and vice versa. Make sure that you know what you are doing with lights. Beautiful girl in bad lighting will look bad. Make sure that your model is in a good mood, other wise do not even bother. If you are publishing her photos, make sure she agrees to it. Be confident but naturally confident. Women will sense immediately if you are fake. Be professional but at the same time make a mental connection with your model. Learn about female body and how to present it from angles that will make your model look sensual and not common. Each person has different body shape, so do not apply standards during your shoots. You can use them as starting point but two different girls will look differently in the same pose and light. Listen to your model suggestions and take them on board, you may learn something. I am shooting for female audience, I could not care less about men. In most cases it is women who understand and appreciate art, men just pay for it. Create for those who understand and enjoy it, not for those who buy it. There is a very fine line between delicate, erotic, and cheap. Learn how to walk that fine line but without crossing it. First, you need to have a solid basics in photoshop (or any other software that allows you to work with multiple layers). It is essential for working non destructively and also with multiple elements. Photoshop manipulations can have 100s of layers and 10s of complex groups of layers. Second, you need to reach into your creative side of the brain and think what theme, what idea, what environment, what details you will be needing to complete the final image. It does not have to be superbly precise but more or less you should set a direction or a theme, which can be altered or improved while you are putting it all together. You will need either stock images or your own photos. I prefer to use my own photos for the main subject, which in my case are models and stock images for completing the details. This gives me not only a greater connection and understanding of the mood, concept and idea behind the shoot (most of the time I shoot certain poses specifically for a photo manipualation, just like I did with this image that you can see below), but also I know exactly what lens and what angle my photo was taken at, which leads us to the next valid point of a successful photoshop manipulation. Third, you need to understand and follow three fundamental rules of successful composite photography: 1. Perspective 2. Angles 3. Colors & tones You have to match the perspective, focal length and the angle of all the items that you place on your image. If you do not, human eye will detect it and render it as fake or not believable. The model has to match the ground, all the elements need to be following the same lines towards the vanishing point. It is good to match the depth of field too, or in other words make sure that the plane of focus is uniform across the image. Fourth, you will need a lot of patience because all good things take time, and believe me when I tell you that good photo manipulaton can take days to finish. Yes, I said days. The photo you see here is over 600 photoshop layers heavy, took me nearly 40h to complete. I am extremely detailed when I work on any of my images, whether it is portrait retouching or architecture photography, and I want to make sure that when I am done, the photo will look good not only on tiny iphne screen on instacrap. Here you can watch a full workflow in photoshop to see how much work went into details during creation of this composite. Fifth is to never give up even if you are failing.My oldest photoshop manipulations are terribad and that is fine. There is no progress without an error, and no discovery without failures. It is all a learning process and if you do not start you will never get into it. Look at the best work out there, the best concept artists and so on and look up to those who are better than yourself. That is the only way to grow and succeed. Have fun!
Contact me directly for one-to-one online photoshop tutorials via desktop sharing. Portrait photography service, Tokyo - website http://www.portrait-photography-tokyo.com/ Photography workshops in Tokyo: http://www.ryuurui.com/photography-workshops.html Hire a photographer in Tokyo: http://www.ryuurui.com/hire-a-photographer-in-tokyo.html Photo blog: http://www.japan-in-photography.com/ Facebook: https://www.facebook.com/ponteryuurui Twitter: https://twitter.com/PonteRyuurui Google+: https://plus.google.com/u/0/+PonteRyuurui/posts For more tutorials and how to videos check out my photoshop and photography tips and tricks YouTube channel: https://www.youtube.com/channel/UCEOVGZ2rpLhR7gSPvaexxxQ I am a multi-genre artist and consequently I have a few websites and few portfolio's. It was all too scattered so I decided to put all of my best work together in one folio, in separate categories. It took me a few days to update my entire portfolio on Smugmug. I went through all of my photos and picked those that I personally think represent what I do as an artist. New portfolio holds all types of photography: portraiture photography, architecture photography and cityscapes, street photography, photoshop manipulations and digital art, black and white photography, nature photography and landscapes, boudoir and body art photography, and Chinese and Japanese calligraphy art. All photos are in their original size at 300dpi. Some of the files are as large as 160MB, so if you are viewing them in original size it may take some times to load them up. All of the images are quality edits which is exactly why I uploaded full size files. Enjoy! Portrait photography service, Tokyo - website
http://www.portrait-photography-tokyo.com/ Photography workshops in Tokyo: http://www.ryuurui.com/photography-workshops.html Hire a photographer in Tokyo: http://www.ryuurui.com/hire-a-photographer-in-tokyo.html Photo blog: http://www.japan-in-photography.com/ Facebook: https://www.facebook.com/ponteryuurui Twitter: https://twitter.com/PonteRyuurui Google+: https://plus.google.com/u/0/+PonteRyuurui/posts For more tutorials and how to videos check out my photoshop and photography tips and tricks YouTube channel: https://www.youtube.com/channel/UCEOVGZ2rpLhR7gSPvaexxxQ If you are asking yourself this question then you are still in a shell of social bonds and "I do not think this is a good idea" zone. How the hell will you know if it is a good idea if you do not try it and see if you like it. What's more, who cares if others do not like it. Is it your art or what? Stay true to your artistic sensibility and style, but if you do not go outside your comfort zone EVERY DAY then how on Earth do you expect to improve or evolve as an artist? You master the rules to break them, you create in a way others don't not because you should but because your soul tells you to. If someone moans about that you shouldn't or whatever, just leave them alone and move on. In most cases they are stuck in a mud of their own miasma of toxic farts. Treat them like you do with anyone that steals your ideas - sprinkle them graciously with a tepid piss from a second step on your luxuriant porch. Wanna steal my ideas? Go for it. i am so absorbed creating that by the time you get it I will be light years ahead. This, however, is not an excuse for being ignorant. True artists deep inside are delicate people. So, you need to learn how to protect your creative core without it being indoctrinated by standards set by those who have no fucking clue what art really is. Artists perceive world on a different frequency and in a whole different range of colors. Yes, you will feel alone and misunderstood, and that is good, it will make you stronger and more sensitive too. Need a wall around your oasis? Build it. Need a shell? Grow the damn thing. Do whatever you have to to guard that core. Forget about opinions and what have you. Do your thing, but keep learning and researching, it is essential to constantly work on improving oneself. Stay open to what life brings with it, but be alert. Look up to those who are better, help those who struggle, and kill on sight anyone that tries to mess with your better half. Creative mind is like another world, you won't survive outside of it . You will die of boredom. We live in visions and that's out power, a power to switch all the surrounding bullshit off. Do not break that switch. Portrait photography service, Tokyo - website
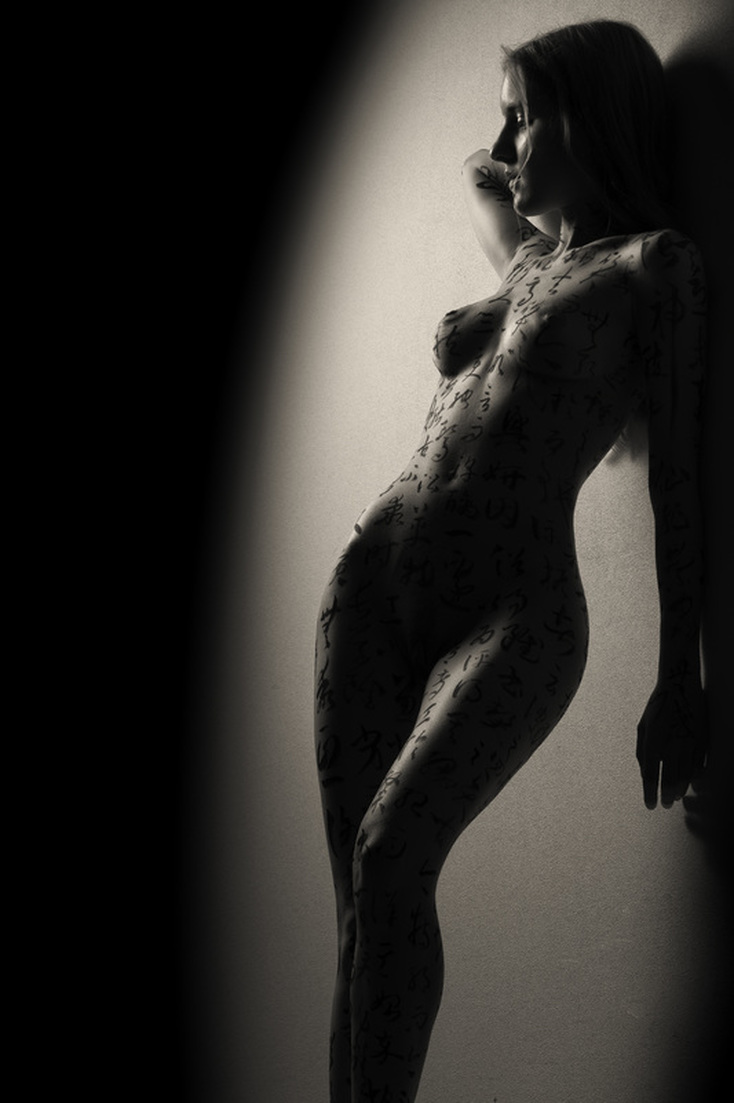
http://www.portrait-photography-tokyo.com/ Photography workshops in Tokyo: http://www.ryuurui.com/photography-workshops.html Hire a photographer in Tokyo: http://www.ryuurui.com/hire-a-photographer-in-tokyo.html Photo blog: http://www.japan-in-photography.com/ Facebook: https://www.facebook.com/ponteryuurui Twitter: https://twitter.com/PonteRyuurui Google+: https://plus.google.com/u/0/+PonteRyuurui/posts For more tutorials and how to videos check out my photoshop and photography tips and tricks YouTube channel: https://www.youtube.com/channel/UCEOVGZ2rpLhR7gSPvaexxxQ Regardless of what type of artist you may be portfolio is your business card. It is your resume, marketing tool, an ad and a statement in one. It says "look this is what I can do and that is my style". It is also a self-check medium for you as the author of its content. There is no time frame within which you should review your folio. you should do it as often as needed, or as often as you feel it is necessary. If you are like me and you love editing your photos, love learning and are on a constant hunt for new ideas, new ways of retouching, new ways of toning images and so on, you will realize two things very quickly. One is that the quality of your work improves with passing time, and two, that your style is evolving. Consequently, if you have a mix of old and new images in your folio, it may happen so that some of them may become outdated and inconsistent in terms of their style. This sends a clear message to your clients that you are not a mature artist, or perhaps a lazy one, who cannot see inconsistency in his or her own work, etc. All that suggests unreliability. Also, clients will choose you mainly for your style and quality of work. They do not know you in person, so all they know about you is what they can see in your portfolio. It is essential to develop a self assessment routine and implement it rigorously in your timetable. Yes, it is time consuming, but it is worth it in more ways than one. Look at the above images which were created within less than a year. The top one is a new version and the bottom one was created last year. It is a whole new edit from scratch, and you do not have to take my word for it, just watch the video below which shows the entire editing workflow in photoshop. Both photos are very different in style and quality. First the quality of texture is much better in the new edit. Old version suffered from texture loss due to blur vignetting done manually without working on tones layer and texture layer separately. This is something I would not do now. Also, skin texture received a much more detailed retouch via micro dodging and burning which eliminates small skin bumps amplified by the hard steep angled light. Vignetting is executed very selectively in the new photo, and it complements the way I reshaped the body of the model with shadows and highlights. The entire image was turned on its axis counter-clockwise to add more kinetic energy and create diagonal lines across the image. They contrast with a general calm and moody feel to the photo. The old edit was a bit too static for my liking and was not multilayered. Dodging and burning emphasizes the drama and creates more visual anchors. I added a tilt shift blur to redirect the attention of the viewer to the body art and lines running across model's body. I also changed the toning to much warmer, which further calms the feel of the photo. There are no happy accidents here, it is all planned and premeditated based on what I feel when I look at the photo. The old edit was not in full agreement with my current style and it had to be addressed. I truly enjoy re-working my images. Some of them I re-edit a few times, even complex photoshop manipulations. I do not care how much time it takes. It is always a very rewarding and educational experience.
Photography workshops in Tokyo: http://www.ryuurui.com/photography-workshops.html Hire a photographer in Tokyo: http://www.ryuurui.com/hire-a-photographer-in-tokyo.html Photo blog: http://www.japan-in-photography.com/ Facebook: https://www.facebook.com/ponteryuurui Twitter: https://twitter.com/PonteRyuurui Google+: https://plus.google.com/u/0/+PonteRyuurui/postsFor more tutorials and how to videos check out my photoshop and photography tips and tricks YouTube channel: https://www.youtube.com/channel/UCEOVGZ2rpLhR7gSPvaexxxQ Neither. It all depends on what mood you are after in your photos. I use studio for specific types of photography. Inside the studio I shoot fine art nudes, calligraphy body art, and dramatic portraits or portraits I use for photoshop manipulations. Outdoors I shoot urban portraits, natural light portraits, where I have the advantage of choosing from variety of backgrounds. On the other hand, I can create dramatic light outdoors as well with the help of flash photography. By combining natural light and flashes I am able to capture images that would not be possible to create in ambient light. I find myself shooting outside more often, because I like the endless possibilities of what surrounding world has to offer. Whether it is city or nature the options are limitless. Studio photography usually has a very stiff and artificial feel to it, but it doesn't have to be so. It all depends on how skilled are you with controlling the light and how good of a connection you have with your model. Outdoors and indoors portrait photography come with challenges that you will need to face. Outside you have to be in control of the background, and also very skilled with understanding the ambient light and how to bend it to your will. It is much harder to control ambient light than artificial studio flashes. When you choose between indoors or outdoors portrait photography always think about what is the theme, what effect you are after and who you are shooting and why. That should give you a clear answer on where to shoot. The most important is to capture your model at their best, and choice of a location is just another tool like your camera or lenses.
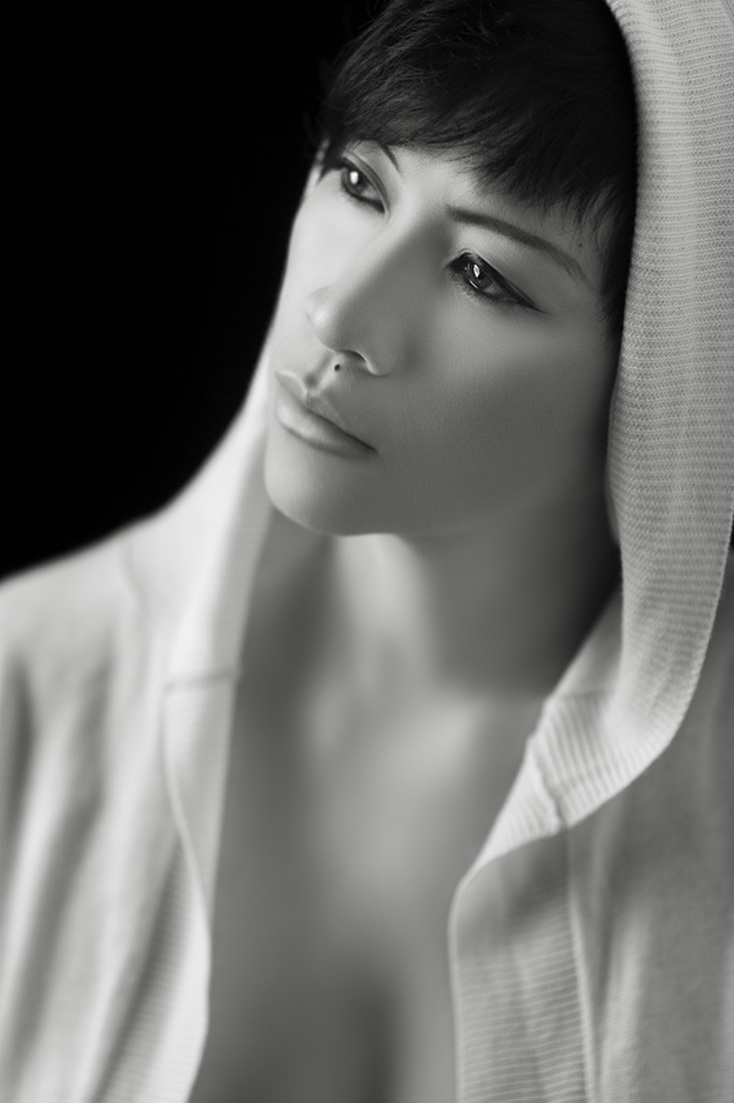
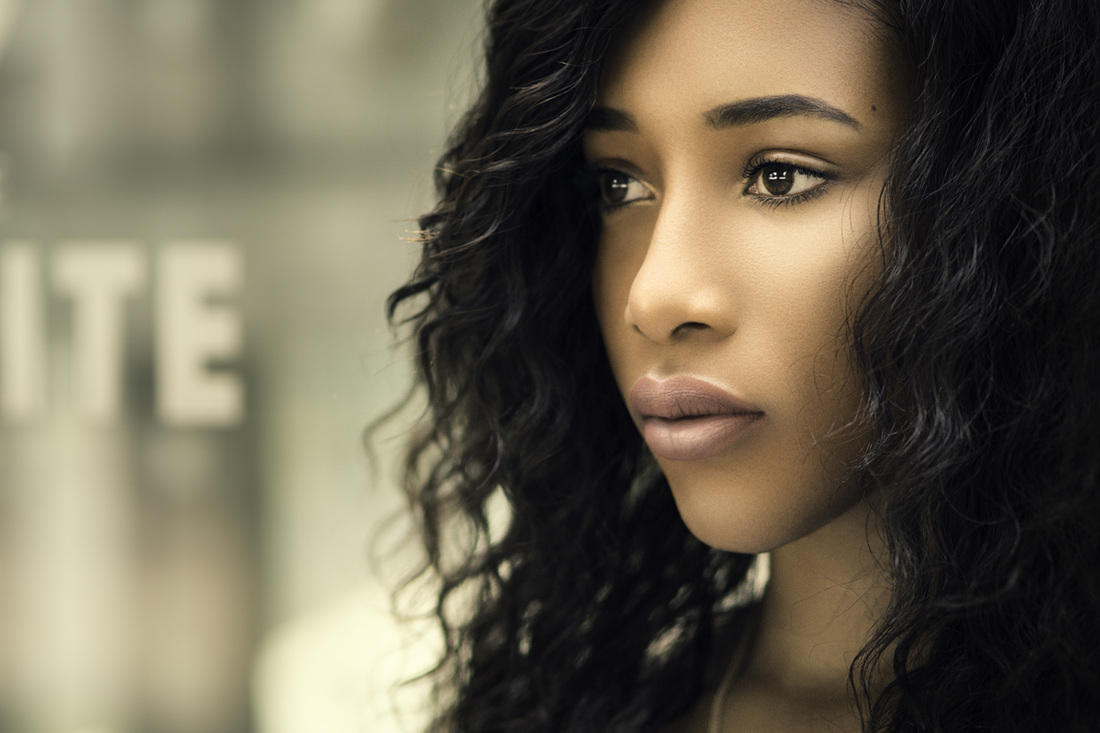
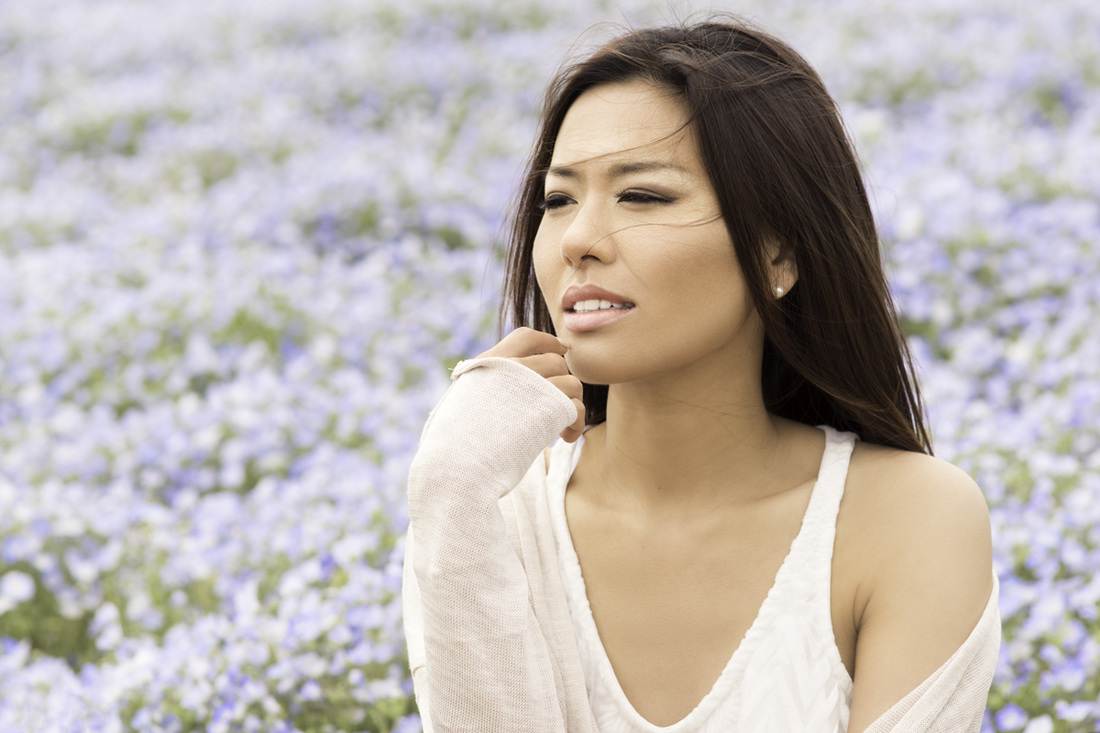
Props, make up, hair stylist and all of these are all great, but so much more can be done in terms of creative portrait photography during photo retouching process. For me photoshop is a doorway to complete artistic freedom. Being able to do anything I want with a photo in post production offers not only much more room during shooting, but also allows me to complete my vision and achieve that perfect mood I was after in a comfort of my digital dark room. I always shoot with a vision of post processing, and photoshop skills are an essential tool not just in my career as photographer, but more importantly as an artist. During the shoot I know exactly how much I can or cannot get away with, what I can or cannot remove or change, which elements of the photo I will use, or what other photos I need to take to complete the image. It is like a puzzle and hell of a fun as well. I love teaching photography and photoshop and I always try to show to others how important and powerful post processing skills can be. For me a photographer who cannot or does not want to edit his work is crippled or has limited imagination. There are occasions when a photo will require a minimum of editing, and I have those as well in my portfolio, but it is not really what the argument is about. The whole point of photo retouching is to give it your own personal finishing touch. For me capturing an image is 50% of work done, and sometimes much much less than 50%. Photo editing will broaden your horizons, your artistic sensitivity, the way you look at details and notice them, the way you take photos, the way you understand light and human anatomy, how to work and combine colors in the scene, how to notice an image in a chaos around you, how to compose images, and so much more. My advise to you is simple - if you want to sail the vast oceans of creativity and not just the seas, master the art of photo retouching, composite photography and even photo manipulation. It is a whole new world. model: Mandy JanePortrait photography service, Tokyo - website
http://www.portrait-photography-tokyo.com/ Photography workshops in Tokyo: http://www.ryuurui.com/photography-workshops.html Hire a photographer in Tokyo: http://www.ryuurui.com/hire-a-photographer-in-tokyo.html Photo blog: http://www.japan-in-photography.com/ Facebook: https://www.facebook.com/ponteryuurui Twitter: https://twitter.com/PonteRyuurui Google+: https://plus.google.com/u/0/+PonteRyuurui/posts For more tutorials and how to videos check out my photoshop and photography tips and tricks YouTube channel: https://www.youtube.com/channel/UCEOVGZ2rpLhR7gSPvaexxxQ Quick guide to an in-depth video tutorial series on portrait retouching techniques in photoshop3/29/2016 This is a short speed art video summarizing the entire process of portrait editing in photoshop. I created it to help with navigation through 5.5h long video tutorial series that are have split into parts 1 to 5. Quick guide video is only 8min long and includes captions that denote most of the actions I have performed during editing. The full length tutorial has a slow pace and a lot of explanatory talk, so it should be very comprehensive, given you have enough patience and determination to listen to me for nearly 6h. I covered steps even before any editing begins, and that is how do I pick a photo for editing. I am comparing a few images and discussing various issues and problem areas. I then talk briefly about achieving a perfect skin tone / white balance in portrait photography, perform rough editing in Adobe Camera RAW, and then I jump into photoshop. Inside photoshop I first assess issues in the photo, minor composition problems and visual distractions, and then I go ahead and start skin editing on a macro scale. Next I split textures and tones (frequency separation) and show you how to edit a portrait without damaging the skin or lowering the image quality. The tutorial will lead you through skin, lips, eyes, hair, skin retouch, matching skin tones, removing skin discolorations, hand drawing eyebrows, halos, blurred shadows, texture grafting, smoothing skin shadow transitions, dodging and burning or macro and micro scale, toning, black and white conversion, some photoshop plugins and how to use them creatively and more. The most important thing is, that this is a free photoshop tutorial series that should allow you to master some of the most advanced photo editing techniques. It is impossible to share it all, even in a few hours long video, but nonetheless you can see a full on in-depth portrait photo retouch in photoshop. Private photoshop workshops via skype - http://www.ryuurui.com/photo-retouching-lessons.html
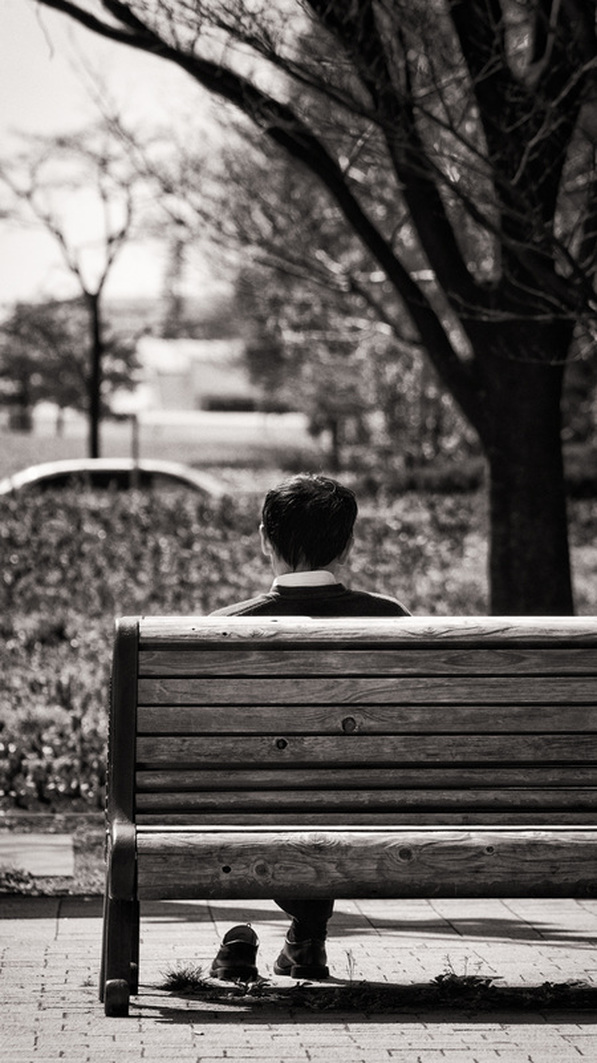
My portrait photography service, Tokyo - website http://www.portrait-photography-tokyo.com/ Photography workshops in Tokyo: http://www.ryuurui.com/photography-workshops.html Hire a photographer in Tokyo: http://www.ryuurui.com/hire-a-photographer-in-tokyo.html Photo blog: http://www.japan-in-photography.com/ Facebook: https://www.facebook.com/ponteryuurui Twitter: https://twitter.com/PonteRyuurui Google+: https://plus.google.com/u/0/+PonteRyuurui/posts For more tutorials and how to videos check out my photoshop and photography tips and tricks YouTube channel: https://www.youtube.com/channel/UCEOVGZ2rpLhR7gSPvaexxxQ Secrets of composition in street photography - a conversation between a moment and the environment.3/24/2016 Street photography is based on two elements: a moment or mood, which is the kinetic part, and the environment or scenery, which is often very static and forms a structure, sort of a framing, to which all the strings are attached. Even the most emotional or candid street photography must have some sort of static reference to bring balance into the composition. However, what is static and what is kinetic does not have to be so clearly defined. If you look at the photograph below, you will notice several things. There is a dialogue between certain elements that create balanced composition. The tree to the right is quite heavy visually, but it is introduces intimacy into the photo. The diagonal branches and deep shadows create an illusion of a shelter. The shoe, the guy the second tree behind the car and the car itself create an off weight to that tree. All photo elements are static. The guy sitting upright like in a church, the trees, no wind, even the car seems static and that is because we can only see the rooftop. Stillness is further emphasized by parallel horizontal straight lines running across the photo from top to bottom. From the shadows on the ground, wood planks the bench is made of, folds and layers of dissipating horizon and so on. The shoe also suggests a pause. Hard sunlight adds warmth and sensation of relaxation. The kinetic element of this photo is indirect. It is hidden inside knowledge of the viewer that this guy is on a short break outside the office. He is taking a breather and will soon rush back to work. This is Tokyo, there is no such thing as rest here. To be able to capture great street photos you not only have to learn how to see photos in your surroundings, be able to predict what is about to happen (things happen in patterns in real life), but also be very patient. Patience is a sign of certainty. People do not wait for no reason. You find a great spot, and you know that there is a photo about to happen, and you know what you are waiting for. That skill of envisioning images is so important, especially if you wish to venture deeper into the realm of photo retouching. All those elements are interconnected. Private photoshop workshops via skype - http://www.ryuurui.com/photo-retouching-lessons.html
My portrait photography service, Tokyo - website http://www.portrait-photography-tokyo.com/ Photography workshops in Tokyo: http://www.ryuurui.com/photography-workshops.html Hire a photographer in Tokyo: http://www.ryuurui.com/hire-a-photographer-in-tokyo.html Photo blog: http://www.japan-in-photography.com/ Facebook: https://www.facebook.com/ponteryuurui Twitter: https://twitter.com/PonteRyuurui Google+: https://plus.google.com/u/0/+PonteRyuurui/posts For more tutorials and how to videos check out my photoshop and photography tips and tricks YouTube channel: https://www.youtube.com/channel/UCEOVGZ2rpLhR7gSPvaexxxQ Master photoshop and learn how retouch photos the way you want, and not just the way you can3/23/2016 There is a huge difference between being limited by your knowledge and limited by your creativity. By mastering photoshop and the art of photo retouching you can literally do anything you want with any photo. In this video I am rearranging hard sunlight shadows, removing them from places I do not want them in and creating new highlights in their place. I also changed the photo composition by cloning a bit of hair to cover a part of the model's chin, to make her appear a bit more mysterious and delicate. By doing so I also redirected the attention to the upper part of the face. Sometimes you capture an amazing body language in your photo, and there are few elements that ruin the impact it could have if they were removed. The art of photo editing is a massive knowledge and a rare one too. Not many photographers can do it well, and lots of them outsources their editing. If you really want to produce your own photography art, that goes along with your vision from the moments you press the shutter to posting the image on your folio, then knowledge of photoshop or any other professional software for photo retouching is a must. Painters create their images in layers, it sometimes takes weeks or months. Why would photography be any different? If the only thing you can do is capturing images, then you are missing on half the fun! Private photoshop workshops via skype - http://www.ryuurui.com/photo-retouching-lessons.html
My portrait photography service, Tokyo - website http://www.portrait-photography-tokyo.com/ Photography workshops in Tokyo: http://www.ryuurui.com/photography-workshops.html Hire a photographer in Tokyo: http://www.ryuurui.com/hire-a-photographer-in-tokyo.html Photo blog: http://www.japan-in-photography.com/ Facebook: https://www.facebook.com/ponteryuurui Twitter: https://twitter.com/PonteRyuurui Google+: https://plus.google.com/u/0/+PonteRyuurui/posts For more tutorials and how to videos check out my photoshop and photography tips and tricks YouTube channel: https://www.youtube.com/channel/UCEOVGZ2rpLhR7gSPvaexxxQ So what do you do when you have two portraits that you would like to edit, you really like both of them but none is actually perfect. You take the elements from both and composite them into one image in photoshop. We had lots of fun with Diana during our recent photo shoots, and I came back with many great portraits. I sat down yesterday to do some more editing and could not decide between two portraits. I love both of them, the lighting, the body language, the composition, and so on, but each of those photos had small issues. You may not notice this if I do not point it out, but since I am obsessively paranoid with balance in my images I simply had to break those photos apart and make one image out of them. In the shot in which she is fixing her hair with a hand, I am bothered by the position of the thumb and slightly strong gesture of the hand. The palm is facing too boldly towards the camera and I think it ruins the delicate and vulnerable pose. The other photo is beautiful, but after adding cascading hair over her hand, I created balance for the sparkling backlit leaves to the top right corner of the photo. Now it creates a bow or curve of light, engulfing the model. It also creates an anchor point for the eyes to the left side of the image, which is crucial, because we are used to look from left to right. That being said, the negative space to the right makes perfect sense and provides sensible pillar that the right side of the image rests on. Got to love photoshop! My Youtube channel with free photoshop tutorials Photography workshops in Tokyo - click for more details. Hire a photographer in Tokyo Buy original Chinese and Japanese calligraphy art Check out my new portrait photography services in Tokyo website! How to edit rough skin pores and mattify shiny skin in photoshop (detailed video tutorial)12/3/2015 In this photoshop tutorial I will show you how you can easily edit rough and bumpy skin pores and mattify shiny and reflective skin patches in photoshop. I am using two techniques: micro dodging and frequency separation. Both are used in professional portrait retouching and are really useful tools for editing not just portraits but other types of photography as well. I use them on a daily basis and although micro dodging can be time consuming if you want to do a really good job, but trust me, there is no better and more accurate method. If you are serious about your photography and wish to handle top notch magazine quality photos to your clients or add them to your portfolio, then both techniques are definitely something you should learn. Micro dodging allows for lessening the difference between dark tones and bright tones in the image, which helps to make skin appear healthy and smooth. Frequency separation allows for splitting tones and textures into separate layers which is essential if you want to keep the quality of tones and textures in your photo. Both techniques require photoshop or any program that allows for working on layers. This is why photoshop is vastly superior to lightroom. In this video tutorial I am explaining frequency separation and micro dodging in details, so you should be able to try both on your own photos without any issues. Happy editing! Anyone interested in private photoshop workshops via skype desktop sharing please contact me directly. My Youtube channel with free photoshop tutorials Photography workshops in Tokyo - click for more details. Hire a photographer in Tokyo Buy original Chinese and Japanese calligraphy art Check out my new portrait photography services in Tokyo website! This video tutorial is for lazy people like myself who cannot be bothered reading. I wrote an article on my other page, Portrait Photography Tokyo, that gives tips on how to crop photos in photoshop and you can read it here, though this video is probably covering it in greater depth. Cropping is nothing else but an attempt at fine tuning composition. If you shoot on a tripod, your composition should be spot on, but if you shoot quick and hand held things may get a bit misaligned. I create many composite images and photoshop manipulations so for me cropping is a second nature. Cropping is a fantastic exercise for improving your composition, and composition is one of the most important things in photography, or any type of art really. So take your time, bring some photos into photoshop and try different ways of cropping one image, you may be surprised what you can learn. In this video I am taking one image and showing you a few ways of cropping it, and explain in details why I cropped it this way or another, which brings you behind the scenes and lets you understand my thought flow. You can apply anything from this photoshop tutorial to your photography when you are out and shooting. Enjoy! Anyone interested in private photoshop workshops via skype desktop sharing please contact me directly. If you are looking for a portrait photographer in Tokyo, check out my services menu tab. My Youtube channel with free photoshop tutorials Photography workshops in Tokyo - click for more details. Hire a photographer in Tokyo Buy original Chinese and Japanese calligraphy art Check out my new portrait photography services in Tokyo website! Street photography is not easy. You have to be observant, patient but at the same time quick and precise if needed. You have to know your gear inside out to be able to act fast. You should have good understanding of human behavior and psychology, just like in portrait photography, although street photography is not all about capturing people. Running around like a rabid dog with your camera will probably not grant good results. Most of the time street photography is all about finding the picture with one element that is missing. Then all you do is wait for that element to appear. Things happen in patterns, so if you saw something you liked, but it was too late,there is a good chance it may happen again. When I visited Narita temple complex north of Tokyo, there was some sort of traditional event going on. I did not really care what it was, all I cared about was that it was a feast for a photographer. So I found myself a spot, with a small shrine framed by a massive branch, and small stone figurines lined up along the path, and the only missing element was someone passing. I saw a few people pass but they did not fit the scene, so I waited some more. And then I saw this guy, not only was he dressed to match the noren (banner) on that shrine, but he even turned his head towards the light in a perfect moment. Patience really pays off when it comes to street photography. If you are looking for a photographer in Tokyo to take you on street photography workshops, then feel free to contact me.
My Youtube channel with free photoshop tutorials Photography workshops in Tokyo - click for more details. Hire a photographer in Tokyo Buy original Chinese and Japanese calligraphy art Check out my new portrait photography services in Tokyo website! How to start with photoshop #5 - layers & masks (photoshop tutorial series for beginners)11/15/2015 In this episode of free photoshop tutorials for beginners I will help you to understand layers and masks and how to use them in practice. The whole series is designed for photographers who either want to improve photoshop skills, or those of you who made the right decision of moving from Lightroom to Photoshop to do some proper photo editing. Photoshop layers and masks is what makes photoshop such a unique tool and what places it high above the abilities of Lightoroom. You can work non-destructively on your photos by stacking various effects as adjustment layers, on top of it you can fine tune those adjustments via blending, opacity and masks. Blending modes and opacity / fill are used for executing global shifts between layers, and masks are there for targeting certain areas of your image that you wish to fix or enhance. By the end of this video you will have a solid grasp on the basics of layers and masks and be aware of its massive potential. If you would prefer private photoshop workshops via skype desktop sharing then contact me directly. My Youtube channel with free photoshop tutorials Photography workshops in Tokyo - click for more details. Hire a photographer in Tokyo Buy original Chinese and Japanese calligraphy art Check out my new portrait photography services in Tokyo website! In this next photoshop tutorial for beginners I explain how to use vector tools on practical examples of photos. The most complex tool here is the pen tool, and it is also the most useful one. I coud not live without pen tool, it is an absolute life saver in editing of virtually any type of photos, but it is essential for making very precise selections in images portraying architecture, where there are many straight or curved lines and other selection tools simply fail. Pen tool is also amazing for editing portraiture and selecting body outline, or parts of the face, like eyes, lips, etc. I have a separate video on how to use pen tool in photoshop here. This part 4 of the photoshop tutorial series for photographers covers other tools such as color palette, pan tool, quick mask tool, and zoom tool. In next episode I will be discussing the basics of working with layers and masks, which lays at the very essence of photoshop workflow. If you would prefer private photoshop workshops via skype desktop sharing then contact me directly. My Youtube channel with free photoshop tutorials Photography workshops in Tokyo - click for more details. Hire a photographer in Tokyo Buy original Chinese and Japanese calligraphy art Check out my new portrait photography services in Tokyo website! |
Categories
All
AuthorPonte Ryuurui (品天龍涙) Archives
August 2020
|


 RSS Feed
